In this blog, I’ll show you how to add tabbed content to your WordPress and WooCommerce site in minutes with no code.
Tabbed content, also known as ‘card stack pattern,’ is widely used to organize related content sets in a single place.
For Instance:
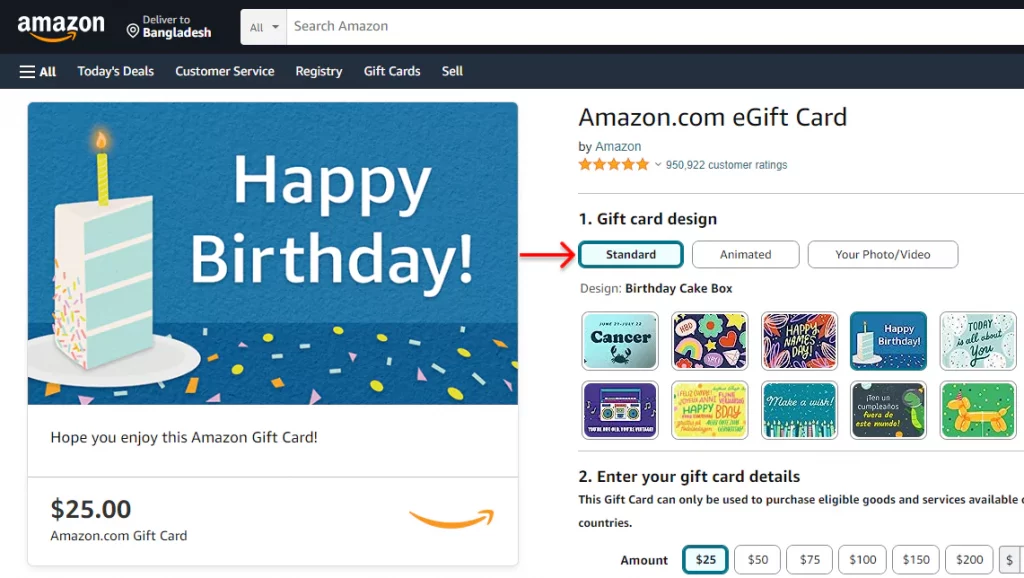
Tabs in Amazon
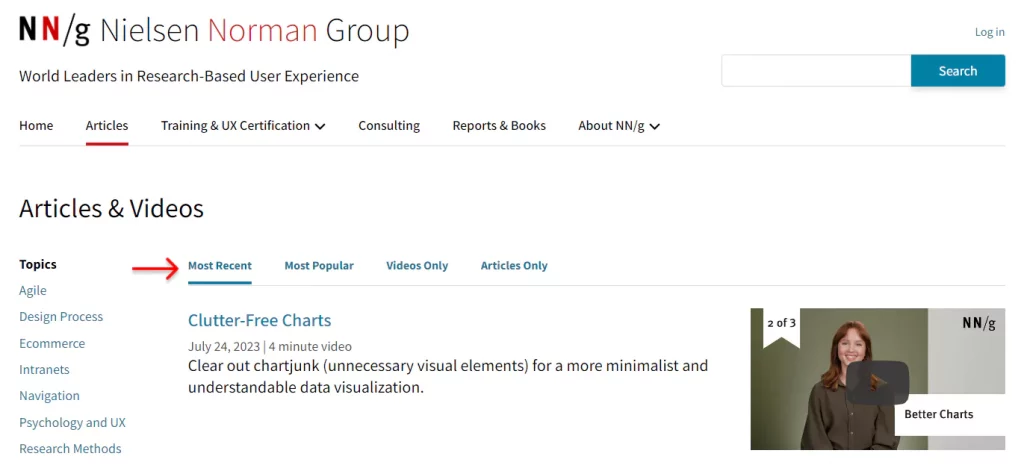
Tabs in NNgroup
Google filter tabs

YouTube filter tabs

Tabs are everywhere. You rarely find a webpage without tabs. However, we’re here focusing on in-page or module tabs.
Web designers prefer tab content as it saves space, and visitors also don’t feel overwhelmed with tons of content. Most importantly, it allows visitors to find the desired content and product information quicker without scrolling down or going to another page.
As a result, it reduces the bounce rate and grows the conversion rate.
So, let’s get in.
However, if you are in a hurry or uncomfortable with English, just see the screenshots and follow the numbered clicking steps to get it done.
Table of contents
4 easy steps to add tabbed content
Follow these simple steps to add tabbed content to your WordPress and WooCommerce site. Moreover, it doesn’t require any coding knowledge.
Step 1: Install a good WordPress tab plugin
As WordPress doesn’t offer to add tabbed content by default, it’s highly challenging and time killer to add tabs in WordPress. So, we need to install and activate a good tab plugin. It will help us add professional tabs to WordPress sites in minutes with no code.
However, a good plugin means more than just offering a wide range of features. It also means being well-coded, slick, fast, compatible, updated with the latest web technologies, and lightweight. Otherwise, it will make your site slow. Most importantly, it should be easy to use and work well with the latest version of WordPress.
Considering all these things, I prefer WP Tabs to create responsive tabbed content in WordPress and WooCommerce. It can be the best WordPress tab plugin for you too.
Let’s install and activate WP Tabs — no need to pay to play with its basic features but WooCommerce.
First, click WP Tabs to download it. After that, open your WordPress dashboard in a new tab and follow the easy steps below.
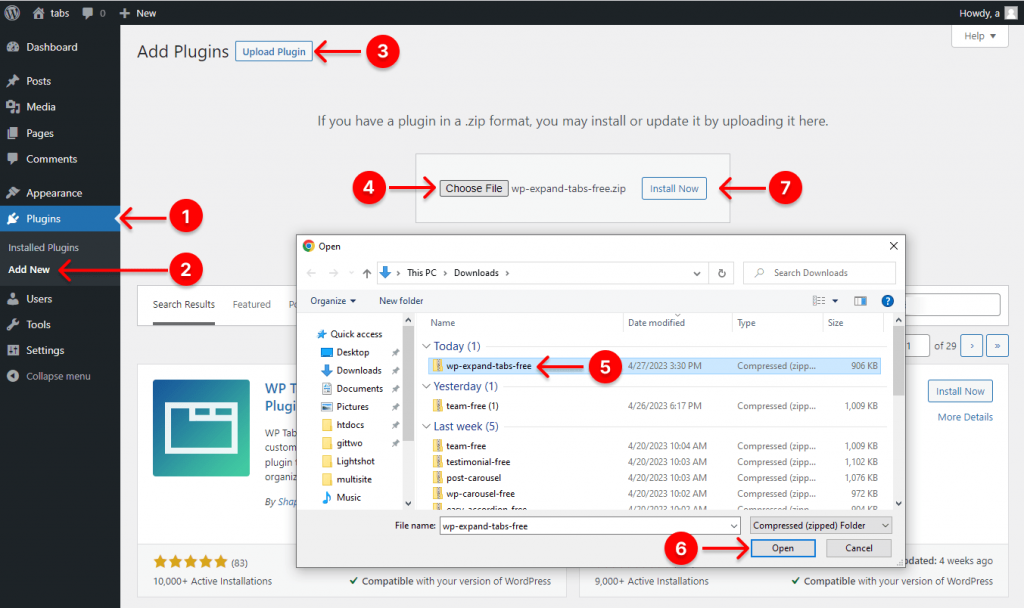
After downloading WP Tabs, click 1. Plugins → 2. Add New → 3. Upload Plugin → 4. Choose File (it will take you to your Downloads) → 5. Select the wp-expand-tabs-free zip file (If you don’t find it, please click here and then click Downloads again). → 6. Open → 7. Install Now.
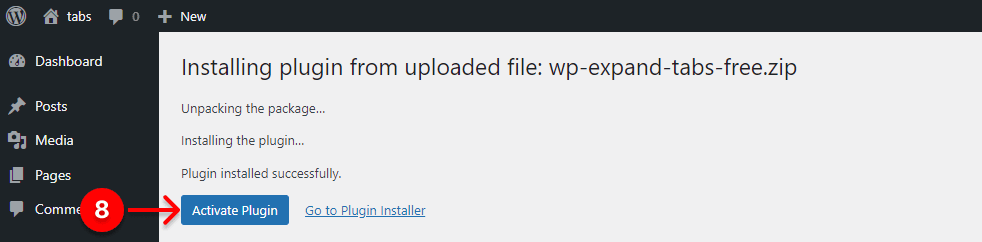
Finally, click 8. Activate Plugin to have the WP Tabs on your WordPress dashboard admin sidebar.
Step 2: Add tabbed content
Upon installation and activation, WP Tabs must be on your WordPress admin sidebar, as seen in the screenshot below. Follow the next steps to add tabbed content easily.
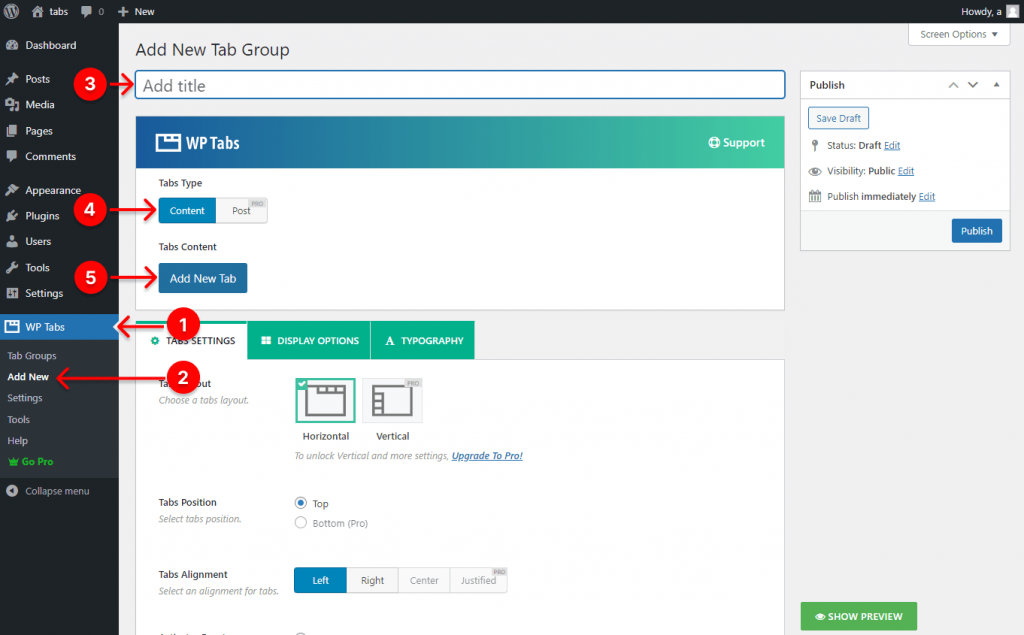
1. Click WP Tabs → 2. Add New → 3. Write a title ( for example, WordPress tabs) → 4. select Content → 5. Add New Tab →
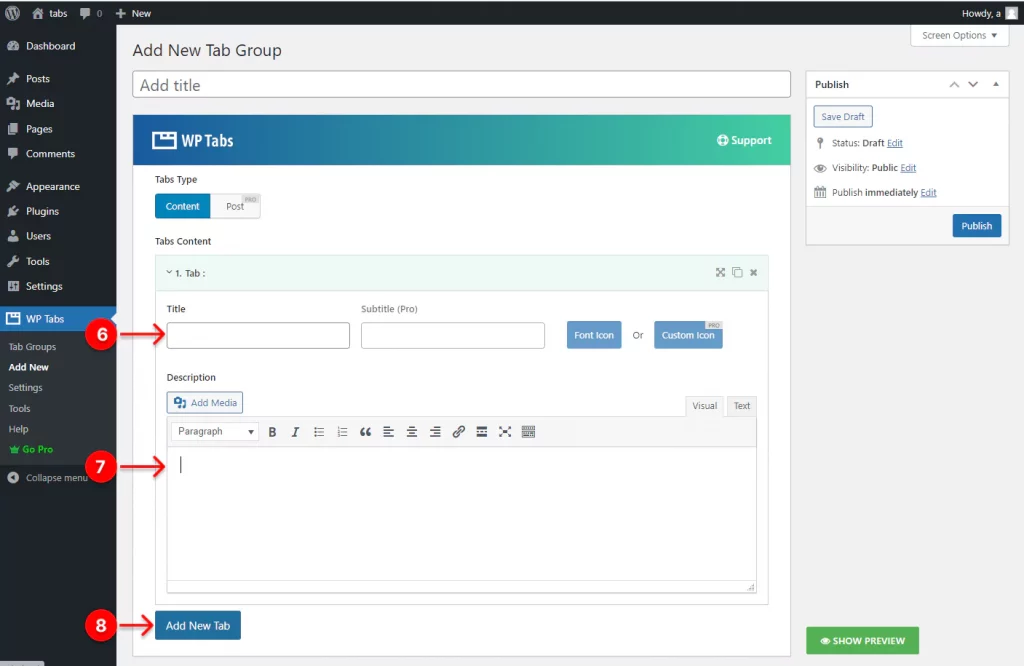
6. Write the label/name of your first tab.
7. Write the tabbed content for your first tab.
8. Click Add New Tab to add another one. Thus, you can add as many tabs as you need.
Step 3: Design your tabbed content
WP Tabs offers a wide range of robust features and ensures ease of use. Consequently, you can easily design your tabs exactly how you want.
Follow the next steps to design your WordPress tabbed content. While designing, keep the best practices at the top of your mind for the most output.
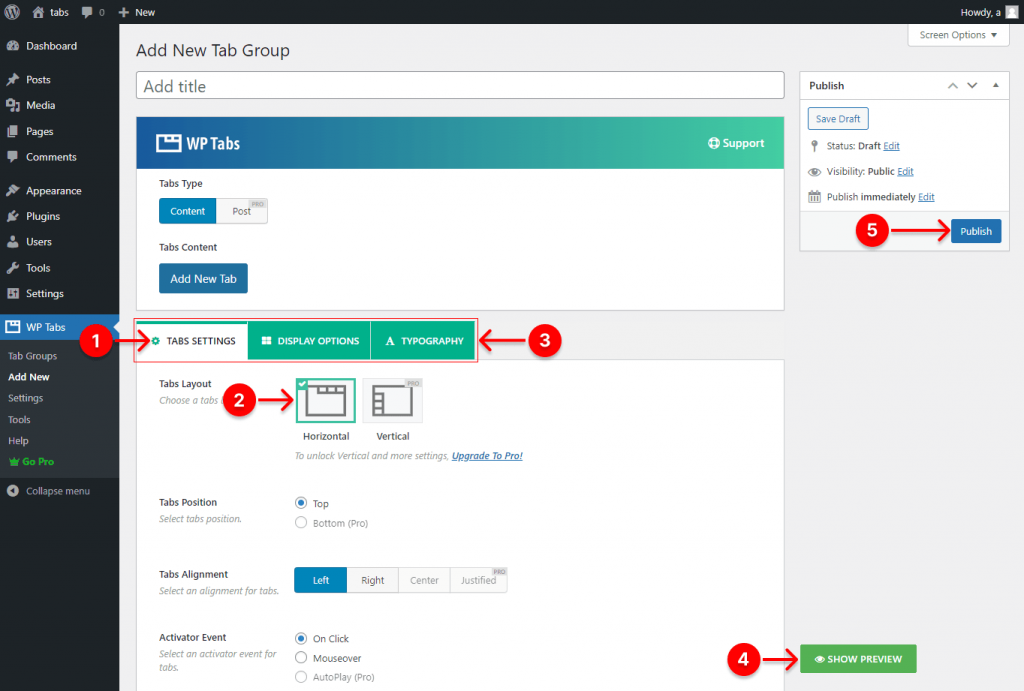
- First, select the TABS SETTINGS tab.
- Leave the Horizontal layout selected to display your tabs horizontally.
- You can see there are three tabs in this tab bar. Each tab has tons of design features. With them, you can design your tab bar and tabbed content how you imagine. So, explore them attentively and use them as per your needs.
- Design is a nonlinear and iterative process. So, you can see the Preview by clicking the SHOW PREVIEW button after trying out some design features, and you can go back to edit them if needed. This way, you can perfectly design your tab bar and tabbed content how they should be.
- After you design your tabs perfectly, hit the Publish or Update button.
You can see some live tabbed content examples and watch the tutorial for more ideas about designing WordPress tabbed content.
Step 4: Publish your WordPress tabbed content
After you have accomplished designing your tabbed content perfectly, it’s time to hit the publish button. Follow the next steps to publish it.
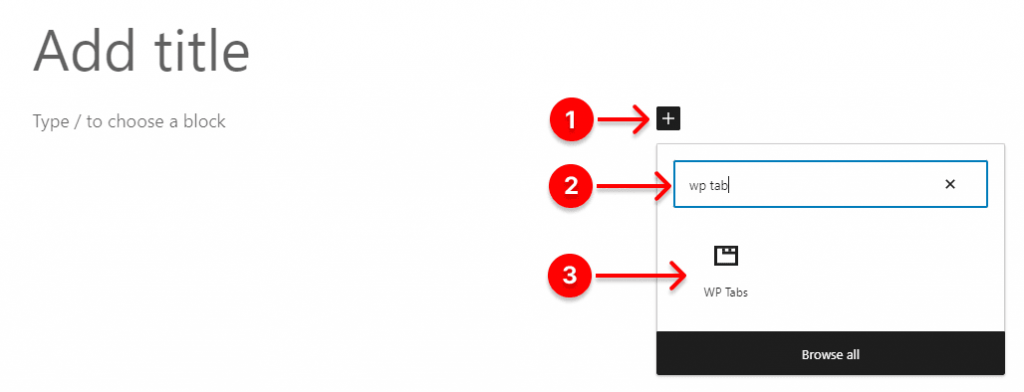
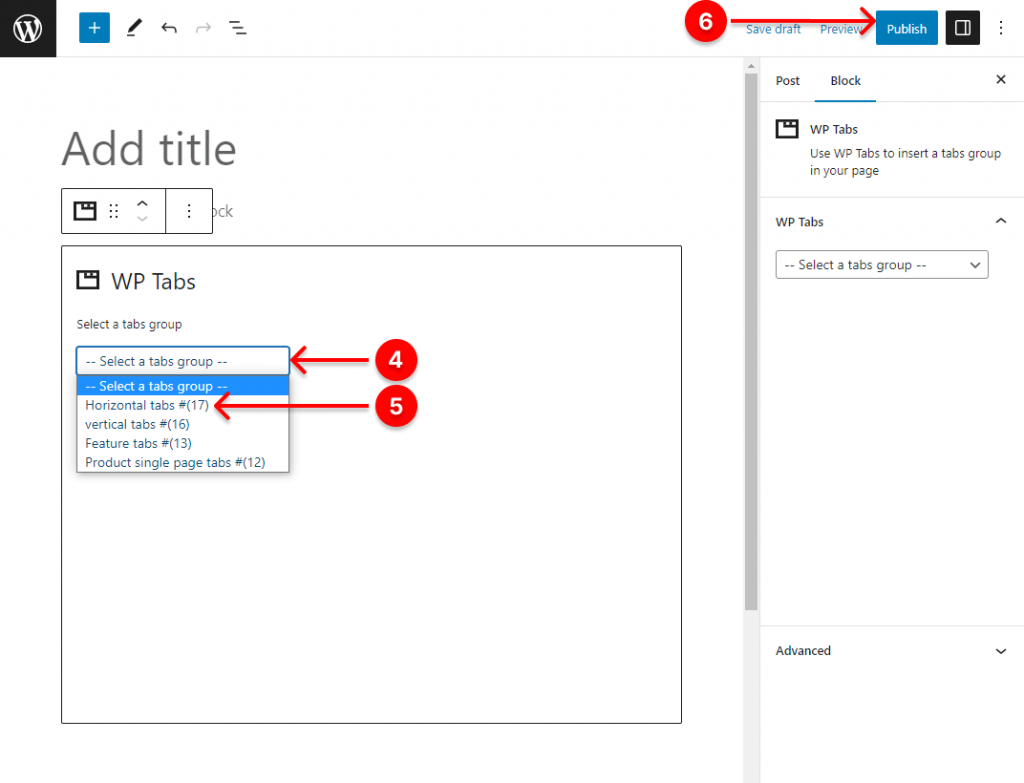
1. Click + (the plus icon) → 2. Type WP Tabs → 3. Click WP Tabs Gutenberg block → 4. Click ▼ (the dropdown) → 5. Select the title you want to publish. → 6. Finally, click Publish or Update button.
Alternatively, you can simply copy the shortcode and paste it anywhere you want to display your tabbed content.
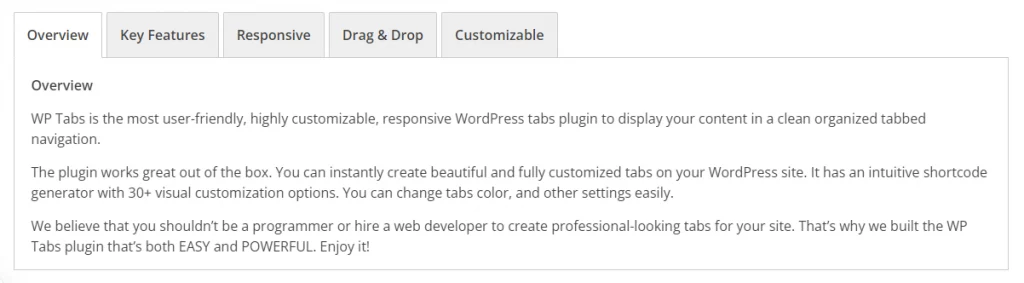
Congratulations! You’ve done it.
Here is what basic tabbed content looks like.
To add tabbed content in WooCommerce, you have to Click WP Tabs Pro → Settings → WOO TAB SETTINGS and perform the intuitive actions.
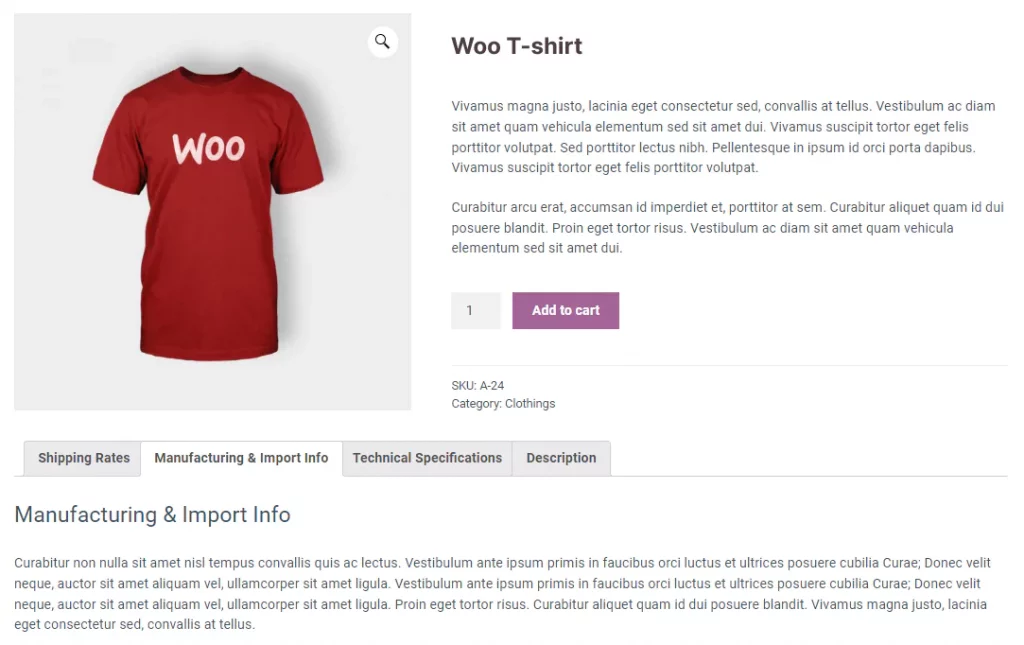
To learn in detail about adding tabbed content in WooCommerce, read How to Add WooCommerce Additional Tabs to Grow Sales.
Wrapping Up
Tabbed content is a widely practiced web design strategy to organize related content concisely. Moreover, when designed properly, it intuitively lets your site visitors navigate to the desired content faster. As a result, it enhances user interactions and satisfaction.
Furthermore, WP Tabs allows you to add tabbed content to your WordPress website, and WooCommerce store more beautifully, following only four simple steps without writing a single line of code.
So, let’s start organizing your content now for a better user experience and more conversion.
Thanks for reading. Let’s discuss more in the comment box below. We love to read your comments and reply.
If this blog was helpful, please share it with your friends and followers on social media.
Leave a Reply