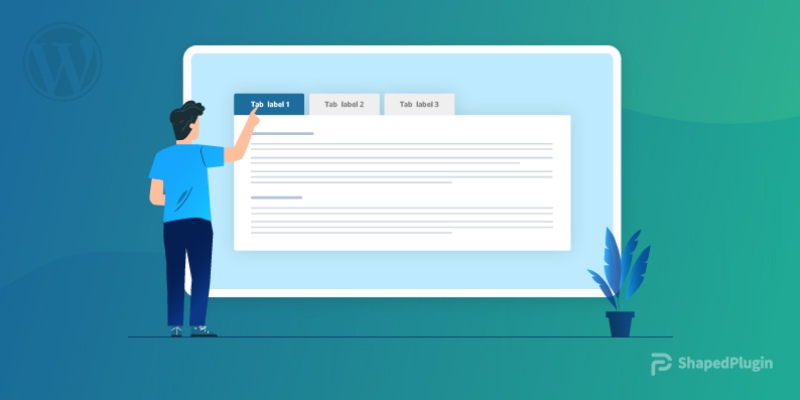
Do you want to organize your closely related content in tabs to save space and make it easier and faster for your site visitors to find their desired piece of content? WordPress tabs can be your best choice to add more information in a single place. Moreover, your visitors can see the related content seamlessly without scrolling down or going to other pages.
In this blog, I’ll show you how to add tabs on your WordPress site to organize related content easily and smartly.
Table of contents
- 4 easy steps to add WordPress Tabs
- Best Practices in tab design
- Write short tab labels
- Avoid ALL CAPS
- Write tab labels in plain language
- Use highly readable fonts
- Stick to only one row of tabs
- Display tabs in a good order
- Highlight the selected tab
- Keep unselected tabs visible
- Connect the current tab to the content area
- Make tabs interactive
- Ensure instant response
- Equal spaces between tabs
- Equal paddings for all tabs
- Nested Tabs
- Final notes
4 easy steps to add WordPress Tabs
Follow these simple steps to add WordPress tabs in minutes. Moreover, it doesn’t require any coding knowledge.
Step 1: Install and activate Smart Tabs ( Formerly WP Tabs)
Unfortunately, WordPress doesn’t offer to add tabs by default. So, you must install and activate a good tab plugin that helps you add tabs seamlessly without writing codes.
However, a good plugin doesn’t mean only offering tons of features but also being well-coded, updated with the latest web technologies, light-weight, slick, fast, and most importantly, easy to use. Considering these facts, I prefer Smart Tabs to easily create responsive tabs in WordPress. Undoubtedly, it can be the best choice for you too.
Let’s install and activate Smart Tabs.
First, click Smart Tabs to download it. After that, open your WordPress dashboard in a new tab and follow the simple instructions below.
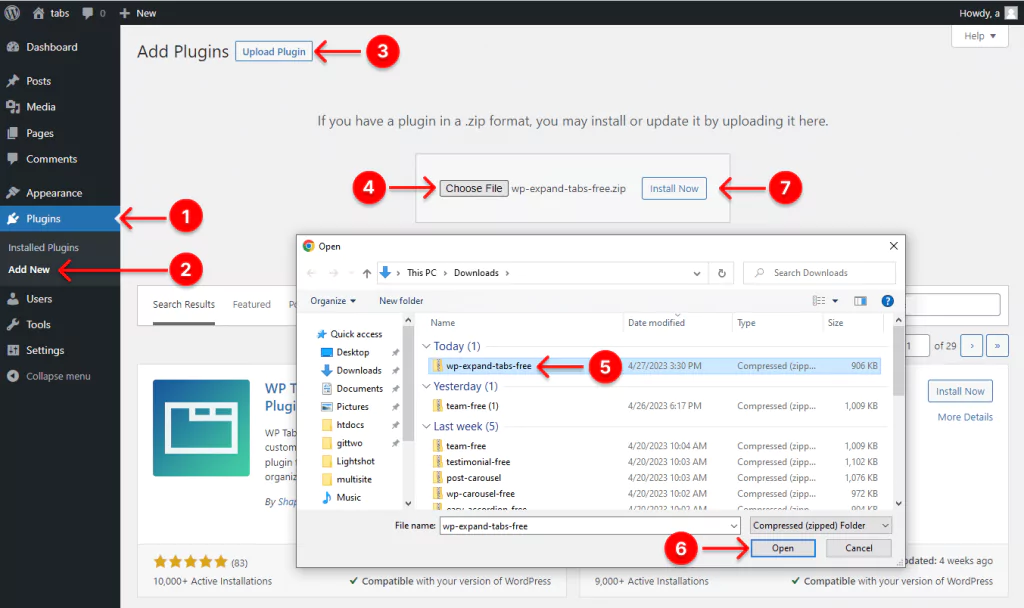
- Click Plugins at your WordPress dashboard admin sidebar.
- Click Add New under the Plugins.
- Click Upload Plugin.
- Click Choose File.
- Select the wp-expand-tabs-free zip file. If you don’t find it, please click here and then click Downloads again. Found it? Great!
- Click Open.
- Click Install Now.
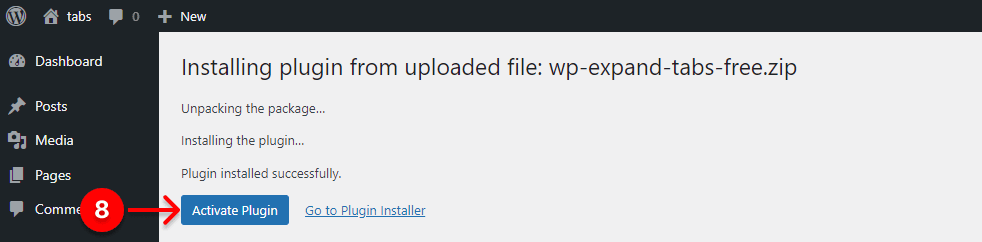
8. Finally, click Activate Plugin to have the Smart Tabs (formerly WP Tabs) on your WordPress dashboard admin sidebar.
Step 2: Add tab titles and content
Once you install and activate Smart Tabs (formerly WP Tabs), it must be on your WordPress admin sidebar, as seen in the image below.
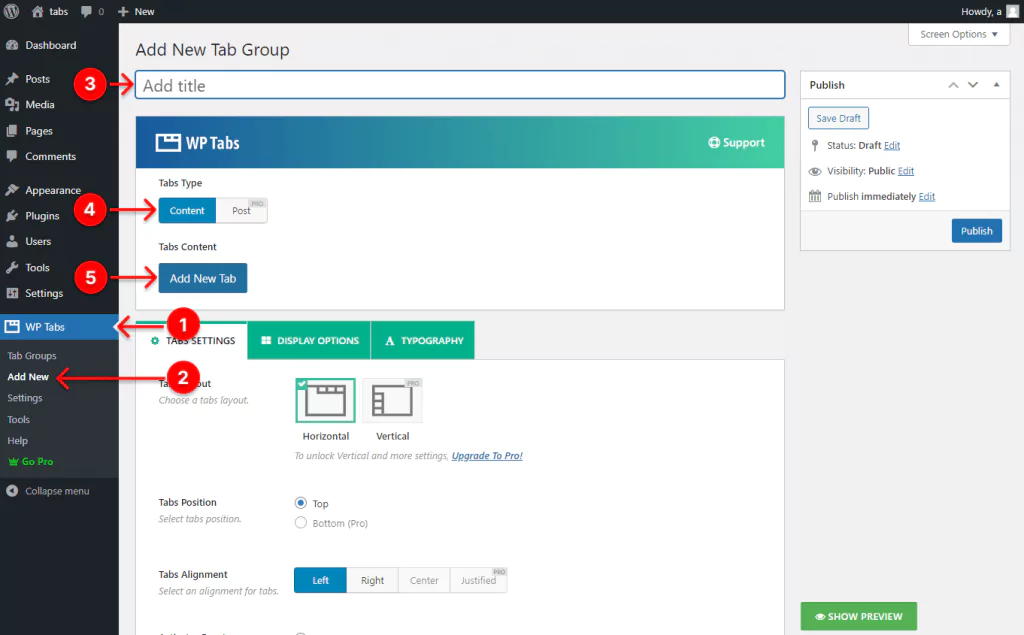
- First, click WP Tabs.
- Click Add New.
- Give your tabs a title.
- Select Content.
- Click Add New Tab. Once you click it, it expands two text fields. The first field is for a tab title, and the second is for its description. You can see them below.
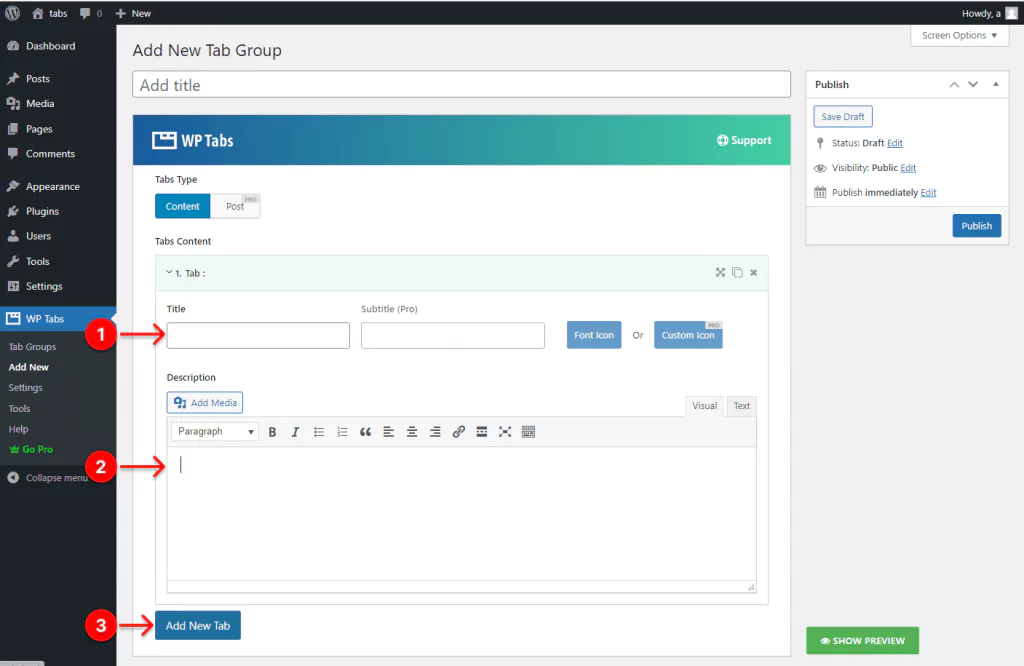
- Write a title for your first tab.
- Write the tabbed content of your first tab.
- Click Add New Tab to add a new one. Thus, you can add as many tabs as you want.
Step 3: Design your WordPress tabs and tabbed content
After you add all your tab titles and tabbed content, it’s time to dive into designing your tab bar and tabbed content. With the robust features of WP Tabs, you can create your WordPress tabs exactly how you want.
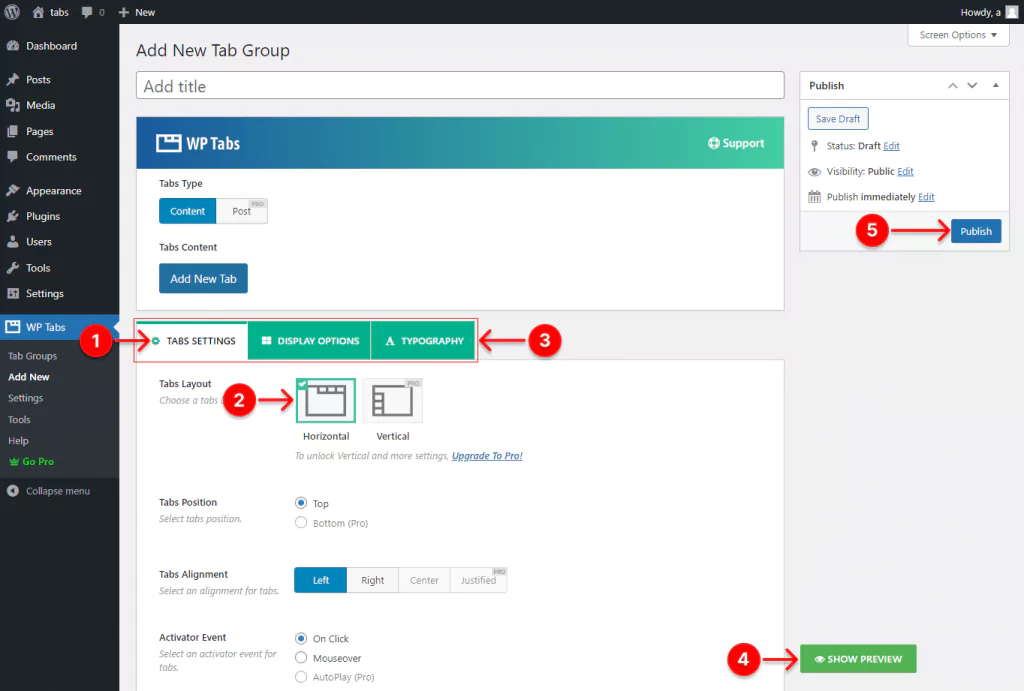
- First, select the tab named TABS SETTINGS.
- Select the Horizontal layout to display your tabs horizontally.
- There are three tabs in this tab bar. Each tab has plenty of design features. With them, you can design your tab bar and tabbed content how you want. So, explore them individually and try them out as per your needs.
- Design is an iterative process. So, you can see the Preview by clicking the SHOW PREVIEW button after applying some design features, and you can go back to revamp it if needed. In this way, you can perfectly make your tab bar and tabbed content how it should be.
- After you design your tabs perfectly, hit the Publish or Update button.
You can see some demos or watch the following tutorial to get more ideas about designing WordPress tabbed content.
Step 4: Publish your WordPress tabs
After you design your WordPress tabs how they should be, it’s time to hit the publish button.
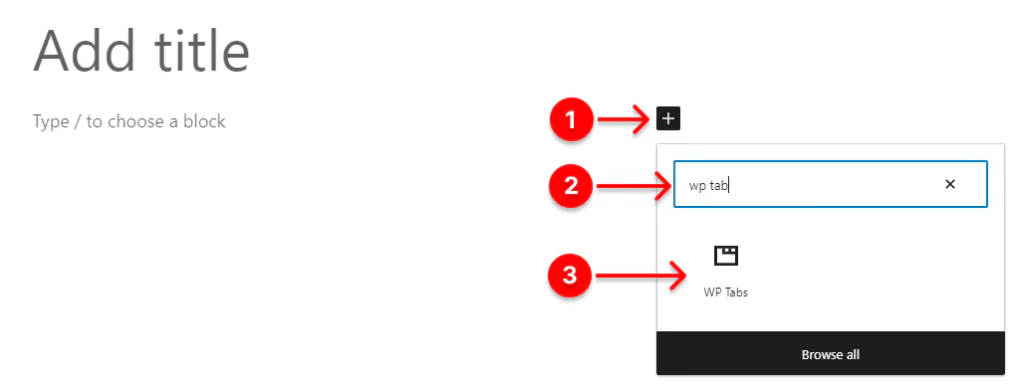
- First, click + (the plus icon).
- Next, type WP Tabs in the search bar.
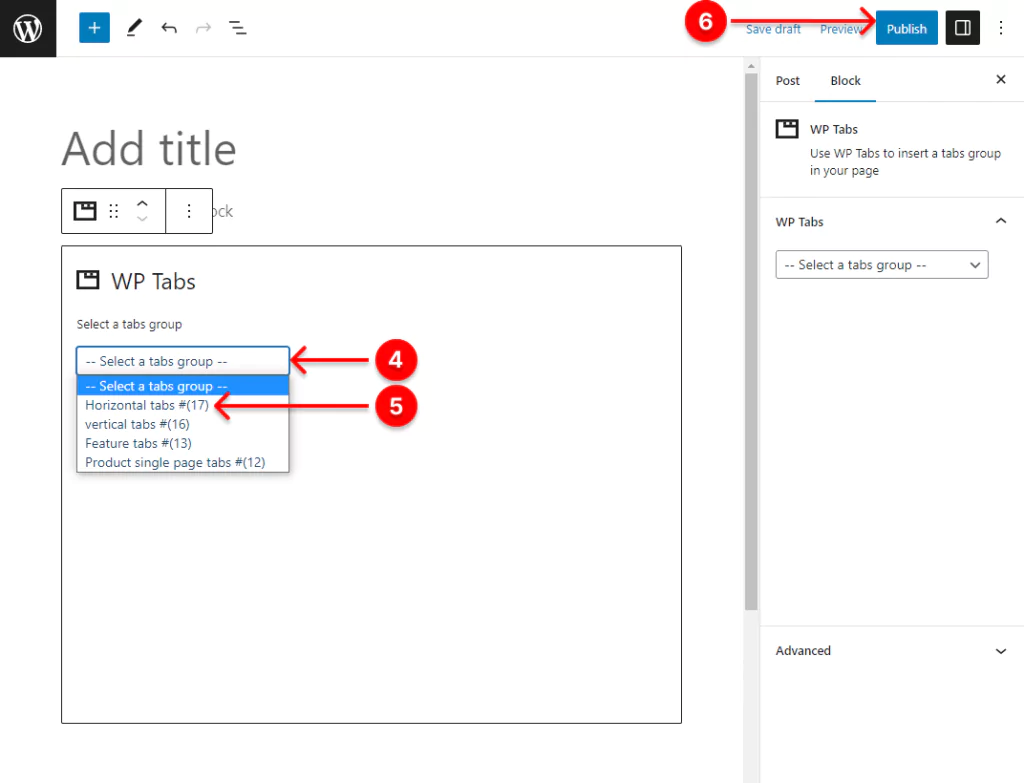
- Click the WP Tabs Gutenberg block.
- Click the dropdown. It will show the list of tab group titles (tab group shortcodes) you’ve created.
- Select the title you want to publish.
- Finally, hit the Publish or Update button.
Great! You have done it.
Here is how WordPress tabs look.

Best Practices in tab design
Follow these best practices in WooCommerce and WordPress tabs design and make the most of them.
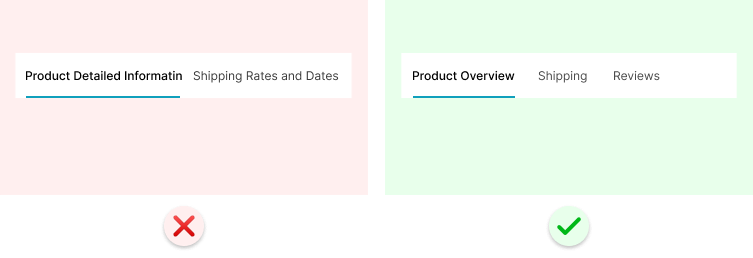
Write short tab labels
Tab labels should be concise and clear. Ideally, they should not be more than two words.
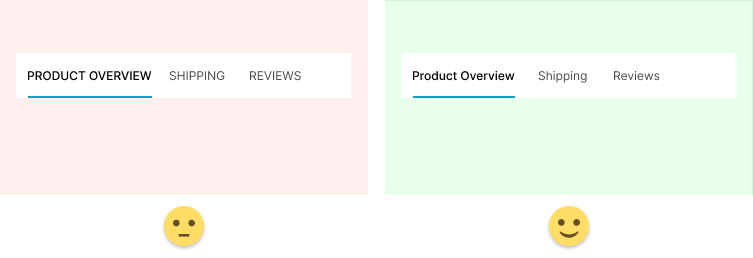
Avoid ALL CAPS
Use title style capitalization for tab labels. ALL CAPITALS is rarely a good option because it’s harder to read.
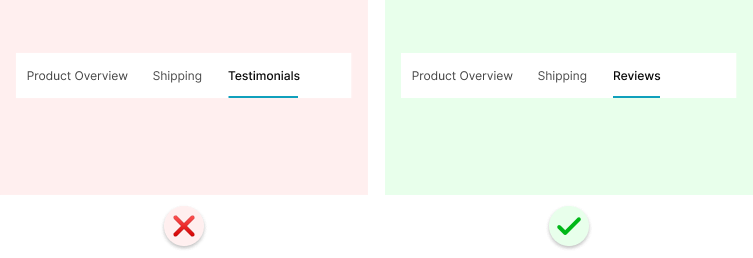
Write tab labels in plain language
Write tab labels in very common language so it sounds usual to customers.
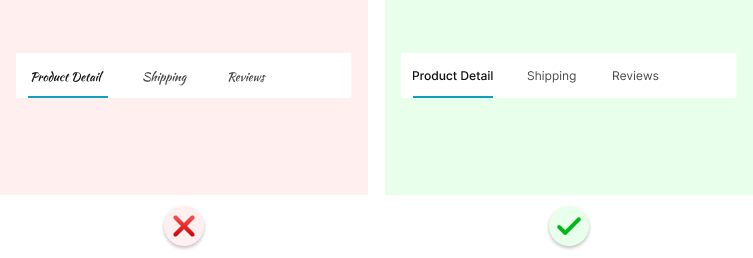
Use highly readable fonts
Use the highly readable fonts that users can understand easily.
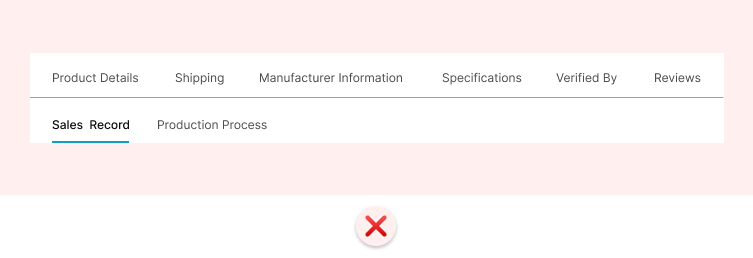
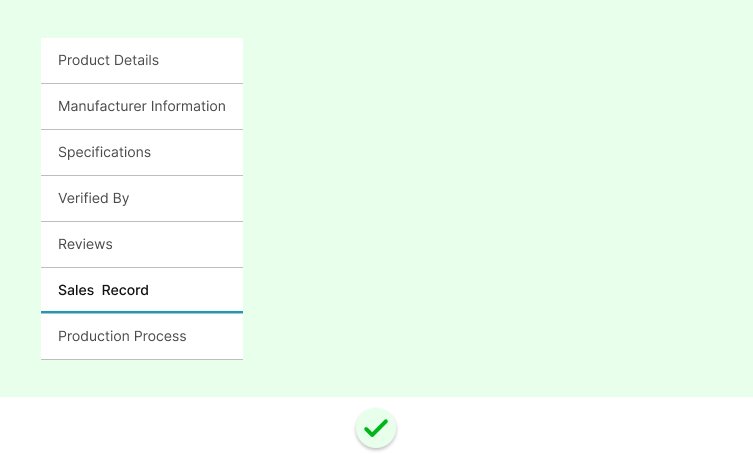
Stick to only one row of tabs
Amazon popularized tabs first in 1998.
However, it started using huge tabs to show tons of product categories.
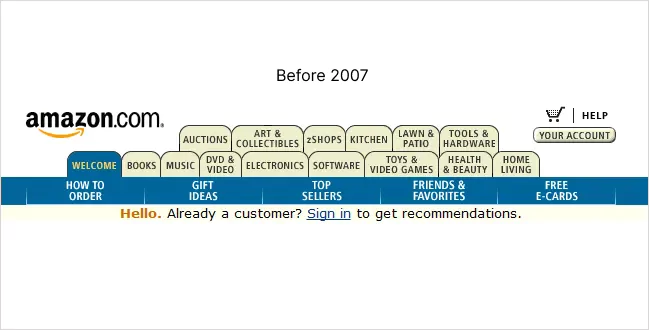
Jacob Nielsen said, “It’s a misuse of tabs.” Then, Amazon changed its design in 2007.
In essence, multiple tab rows makes it hard to relate the tab with its content.
Therefore, multiple tab rows is not a good idea.
However, what to do when it’s your crying need?
There are two options you can choose from:
1. A vertical tab bar.
2. A scrollable horizontal tab bar.
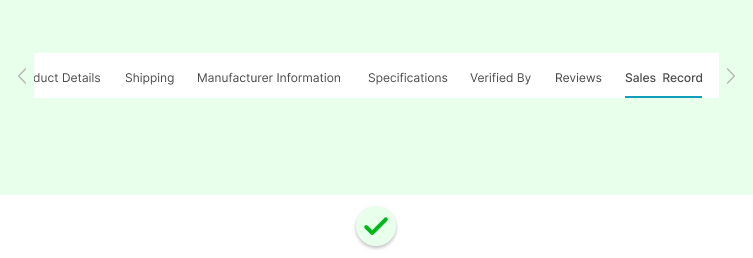
Use right and left arrows to make the visitors understand that there are more tabs to scroll.
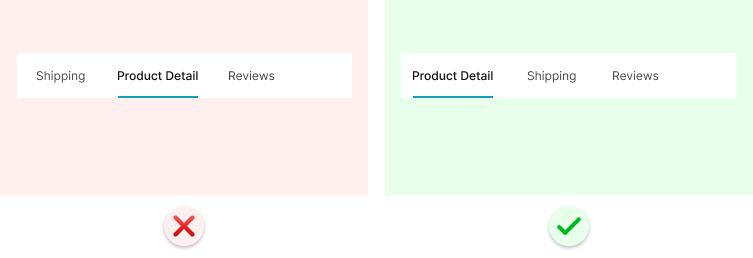
Display tabs in a good order
Arrange tab labels in an order that makes sense for your users.
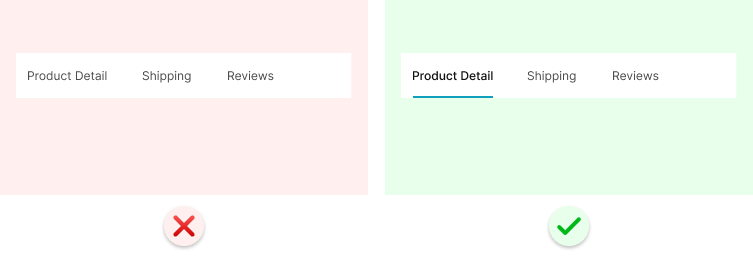
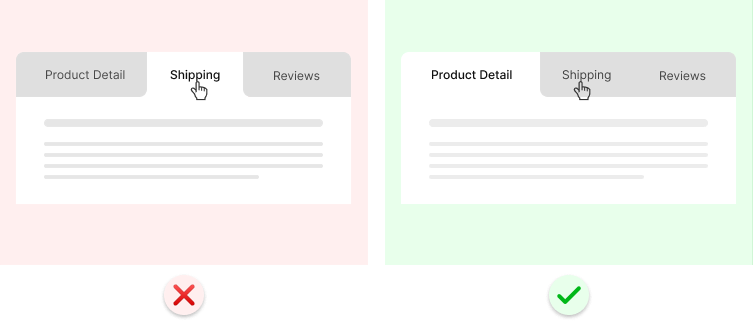
Highlight the selected tab
Make the currently selected tab stand out from others. As a result, visitors can easily relate the tab with its content.
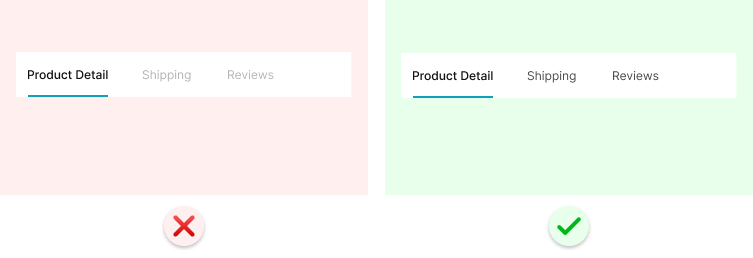
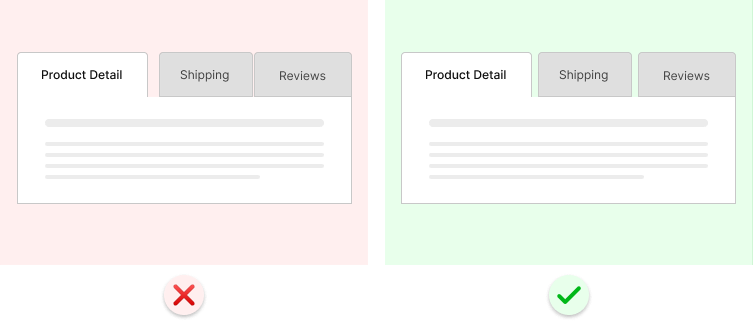
Keep unselected tabs visible
Unselected WooCommerce and WordPress tabs should be clearly visible so that visitors can see them and click them to see the content.
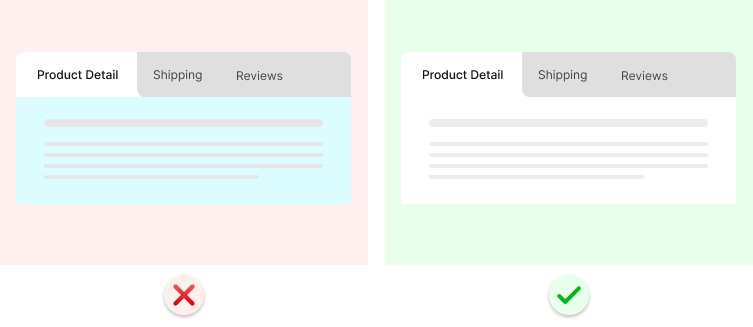
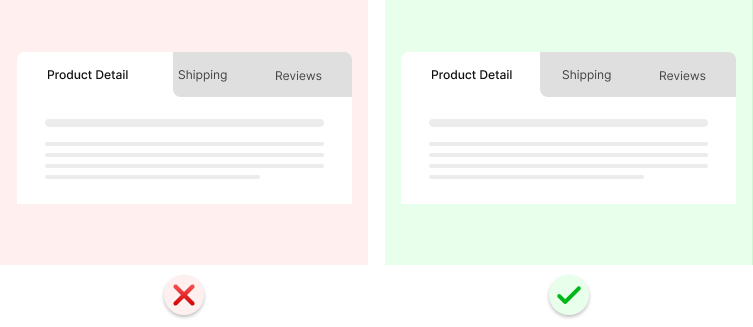
Connect the current tab to the content area
Make the currently selected tab connected to the content area so that users can easily relate the tab with the content.
Make tabs interactive
When a visitor hovers over a tab, it should interact with an effect or a slight change in color or size.

Ensure instant response
Tabs are used to let users find the content in no time with a better user experience. Regarding filter tabs, it could be achieved by using the AJAX load method to display content instantly.
Allow users to navigate WordPress tabs by clicking only
Although visitors can move from one tab to another faster than they would if they had to move by clicking the tabs, using the cursor location to open and close tabs can be a poor user experience.
Equal spaces between tabs
Maintain equal spaces between WooCommerce and WordPress tabs so that they look consistent.
Equal paddings for all tabs
Use equal paddings for all tabs to make the tab bar visually perfect.
Nested Tabs
If you need to use nested tabs to display subcategories of the content, you should use different styles for them.
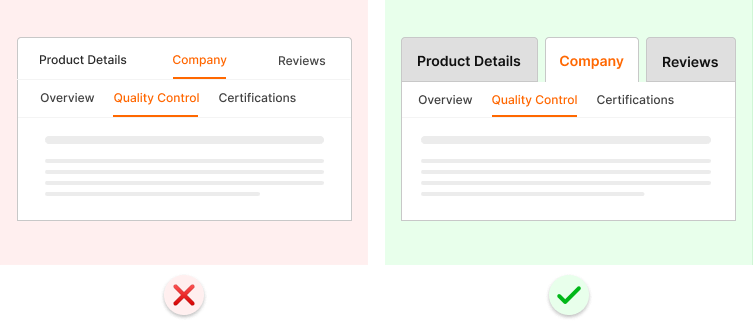
Or, you can distribute the content area to the subcategories and show them along with content at a time.
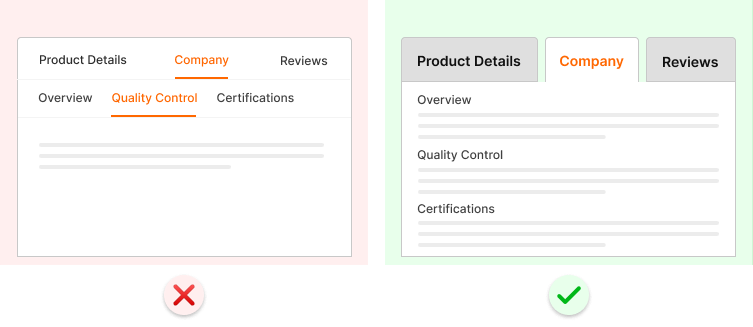
Alternatively, you can use accordions to show the subcategories smartly.
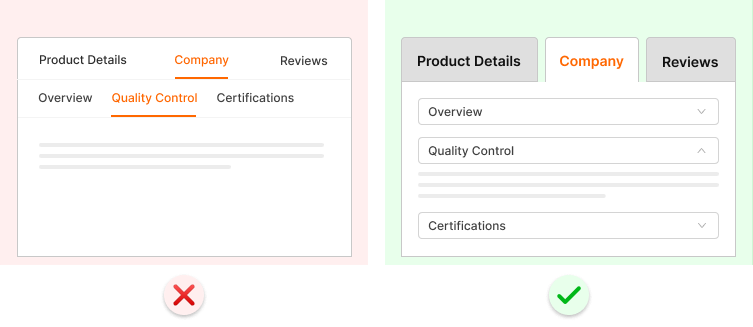
You can use Easy Accordion to organize content with beautiful accordions in minutes
without writing code.
Exciting News! You will find most of the designs above done by default in Smart Tabs (formerly WP Tabs) settings. It means Smart Tabs saves your huge valuable time. Save time and enjoy your life.
Final notes
Adding WordPress tabs is an easy and space-saving way to display your closely related content. Moreover, it improves your site’s user experience with better interactivity. You have to follow only four easy steps to get it done for your website.
So, let’s add WooCommerce and WordPress tabs to your website now.
Thanks for reading. We highly appreciate your comments and always love to respond to them promptly.
If you find this blog helpful, please share it with your friends and followers on social media.
Leave a Reply