Do you want to add WooCommerce additional tabs to your product pages to provide adequate information and impress your customers to increase sales? Are you looking for the easiest way to do it?
If yes, welcome to this blog. I will show you every step of how to add additional tabs to WooCommerce product pages seamlessly.
Tabs help you organize additional information to your WooCommerce product page in a logical chunk. As a result, customers find their desired information faster without scrolling down and leaving the product page. Consequently, your conversion rate grows.
Moreover, additional tabs provide more content that helps your product pages rank higher and get more new customers. Finally it helps your business growth.
So, let’s get right in.
Table of contents
3 Easy Steps to Add WooCommerce Additional Tabs
Follow these simple steps to add additional tabs to your WooCommerce product pages in minutes. Moreover, it doesn’t require any coding knowledge.
Step 1: Install and activate a good tab plugin
WooCommerce allows to add only three tabs. So, we must install and activate a good plugin to add further tabs in WooCommerce faster with no code.
However, a good plugin not only provides tons of features but also ensures qualities such as clean coding, intuitive user interfaces, fast performance, compatibility with other plugins and themes, regular updates with the latest web technologies, and a lightweight structure. Failure to meet these qualities can cause errors in your site and make it slow. Most importantly, the plugin should be user-friendly and seamlessly compatible with the latest version of WordPress so you can work flawlessly.
Considering all these things censoriously, I prefer Smart Tabs (formerly WP Tabs) to add more tabs to WooCommerce product pages. It can be the best WooCommerce tab solution for you too.
Let’s install and activate Smart Tabs (formerly WP Tabs)
If you are a beginner (future leader), you can watch this tutorial to see how to install and activate Smart Tabs Pro.
You can read the documentation or reach out to the support team for further help.
Step 2: Add New WooCommerce Additional Tabs to Specific or All Products
Upon installation and activation of Smart Tabs (formerly WP Tabs), it must be on your WordPress admin sidebar, as seen in the following screenshot. Follow the next steps to add custom product tabs to your WooCommerce product pages.
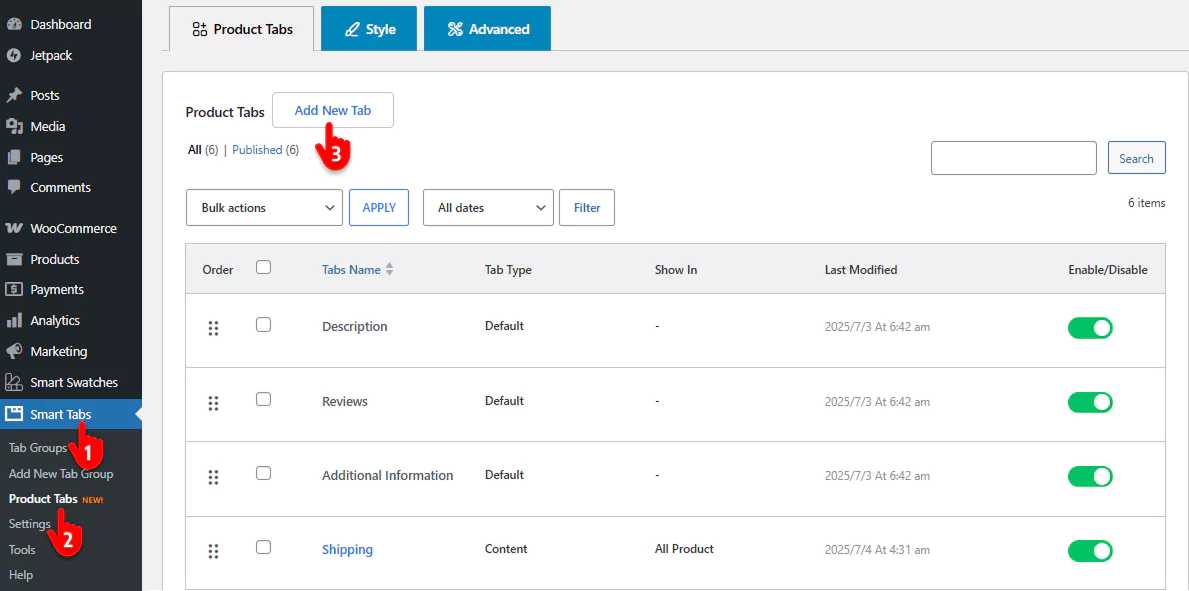
- Navigate to Smart Tabs in your WordPress admin sidebar
- Select Product Tabs from the menu
- Click the Add New Tab button to open the tab creation interface
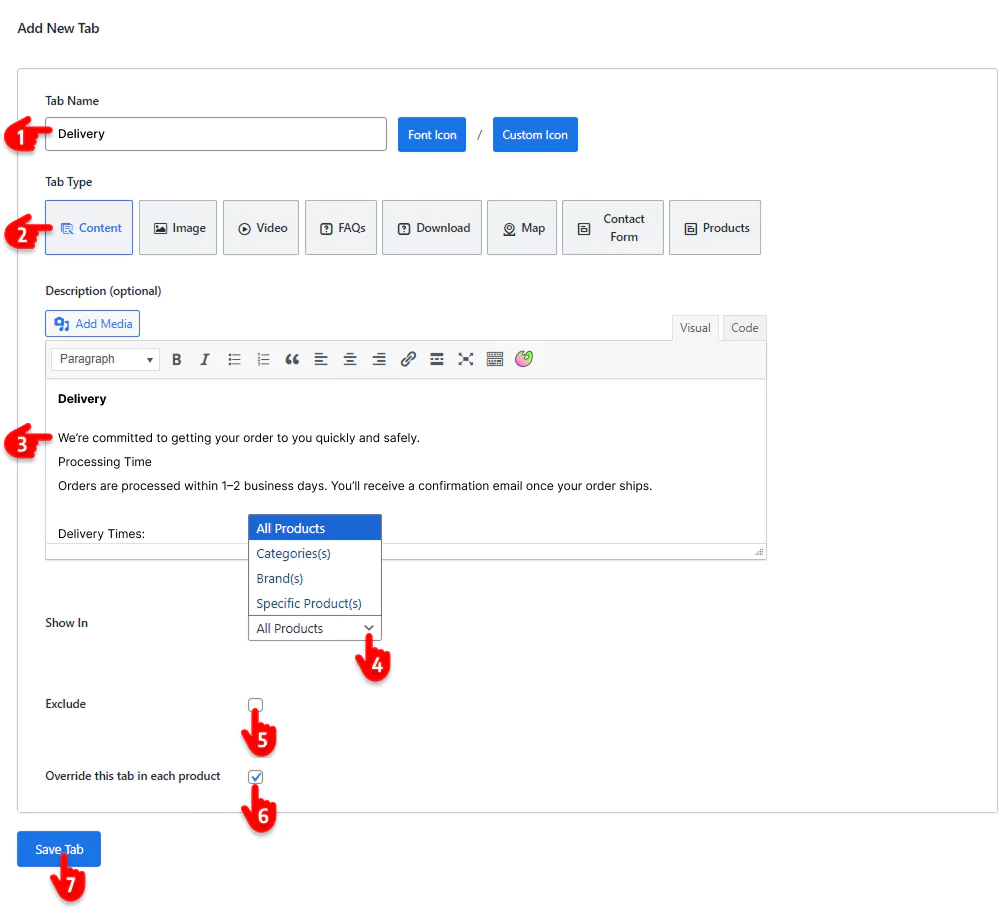
- Enter the tab name – Give your tab a descriptive title that customers will see
- Select the tab type – Choose from 8 available tab types that allow you to add rich content including size charts, image galleries, tutorial videos, and other media
- Add your content – Use the robust WYSIWYG editor or code editor for maximum customization flexibility when creating your tab content
- Assign to products – Determine where the tab appears by selecting from these options:
- Specific individual products
- Entire product categories
- Specific brands
- All products in your store
- Set exclusions (optional) – Check this box if you need to exclude certain products from your selection
- Enable per-product editing (optional) – Check this option to allow unique tab content customization for individual products
- Save your changes – Click the Save Tab button to finalize your new product tab
You can repeat this process to create multiple custom product tabs for your WooCommerce store, giving you complete control over your product information display.
Step 3: Design Your WooCommerce Additional Tabs
Smart Tabs is a feature-rich and user-friendly WordPress and WooCommerce tab plugin. As a result, you can easily design your product tabs exactly how you want.
Follow these steps to create additional tabs for your WooCommerce product pages. As you design, keep the tab best practices in mind to ensure the best results.

- Access styling options – Go to the Style tab, which provides comprehensive customization settings
- Select tab layout – Choose the layout design that best matches your store’s aesthetic
- Set tab alignment – Position your tabs with the preferred alignment option
- Configure tab placement – Determine where the tabs will appear on your product pages
- Explore additional features – Browse through all available styling options to maximize the Smart Tabs plugin’s capabilities and create the ideal presentation for your product tabs
- Click SAVE SETTINGS to implement your styling preferences
Smart Tabs offers a lot of customization options to ensure your product tabs seamlessly integrate with your store’s design while providing an optimal user experience.
Manage Tabs from a Streamlined Dashboard, and Edit Per Product
After you design the additional tabs perfectly, follow the next steps to manage them with full flexibility.
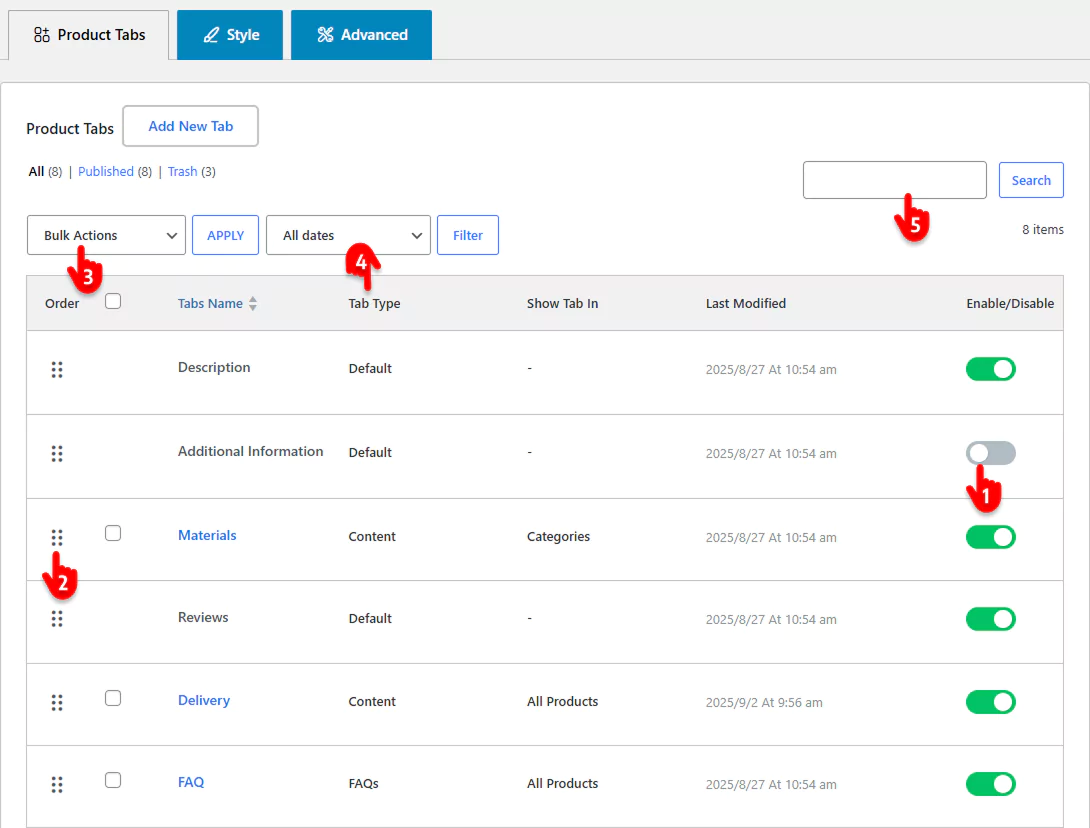
- Tab visibility Toggle – Easily hide or display both WooCommerce default tabs and custom product tabs with one click
- Reorganize tab order – Use simple drag-and-drop functionality to arrange tabs in your preferred sequence
- Execute bulk operations – Perform actions on multiple tabs simultaneously to save time
- View comprehensive tab details – Access key information including tab types, product assignments, and modification timestamps in a single overview
- Find tabs quickly – Use the built-in search function to instantly find any specific tab
These management tools streamline your workflow and provide complete control over your product tab organization.
Hide or Edit Tab Per Product
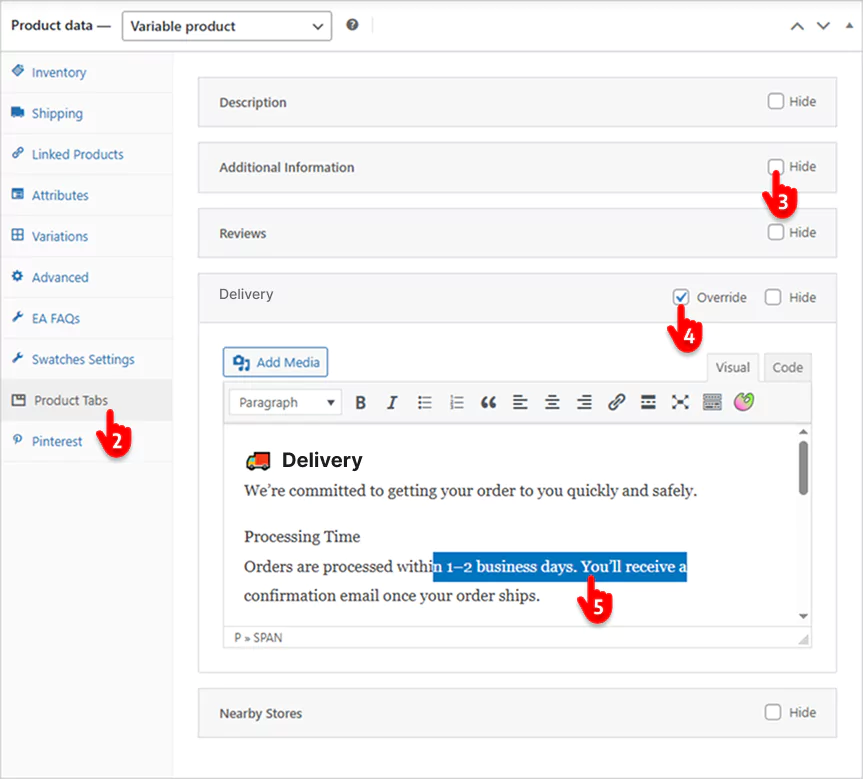
- Open product editor – Navigate to the specific product you want to customize tabs for
- Access tab settings – Scroll down to locate the Product Tabs section and click to expand the available options
- Control tab visibility – Toggle individual tabs on or off for this specific product
- Edit tab content – Click on any tab to expand it and modify its content as needed
This allows you to customize tab settings and content on a per-product basis, giving you granular control over what information appears for each item in your store.
Lastly, go to your product pages and and see the changes.
Congratulations! You have done it.
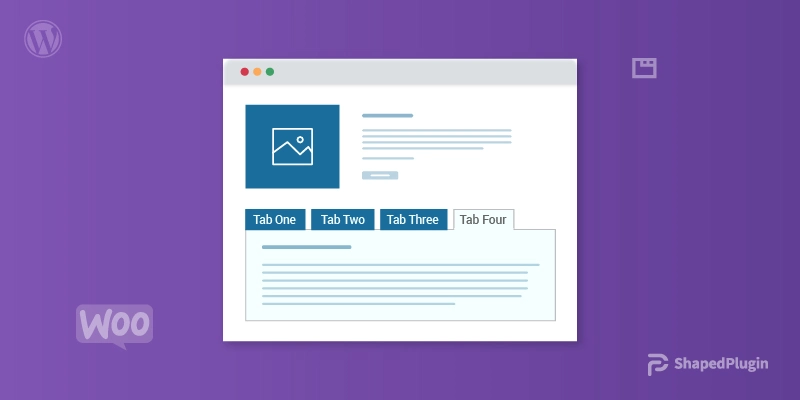
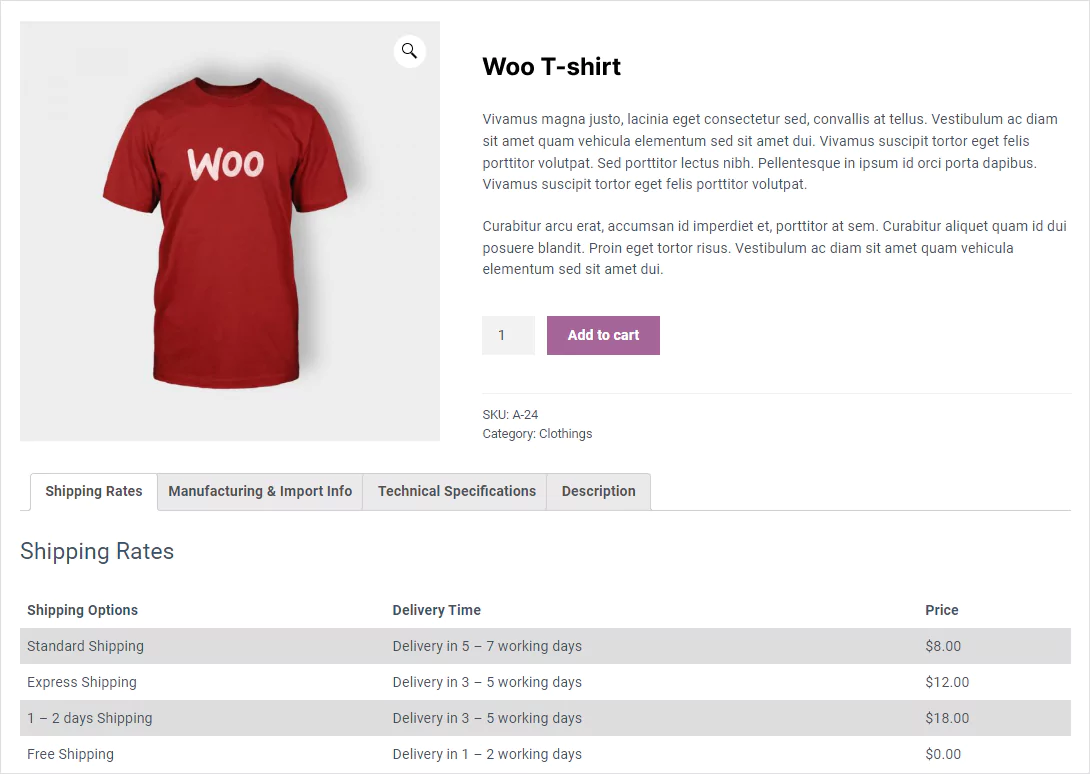
Here is how basic WooCommerce Additional tabs look.
Take Away
WooCommerce additional tabs and their content provide more information about your products. They impress costumes and grow conversion rates.
Additionally, they help your product pages rank higher and get more new customers to grow sales.
Following only four easy steps, you can add additional tabs to your WooCommerce product pages and increase your business growth.
So, let’s do it now.
Thanks for reading. Let’s talk about it more in the comment box below. We enjoy reading your comments and replying to them.
If this blog was helpful, please share it with your friends and followers on social media.
Leave a Reply