
Do you sell products from locally or globally popular brands? Or do you want to build your own brands in the market? If you do, adding a beautiful brand slider to your shop will be greatly effective. Statistics show:
90% of consumers claimed brand loyalty is crucial to purchasing decisions
71% of customers who have a positive experience with a brand on social media are highly inclined to recommend it to friends and family.
59% of consumers prefer purchasing new products from brands they are already familiar with.
I can guess you purchased your mobile phone, tablet, or computer from the brands you like. Famous brands influence everyone.
In this blog, I’ll share a step-by-step process for adding an attention-grabbing brand slider to your WooCommerce shop in minutes and boosting sales.
So, let’s dive in.
Table of contents
By the way, by default, you can’t add brands or create brand sliders in WooCommerce. So, you need to install a good WooCommerce brand plugin.
Step 1: Install Smart Brand for WooCommerce plugin
Smart Brands for WooCommerce is the best plugin for adding brands and creating outstanding brand sliders in WooCommerce. It lets you add products’ brand names, descriptions, logos, and banners to your WooCommerce shop in minutes. Moreover, it creates an individual landing page for each brand and allows visitors to browse products based on brands easily. As a result, your shop visitors find their desired products from their favorite brands faster and make purchases more seamlessly.
Its robust and easy-to-use features enable you to design brand sliders exactly how you want.
Let’s install Brand Slider for WooCommerce. It’s easy.
Are you unsure how to install it? Please read the documentation. It’s simple and takes less than a minute.
Step 2: Add brands
Once you install the plugin, you will find an additional option, Brands, in the Product menu on your WordPress dashboard admin sidebar, as seen in the following screenshot. Let’s follow the simple steps to add brands.
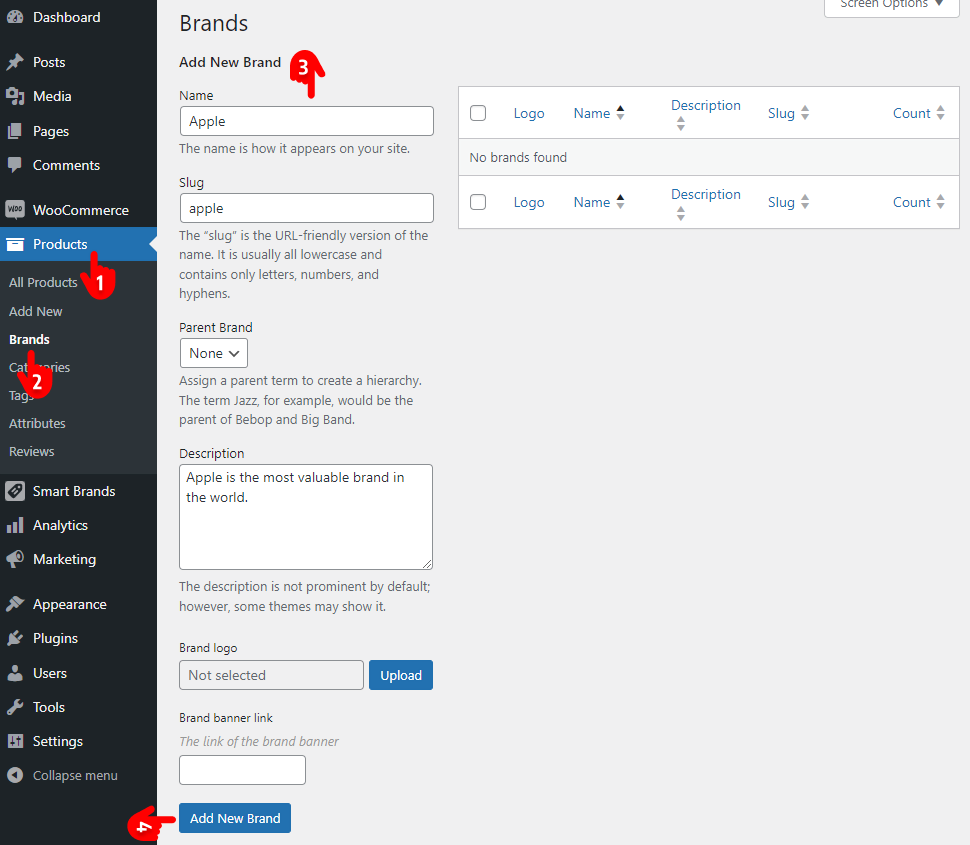
- First, click Products on your WordPress admin sidebar.
- Click Brands.
- Fill out the brand form properly.
- Click the Add New Brand button at the bottom to add a new brand. Thus, you can as many brands as you need.
Step 3: Add products to brands
Upon adding brands, let’s follow the easy steps to add products to brands.
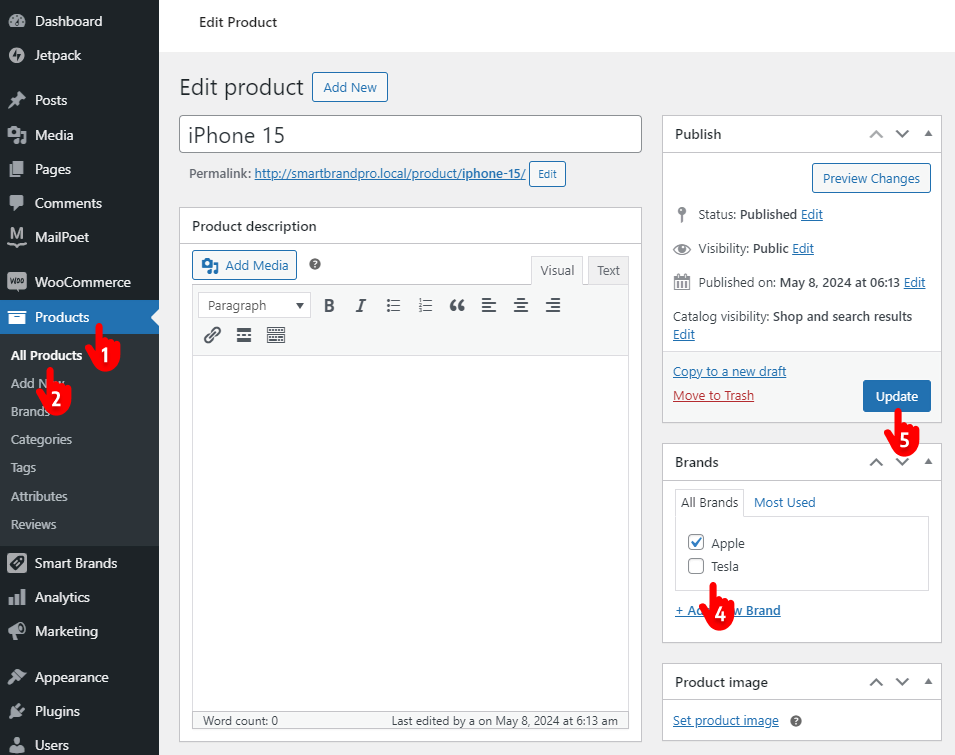
- First, click Products on your WordPress admin sidebar.
- Click All Products.
- Click a product.
- Check a brand.
- Click the Update button on the top right of the product form.
Step 4: Customize a brand slider
We have already added brands and products to the brands. Now, let’s dive into designing a stunning brand slider.
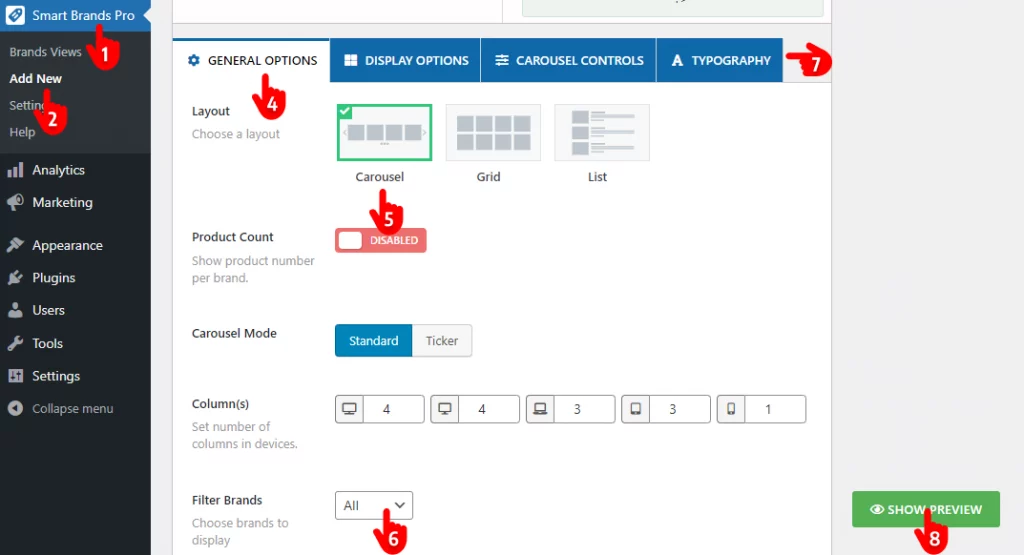
- First, click Smart Brands.
- Click Add New.
- Give it a title.
- Leave the GENERAL OPTIONS tab selected.
- Keep the Carousel layout selected. However, it also allows you to display your brands in a grid and list view.
- Filter the brands you want to display.
- Navigate through the tabs to find all the customization options. Try them according to your requirements and preferences.
- You can use the SHOW PREVIEW button to watch the preview and revamp.
Step 5: Publish the brand slider
If your brand slider sounds perfect, it’s time to make the brand slider live. Follow the steps below.
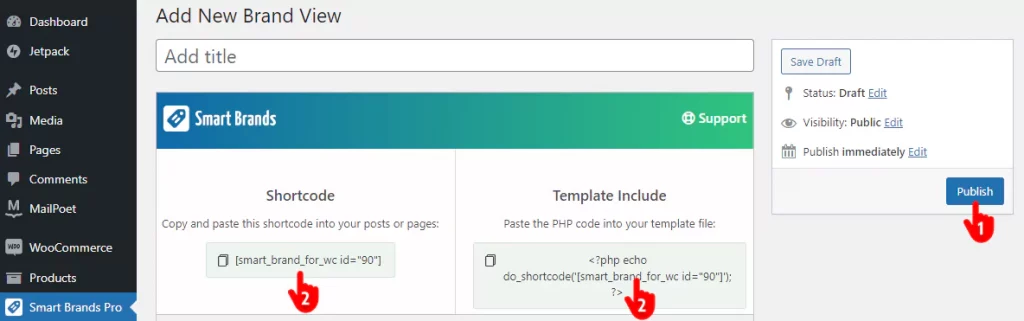
- Hit the Publish or Update button at the top right of the Smart Brands screen.
- Copy the shortcode, paste it on your WooCommerce page or post, and update it. Alternatively, copy the PHP code and paste it into your template file.
Here is how a basic brand slider looks.

The takeaway
Brands have a great impact on consumers. Adding brands to your WooCommerce products and creating a beautiful brand slider can boost your sales and take your business experience to the next level.
You can create a mesmerizing brand carousel in WooCommerce in minutes by following the five easy steps shown above.
So, add a gorgeous brand slider to your WooCommerce shop and boost sales.
Additionally, you can create attractive product slider, category slider and gallery slider like Amazon, Alibaba, and Walmart to boost sales.
Leave a Reply