
WordPress image slider, also known as a WordPress image carousel, is the most effective and attention-grabbing way to display your multiple images in a single place.
Do you want to save your space but show a good number of particular images? Do you want to make your website more interactive and engaging with fantastic slider effects and features? If your replies are yeah, let’s walk together for a while. I can make sure it’s not something more than a walk in the park.
However, if you have some fishes to fry and want to spend as little time as possible to create an attractive WordPress photo slider, the following table of contents may help you navigate to your desired part of the content in no time.
Table of contents
4 Steps to create a WordPress image slider
To create a captivating slider for your WordPress website, follow these four simple steps below.
1. Install and activate a good plugin
The first and foremost task is to choose a good plugin. A good plugin helps you intuitively create a WordPress image slider without any code. Therefore, I would like to recommend you the WP Carousel. Its beginner-friendly user experiences and powerful features set it apart from any other carousel plugin.
The installation and activation process of a WordPress plugin is simple. Get WP Carousel Pro for advanced features, or download WP Carousel for free for basics.
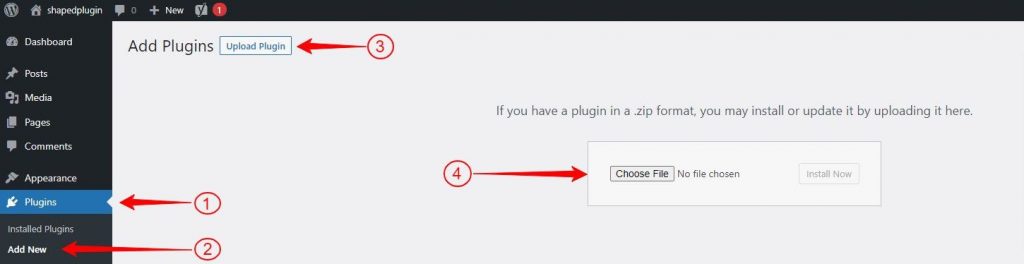
Go to your WordPress Dashboard and find Plugins available at the left sidebar. Click Add New, Upload Plugin, and Choose File. Your downloads will open. Select the WP Carousel Free file (wp-carousel-free) and open it. Install and activate the plugin.
Click steps:
Download WP Carousel → WordPress Dashboard→ Plugins→ Add New→ Upload Plugin→ Choose File → wp-carousel-free→ Open→ Install Now→ Activate.
Or,
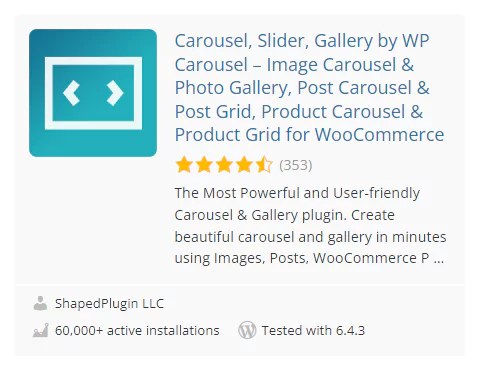
You can also get WP Carousel by searching it on the search bar that appears after clicking Add New. Click Plugins and Add New. A search bar will appear on the top right side. Type WP Carousel in the search bar and pick WP Carousel from the search results. Now install and activate it.
Click steps:
WordPress Dashboard→ Plugins→ Add New→ Search WP Carousel→ WP Carousel →Install and Activate.
This simple and cute logo of the WP carousel helps you find it right in search results.
Upon Installation and activation, WP Carousel appears on the menu bar of your WordPress Dashboard. See the documentation for more details.
If you like avoiding cognitive load, stop reading more, try out the easy steps above, and move forward. The method of reading the steps and trying them out simultaneously saves your time and helps you a lot to learn a new tool.
2. Add images for your image slider
Great! you have already installed and activated WP Carousel successfully. Now, WP Carousel is available on your WordPress dashboard.
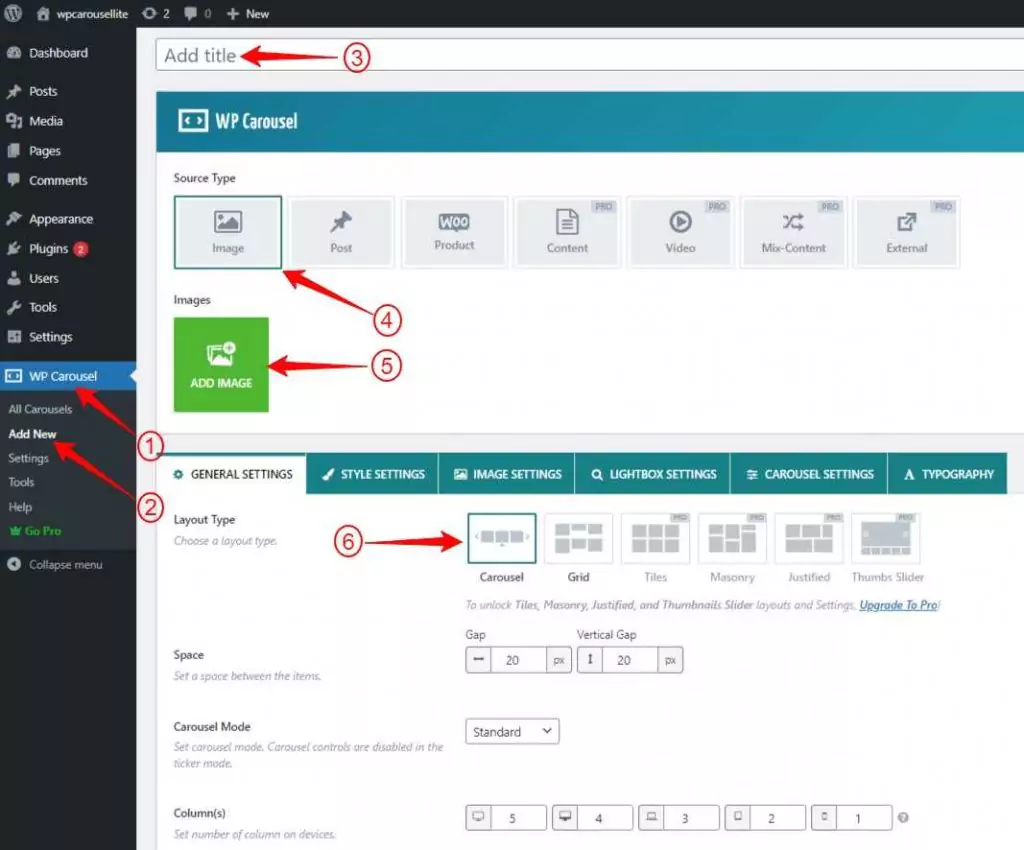
Click WP Carousel and Add New to start creating a beautiful slider. Give your slider a title. Click ADD IMAGE. It will take you to the media library.
Select the images as many as you want to display on your slider. You can add alt texts, titles, captions, and more for every image. Click Create a new gallery at the bottom right corner and click Insert gallery. The images have been added.
Click steps:
WP Carousel→ Add New→ Add title, give it a title →Image (source type)→ ADD IMAGE, select images→ Create a new gallery→ Insert gallery
Now you are ready to try out the robust features of WP Carousel for your photo slider.
3. Design your image slider
WP Carousel offers you tons of functional and aesthetical setting options you can set to make your slider exactly how you want. These powerful features help you make your slider more usable, accessible, and enjoyable.
You might have noticed some bonuses for you. You have been here to explore the best way to create only a WordPress image slider. Now you can enjoy some incredible additional features. Besides the image carousel, it allows you to create many more like:
- Image Gallery
- post slider and gallery
- product slider and gallery
- Content slider and gallery
- Video slider and gallery
- Mix-content slider and gallery
- External slider and gallery
And the galleries in several layouts:
- Grid
- Tiles
- Masonry
- Justified
- Thumbnail slider
Check out them and all the settings one by one and try them out as per your needs and preferences for your users. Only WP Carousel Pro offers you advanced features. Users don’t skimp on purchasing WP carousel Pro as its ROI is much high. However, Learn more about creating a slider in this video tutorial. You can see the demos to understand the range of WP Carousel Pro’s features and what else you can do with it.
4. Publish your WordPress image slider
If you have accomplished setting apropos features for your WordPress image slider, it’s time to publish it. Before publishing, watch the preview by clicking on the SHOW PREVIEW button at the bottom right corner. It shows you how your sliders will look after publishing it finally.
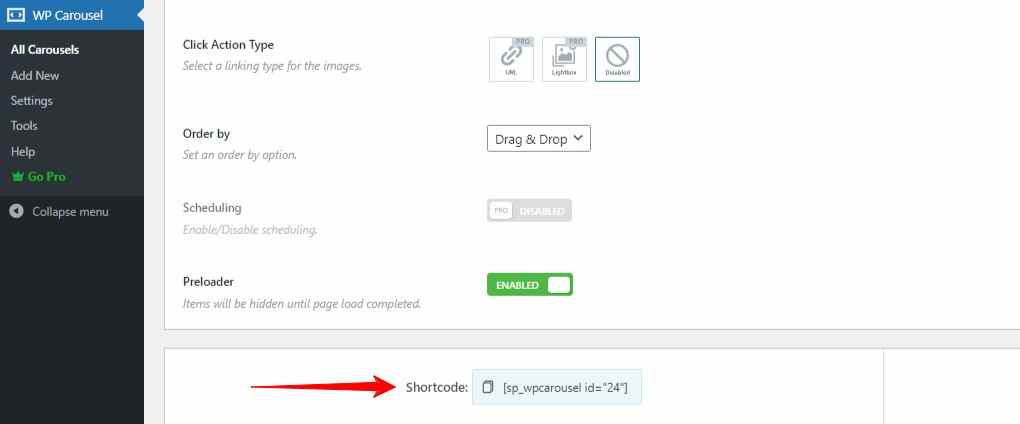
If everything is ok, publish it by clicking Publish button at the top right corner. Now, copy the shortcode available at the bottom left side and go to the page or post where you want to place the slider. Search Shortcode block and paste the shortcode there. If you like to display it on a new page or post, you can just add a new one from the left sidebar of your WordPress dashboard and paste it the same way you have done in terms of existing posts and pages.
On the other hand, the WP carousel allows you to display your slider with the WP Carousel block. Click the plus icon for a new block. It will come with a search bar.
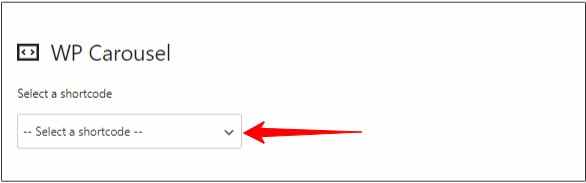
For the first time, search for the WP Carousel block and click it. Then click Select a shortcode. It will show the list of sliders you have created. Next, pick the slider title you want to display. Wow! It plays. Now publish it finally by clicking the Publish or Update button at the top right corner.
Click steps:
Publish/Update(slider) →(go to) the page/post→ Plus icon→ Search for WP Carousel→ WP Carousel block→ Select a shortcode→ Pick the slider title→ Publish
You can watch the video tutorial for more in detail.
If you love written content, please continue reading.
Slider best practices you should follow
To create a slider with the highest usability, you must be careful of the following things. Furthermore, they help you ensure the best output of your sliders. However, there are a few different cases where some of them are not applicable.
Optimize images
Since you click ADD IMAGES, it takes you to the media library to let you add images. When you select an image on the media library, you can add alt texts, titles, captions, and descriptions to every image. Add the alt text and title incorporating your page or post’s keywords. They significantly contribute to your content SEO.
Images of large sizes may increase your page load time which harms SEO. Hence, resizing and compressing the images is a good practice for better performance.
Enable Lazy Load
WP Carousel offers you the best features for your photo slider. One of them is Lazy Load. Find it under the Image Setting. It reduces the initial load time by delivering the requested images first. As a result your page loads faster.
Show navigation
WP Carousel lets you customize the navigation icon how you want. Please make sure the navigation icon is large enough to allow your users to navigate to their desired images easily. Moreover, It helps your users feel in control.
Show pagination
Showing pagination is another good practice for creating a WordPress image carousel. It helps your users to have a clear idea of how many images are in the slider and their progression. As a result, your users don’t get confused and don’t walk to an unknown destination. Finally, users love your sliders.
Set autoplay speed
The autoplay is one of the robust features of sliders. It saves users’ effort and time. But be careful in setting the autoplay speed. Don’t make it so fast that it moves before your users see the content thoroughly.
Pause on hover
Pause on hover is one of the crucial features of the WP carousel. If you enable the autoplay, please don’t forget to enable this option to help your users spend more time on their desired images and content. Moreover, it helps your users feel in control.
How a WordPress image slider benefits you
A WordPress image slider benefits you in many ways. How do you feel when a speaker keeps delivering his informative speeches without any body language? Dull and vogue, a lot like a statue, right? Sliders are like the body language of your website.
When you add some sliders to your website, they make your website more interactive and vivid. As a result, your site communicate with your visitors more closely. In addition, it saves your users’ time and effort as well as your space.
Most importantly, A WordPress image carousel grabs your users’ attention and helps to increase the conversion rate on a large scale.
So, no more procrastination. Let’s get started right now.
Lastly, Feel free to leave a comment below if you need further help.
Leave a Reply