WooCommerce variable product images and videos offer your shop visitors more options and detailed product display. They are more likely to match your shop visitors’ choices and increase sales.
Can you remember when you struggled last time with matching design, color, and size while shopping?
Let me tell you a short story in a few seconds. A couple of months ago, I went to a local market to buy some warm clothes. I fell in love with the design of a sweater, but the color was not my favorite. I said, “The design is superb, but I’m not a big fan of this color.”
The vendor said, “No worries! This sweater has seven color variants; please have a look.” I found my favorite color and also the size I needed the same way. Generally, it happens with almost all. Doesn’t it?
Finally, I purchased that sweater and some other clothes, and I was so happy.
Do you want to enhance your WooCommerce product detail pages and make your customers happy the same way? Things are exactly the same in WooCommerce. Like that resourceful vendor, you can display product variations such as color, size, material, and more in WooCommerce. Moreover, it doesn’t require any coding knowledge.
This beginner-friendly step-by-step visual tutorial made it super easy.
So, let’s get in and start adding WooCommerce product swatches to boost sales today.
Table of contents
What are WooCommerce variations and WooCommerce Variable products?
WooCommerce variations are interactive features that allow you to offer multiple versions of the same product with different attributes like color, size, material, and more. And the multiple versions are WooCommerce variable products.
However, WooCommerce variations and WooCommerce attributes are not the same things. WooCommerce attributes describe key information about a product. Visitors can only read the information in the additional information tab on the product detail page. These plain text are not interactive.
On the other hand, WooCommerce variations are interactive. So, visitors can use them to see multiple product variations like color, size, material, and more. That said, it requires attributes to create WooCommerce variations. Some of the WooCommerce variations include:
- Color
- Size
- Material
- Design/Style
- Flavor for food
- Brand
Does it still sound confusing? No worries, they must be crystal clear as you are going to create both WooCommerce attributes and WooCommece variations in next couple of minutes. Besides, I’ve added the real examples in the first and third steps below.
Why you should add WooCommerce variable products
WooCommerce variations and variable products benefit your business in many ways. Some of the key benefits include:
- WooCommerce variations Simplify product listing: Instead of creating separate product listings for each variable product, you can manage all the variable products under a single product listing. This makes managing inventory, descriptions, images, and other product details easier.
- Offer more options: WooCommerce variable products offer customers more options like different colors, sizes, and flavors to choose their favorite ones.
- Better UI & UX: Product detail pages with WooCommerce swathes look more beautiful and interact more efficiently with customers.
- Enhance shopping experience and customer satisfaction: WooCommerce variable products enhance customers’ shopping experiences with various options to choose from. As a result, they find their desired products in a shorter time. So, customers become happy.
- Reduce bounce rate: When you offer your shop visitors multiple options with WooCommerce variations, they are more likely to find their favorite product without leaving the product page.
- Increase sales: Eventually, by offering more flexibility and enhancing the shopping experience, WooCommerce variable products increase sales.
- Develop brand loyalty and grow business: They give your product page a highly professional look and ensure a better shopping experience. As a result, they finally achieve visitors’ trust, develop your brand loyalty, and grow your business.
3 easy steps to add WooCommerce variable product images
Follow the three simple steps to add WooCommerce variable products with additional image galleries in minutes. Moreover, it doesn’t require writing a single line of code.
Step 1: Create WooCommerce attributes and terms
WooCommerce attributes are characteristics or properties that are assigned to products to give customers more information like size, Color, material, and more.
If you haven’t added any attribute yet, open your WordPress dashboard in a new tab and follow the simple steps below to add some WooCommerce attributes and terms.
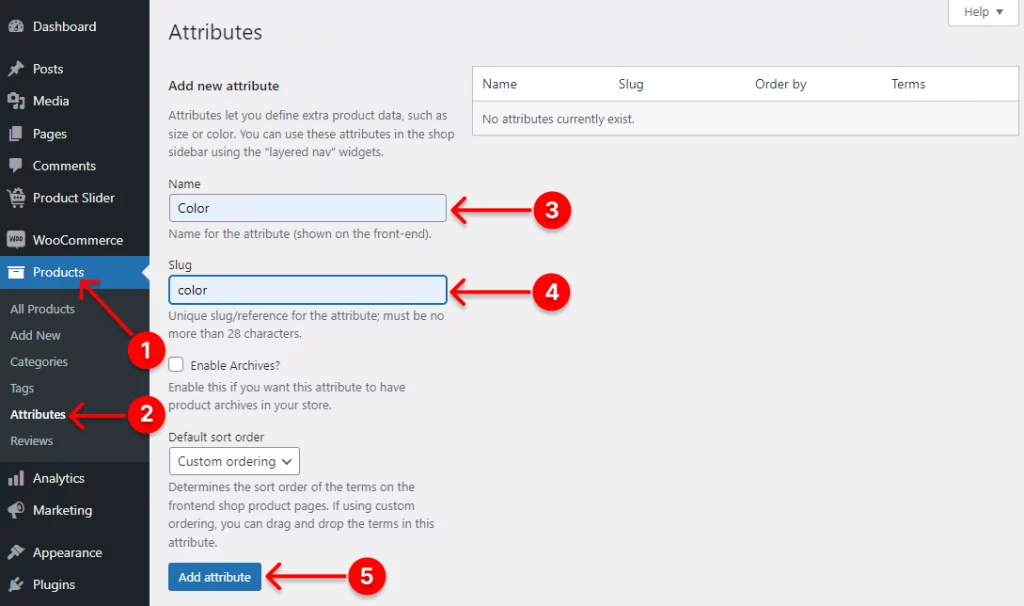
- First, click Products at your WordPress admin sidebar.
- Click Attributes.
- Name the attribute. For example, I’ve named it Color to add the color attribute.
- Add the slug.
- Click the Add attribute button.
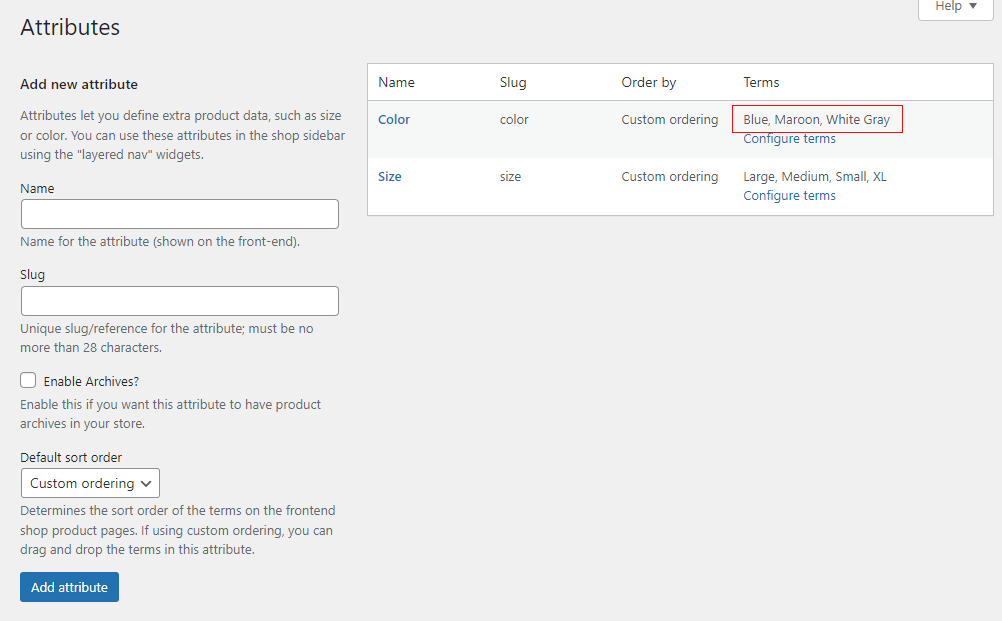
You can continue adding various WooCommerce attributes, such as size, material, flavor, brand, etc if you need. Upon adding an attribute, it looks like the following.
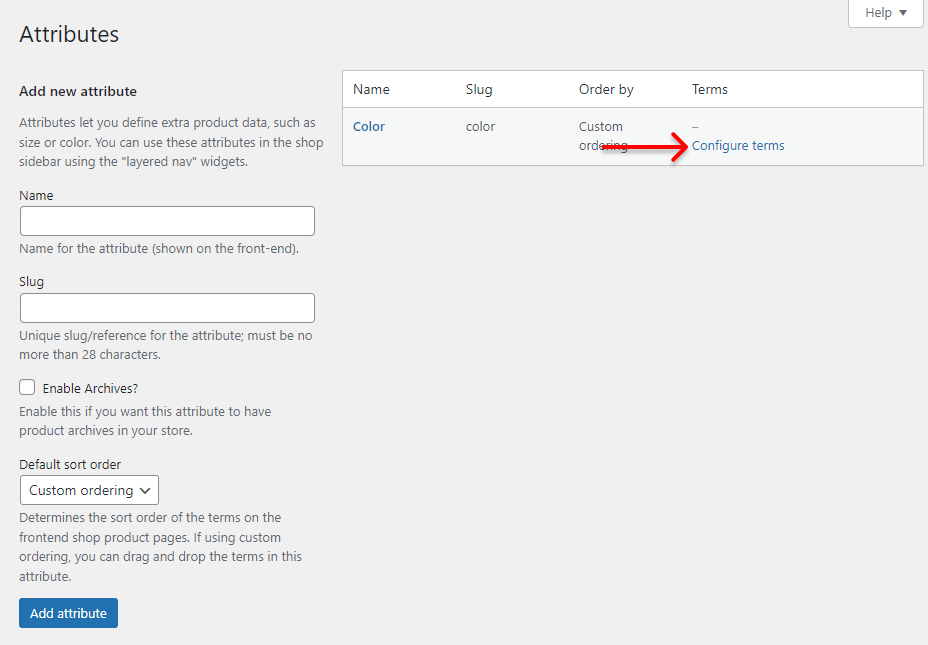
Now, we need to configure some terms for the attribute. Click Configure terms and find the following color form.
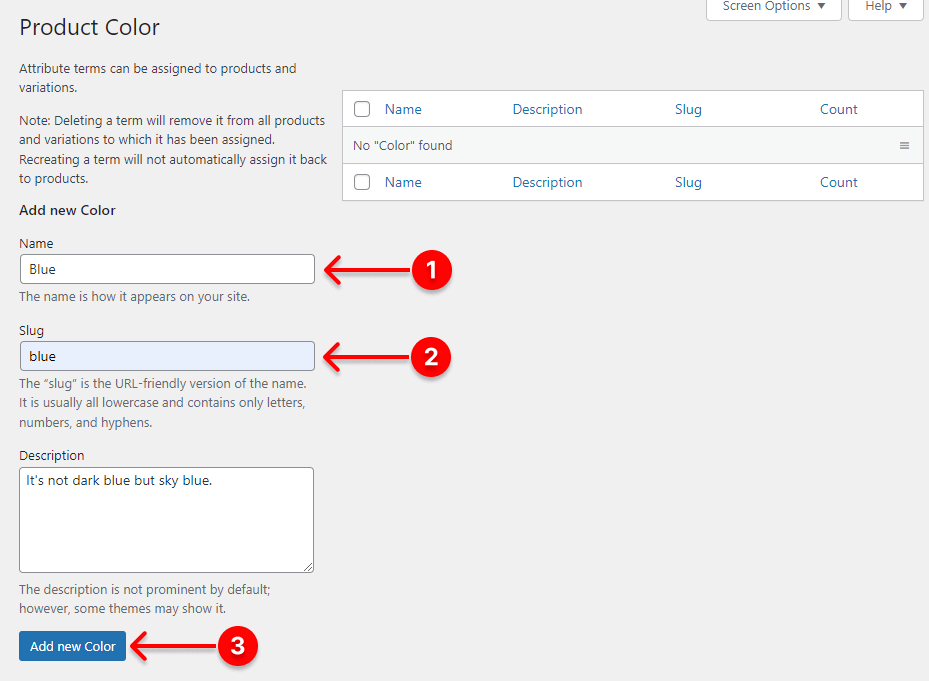
- Write the color name you want to add WooCommerce variable product images of. For example, I write Blue as I want to add the blue variable for one of my WooCommerce products to show you the process.
- Add the slug.
- Click Add new color.
Thus, you can add as many terms as you need to the attributes individually. For example, I’ve added some attributes and terms for them, as seen below.
Step 2: Set the attributes to the product you want to add variables for
Follow the simple steps to assign the attributes to the product you want to add variables. For example, let’s set the color attribute.
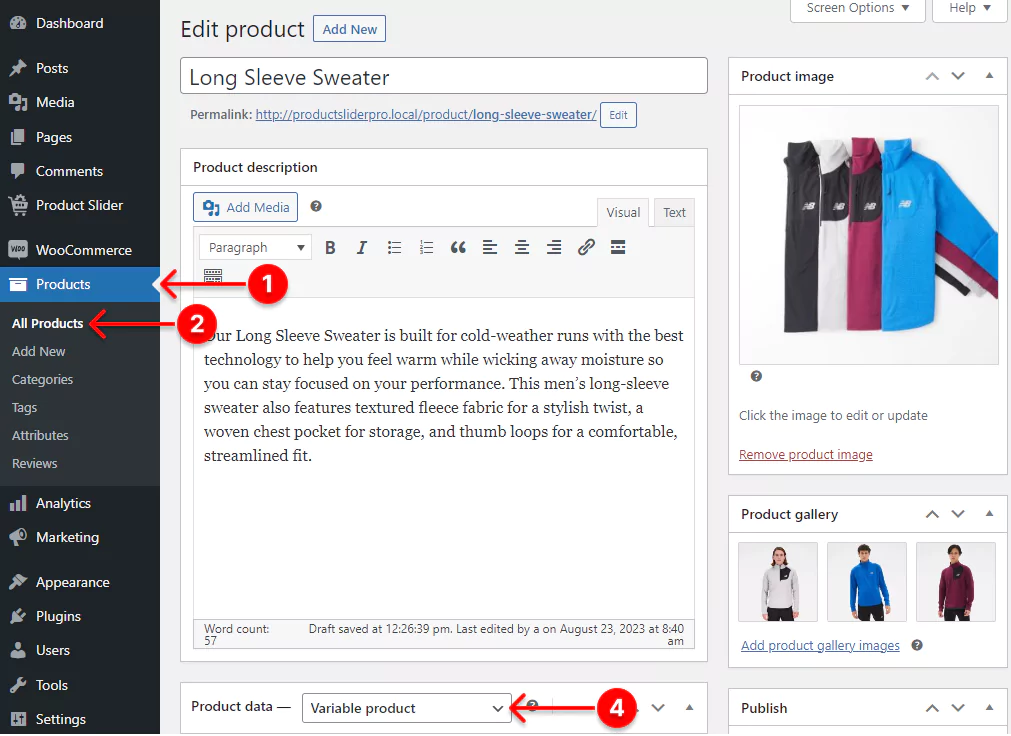
- First, click Products.
- Click All Products. It will show your product list. You can also assign attributes while adding new products.
- Click the product you want to add variables for.
- Scroll down to the Product Data section in the product form and pick up the Variable product from the dropdown list.
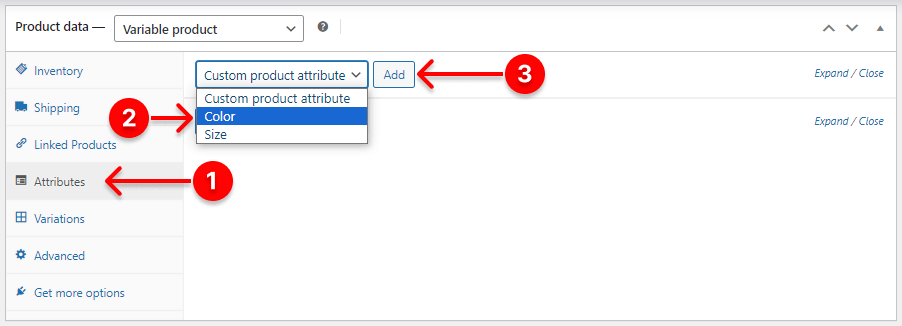
- Select the Attributes tab.
- Click the dropdown and pick up Color.
- Click Add to assign more attributes to the product.
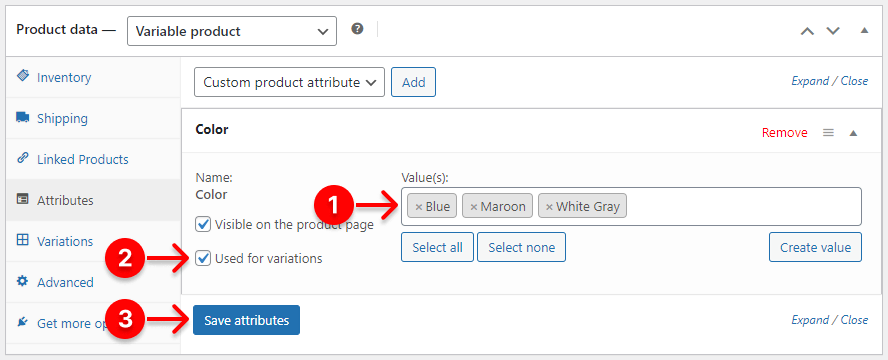
- First, click to add color values. For example, I’ve added blue, maroon, and white gray here.
- Check Used for variations.
- Click the Save Attributes button.
- Click the Update button of your product form at top right corner.
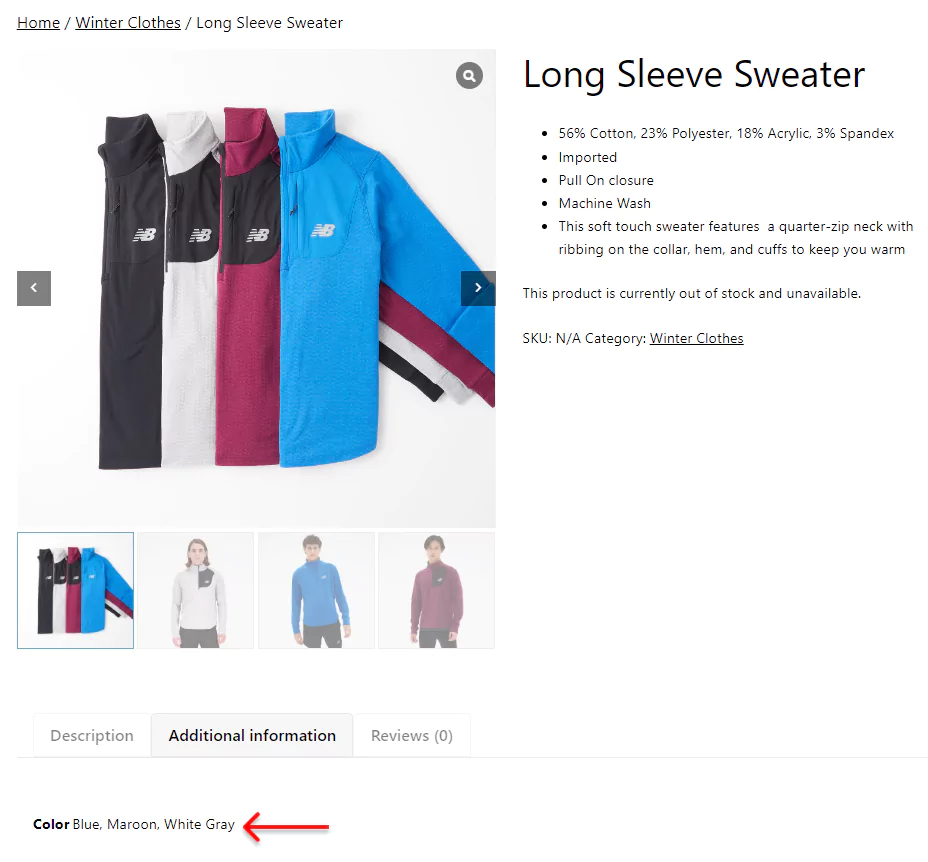
Similarly, you can assign as many attributes as you need. After I set the color attribute with three values to the product, hit the Update button, and refresh the product page, it looks like:
Step 3: Add WooCommerce variable product images
Now, follow the simple steps below to add WooCommerce variable product images.
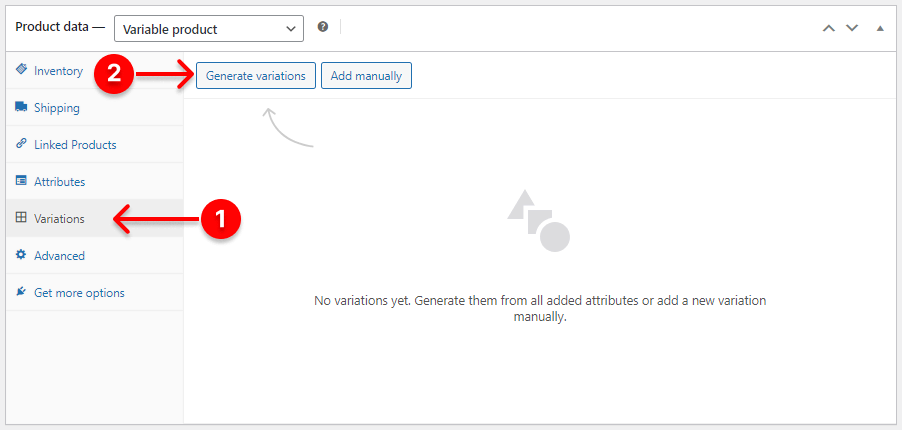
- First, select the Variations tab.
- Click Generate Variations. However, you can add variations manually by clicking the Add manually button.
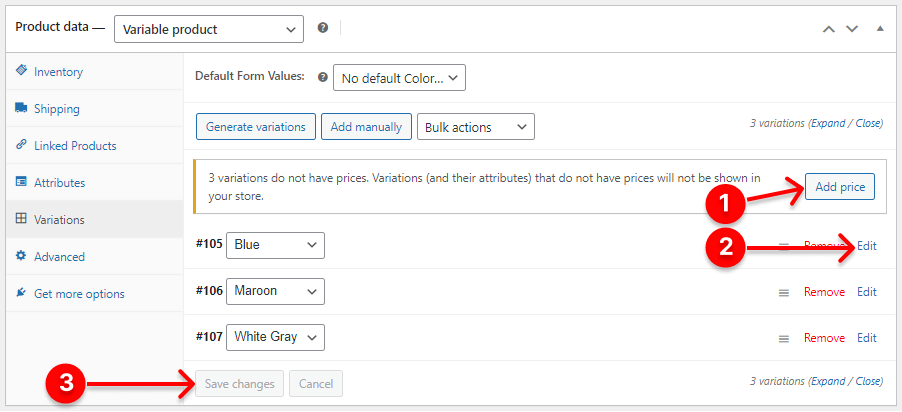
- Adding price is a must. If the prices are the same for all your variables, you can go to add the price by clicking the Add Price button.
- However, if the prices are different, you can click Edit. It will display a detailed form to add various information, including price. Fill out the form with the necessary information, including the required price.
- Click the Save Changes button.
- Hit the Update button of your product form at top right corner.
Now the product page looks like this:

As seen above, three variations ( Blue, Maroon, and White Gray) have been added. Now, let’s add images for the variations.
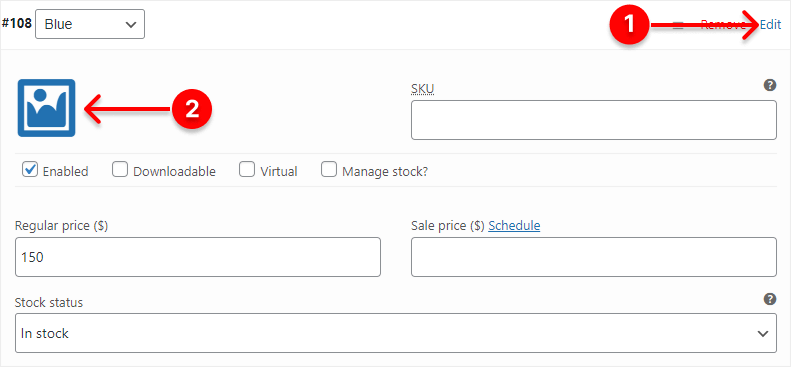
- I clicked Edit to expand the blue variable form. However, you can click Edit or anywhere of the Blue bar whitespace to expand it.
- Click the image field and follow the process to add the variable product image.
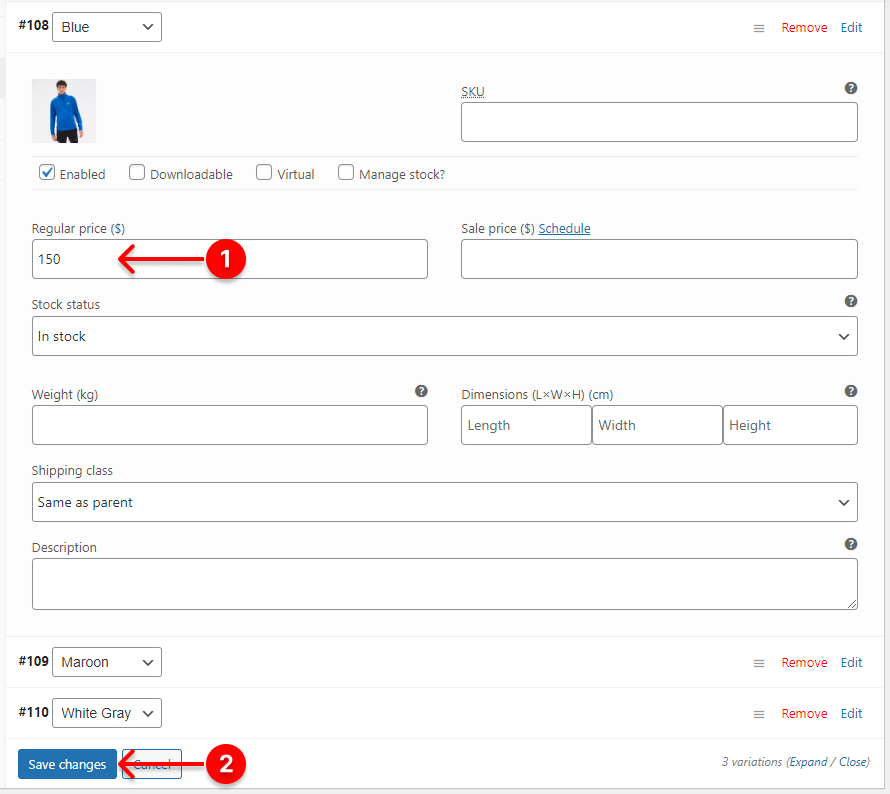
- Add price if you haven’t added it yet.
- Click the Save changes button.
- Click the Update button of the product form.
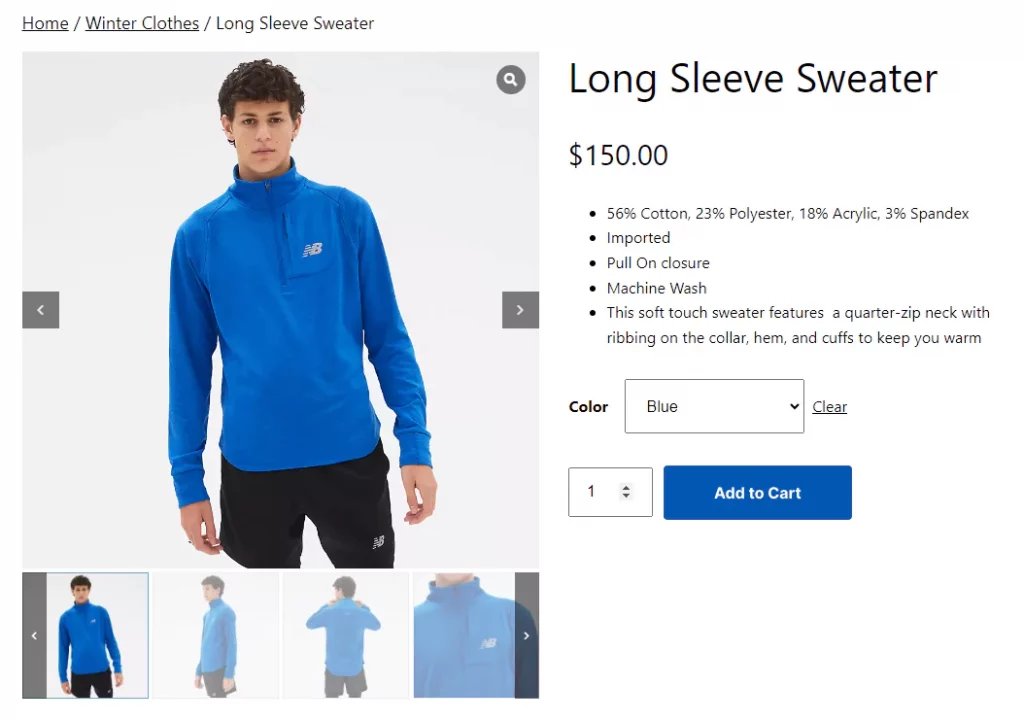
After I refresh the product page, it looks like:
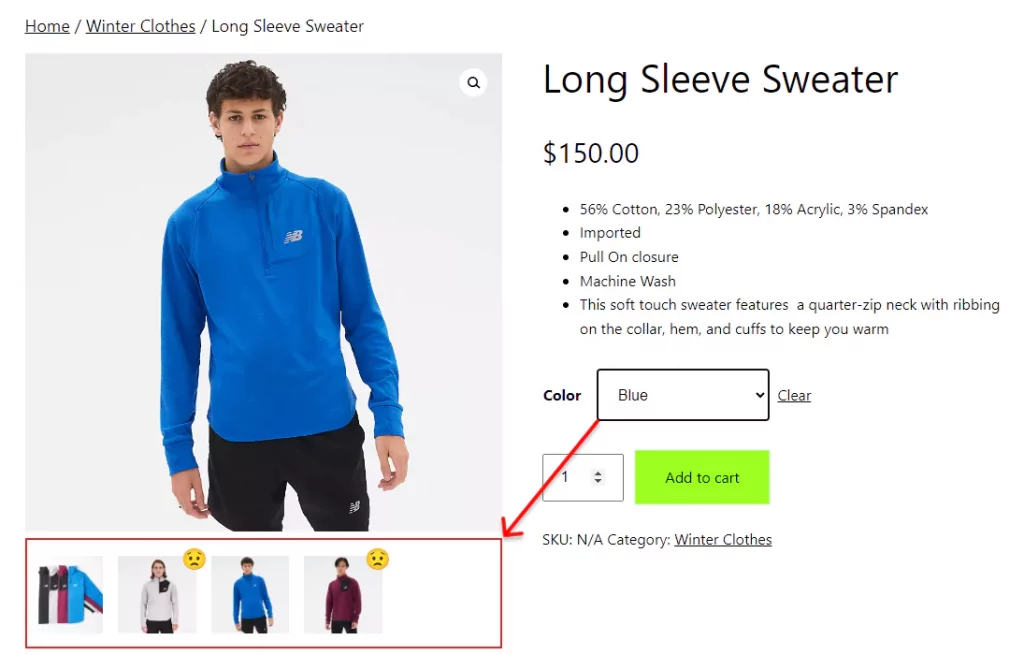
Thus, you can add only a single image for every variable product. As a result, the additional image gallery remains as it was before. But, it should have displaid only blue additional images. Plus, it should have been aligned well with the thumbnail above. So, it doesn’t look professional. Does it?
So, finally, is there no option to add additional images for variable products and align them well with the thumbnails in WooCommerce?
Yes, there is.
Bonus and Important tip
As discussed above, there is no built-in option to add multiple images to WooCommerce variations. However, you can add unlimited additional product images to a WooCommerce variable product with the WooGallery plugin seamlessly. Moreover, this plugin allows you to add unlimited product videos to additional variation image galleries, shop pages, and single product galleries to ensure the best product visual experience for your customers. In essence, it’s a complete solution for your WooCommerce additional image and video galleries to enhance shopping experience and boost sales.
Once you install and activate the plugin, you will find the Add Gallery Images button next to the single image field icon, as seen below.
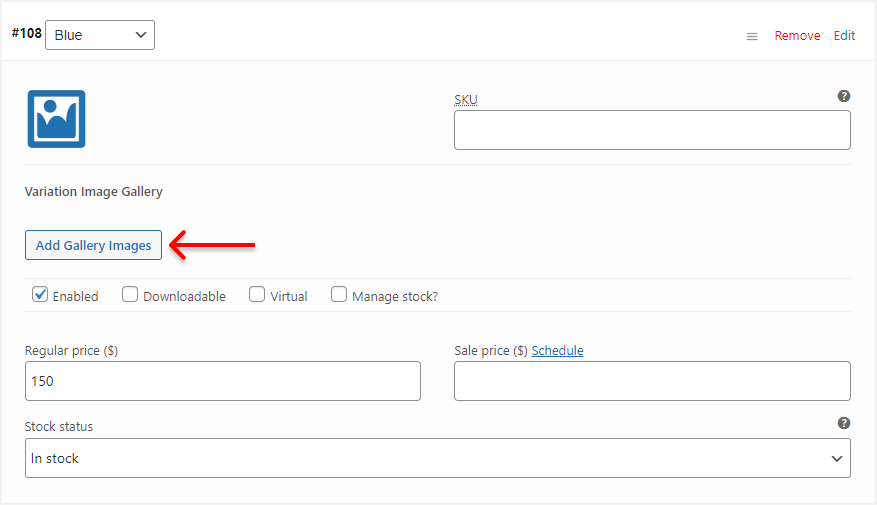
Click the button. It will take you to your WordPress media library. Select as many additional images as you need and add them. To add a video to the product gallery, select an image first. When you select an image, you will find a field at the bottom of right sidebar to add video links. If you add a video link to an image, the image will be added as the thumbnail of the video. The WooGallery Slider plugin allows you to add unlimited YouTube, Vimeo, Dailymotion, Facebook, and self-hosted videos to your product and variation gallery. Follow the next process to add the images and videos finally.
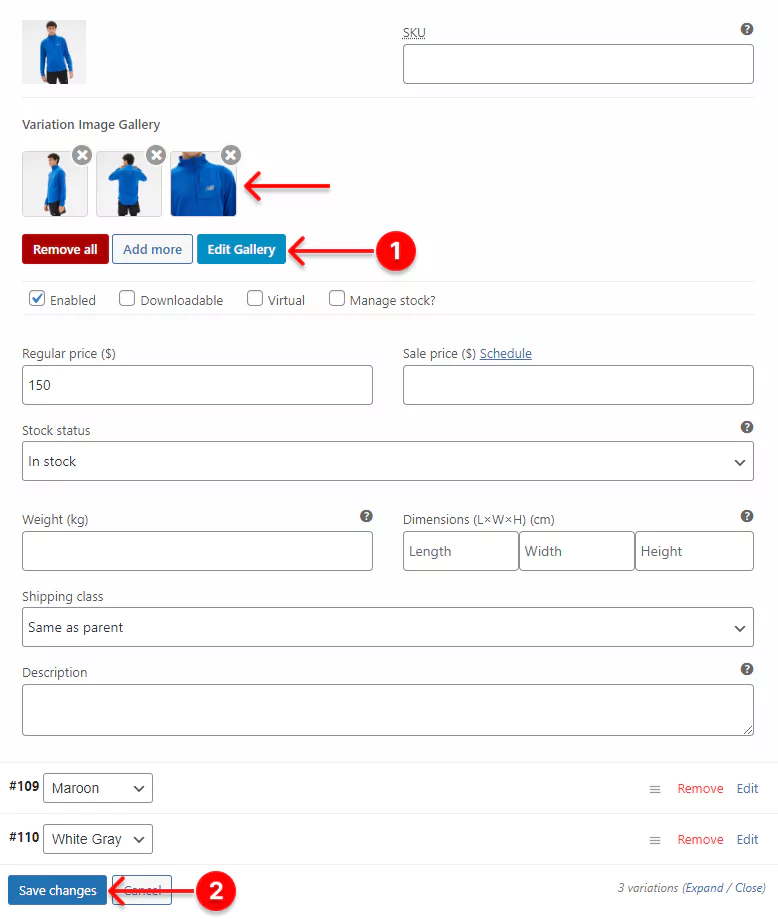
- Add more and edit additional images if needed. It allows you to add as many images as you want. It will display all the images in a single row slider.
- Click the Save changes button.
- Remember to hit the Update button of the product form.
Finally, the product page looks like this:
Now the additional image gallery looks better. Doesn’t it? Moreover, instead of using Thumbs Bottom, you can choose the Thumbs Left layout or any other modern layouts used in the world’s top e-commerce platforms, such as Adidas, Nike, Amazon, Walmart, and more. WooGallery plugin offers a wide range of elegant product gallery layouts you find nowhere else.
Smart Product Variation Swatches
However, the swatches in the dropdown don’t reflect the elegance of modern product pages. Do they? Smart Swatches help you convert outdated dropdown attributes into attractive and interactive swatches as below.
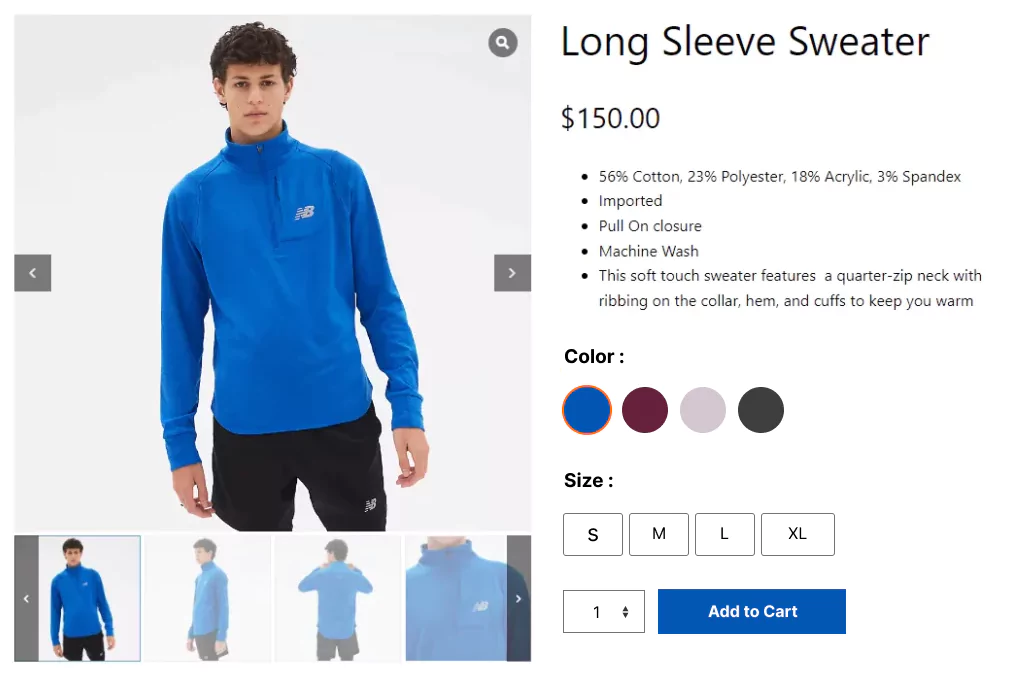
These eye-catching swatches help customers quickly find a product’s perfect size, color, pattern, and more with fun and your sales grow.
Now it’s your turn. Is this the product page with WooCommerce variable product images you expected to craft? Nope? Ok, look what other layouts and styles you can apply with WooGallery and Smart Swatch.
Do you have any questions? Let’s discuss more in the comment box.
If this blog was helpful, please share it with your friends and followers on social media below.
Leave a Reply