In online business, the more sales depend on the more conversation rate. If you can draw the attention of the customers, the conversation rate will increase. Consequently, your sales will also increase. Therefore, the most important part is to draw the client’s attention and engage them more with your business. Moreover, we can do this part simply by just highlighting the trending or some special categories products with a WooCommerce Category Slider.
We can easily create a WooCommerce category slider with the Category Slider for WooCommerce plugin. It allows us to create our expected category slider on any page in our WordPress website. Now, I am going to share the step-by-step guideline on creating a complete WooCommerce category slider with the Category Slider for WooCommerce plugin.

Table of contents
Why Category Slider for WooCommerce plugin?
There are a number of similar functionality plugins available in the online marketplace. But I prefer the Category Slider for WooCommerce plugin as the number one best category slider building plugin. However, I have chosen it due to a number of reasons. Category Slider for WooCommerce plugin is highly customizable, updated, optimized, and super-fast. Its incredible features are really mind-blowing. I want o mentions some key features-
- Unlimited category sliders with individual shortcode
- WooCommerce category filtering
- Highly customizable with unlimited colors and stylings
- 12+ Slider controls
- Multisite supported
- Compatible with any theme, plugin, page builder, and browsers.
- Any more options

4 Easy Steps to Create a WooCommerce Category Slider
We will follow only 4 simple steps to create an awesome WooCommerce product category slider.
Step 1: Installation and activation of the plugin
The installation and activation of any WordPress plugin are the same as all. I hope you are familiar with the process of installation and activation of WordPress plugins. So, simply install and activate the plugin in your WordPress dashboard.
After all, if you have any issues, you may check out this installation and activation article so that you may get instructions on installing and activating the plugin.
Step 2: Add a product category with a thumbnail and description
This is an extra step and you can simply skip it if you have already done it. As our goal is to create a category slider. So, it is needed to add a thumbnail and description of each category to create a professional and eye-catching category slider.
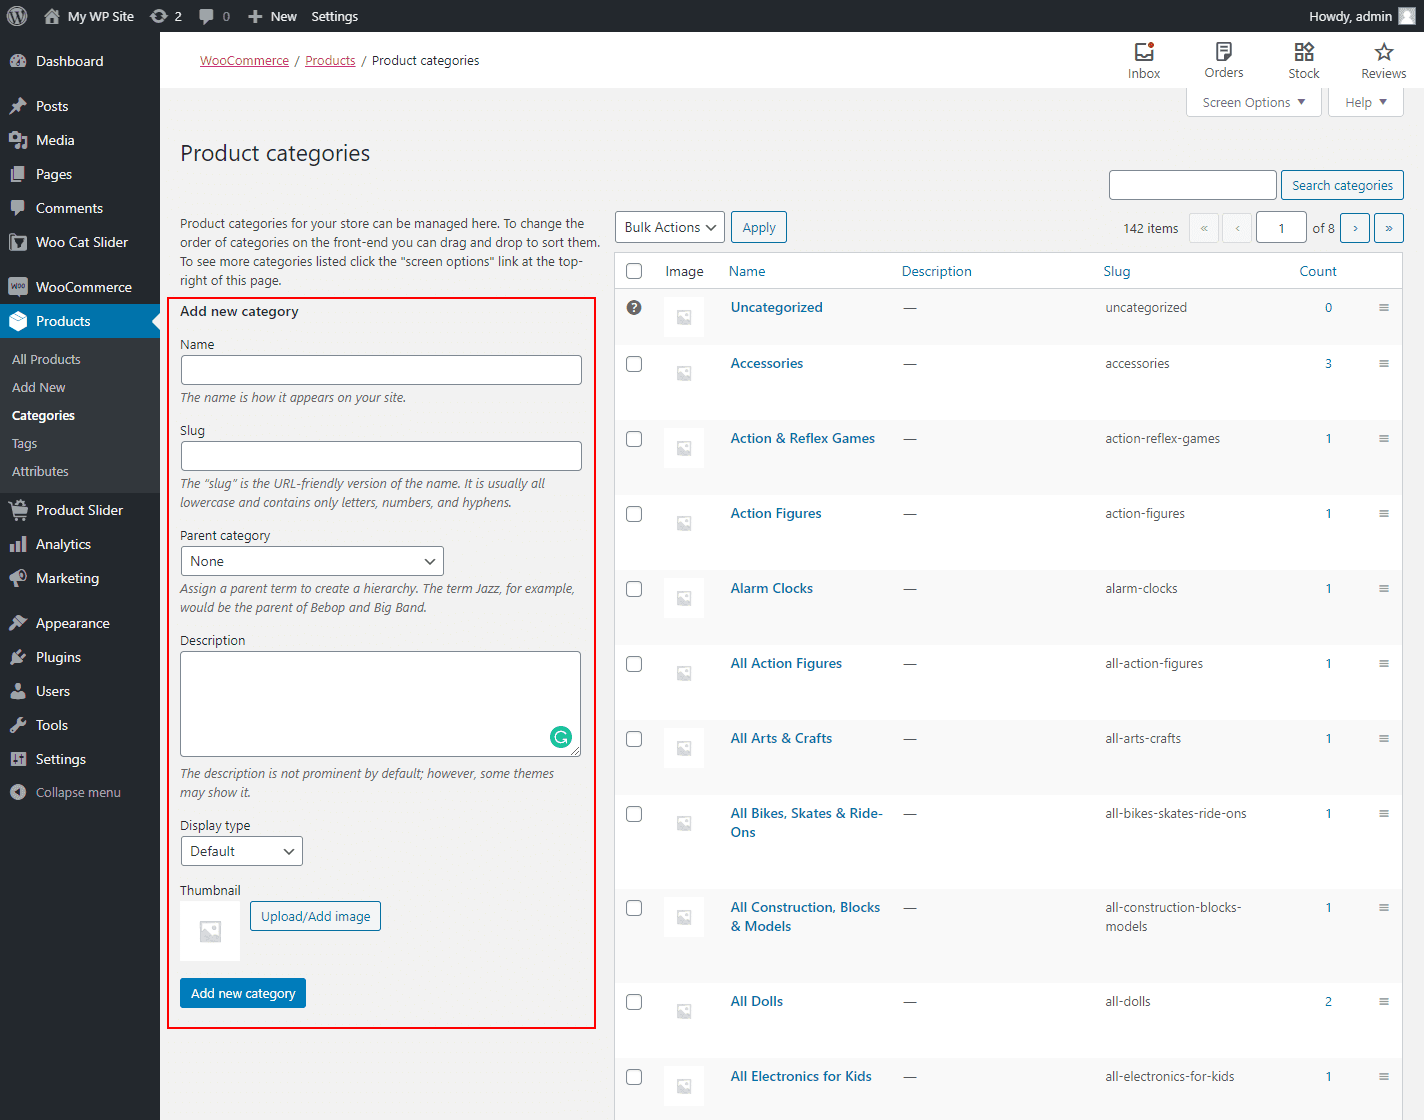
I am showing the whole process of creating a new product category. You can edit your existing product category and add a thumbnail and description following this way. So, create a product category, click on the Categories under the product menu. It will show some fields. Now, you have to fill out these fields. There is also a field called description. You can write a short description of this category. Similarly, you can see there is also another field named thumbnail. You need to upload an image as the thumbnail for this category. So, the whole process looks like the following screen-
Step 3: Design a WooCommerce category slider
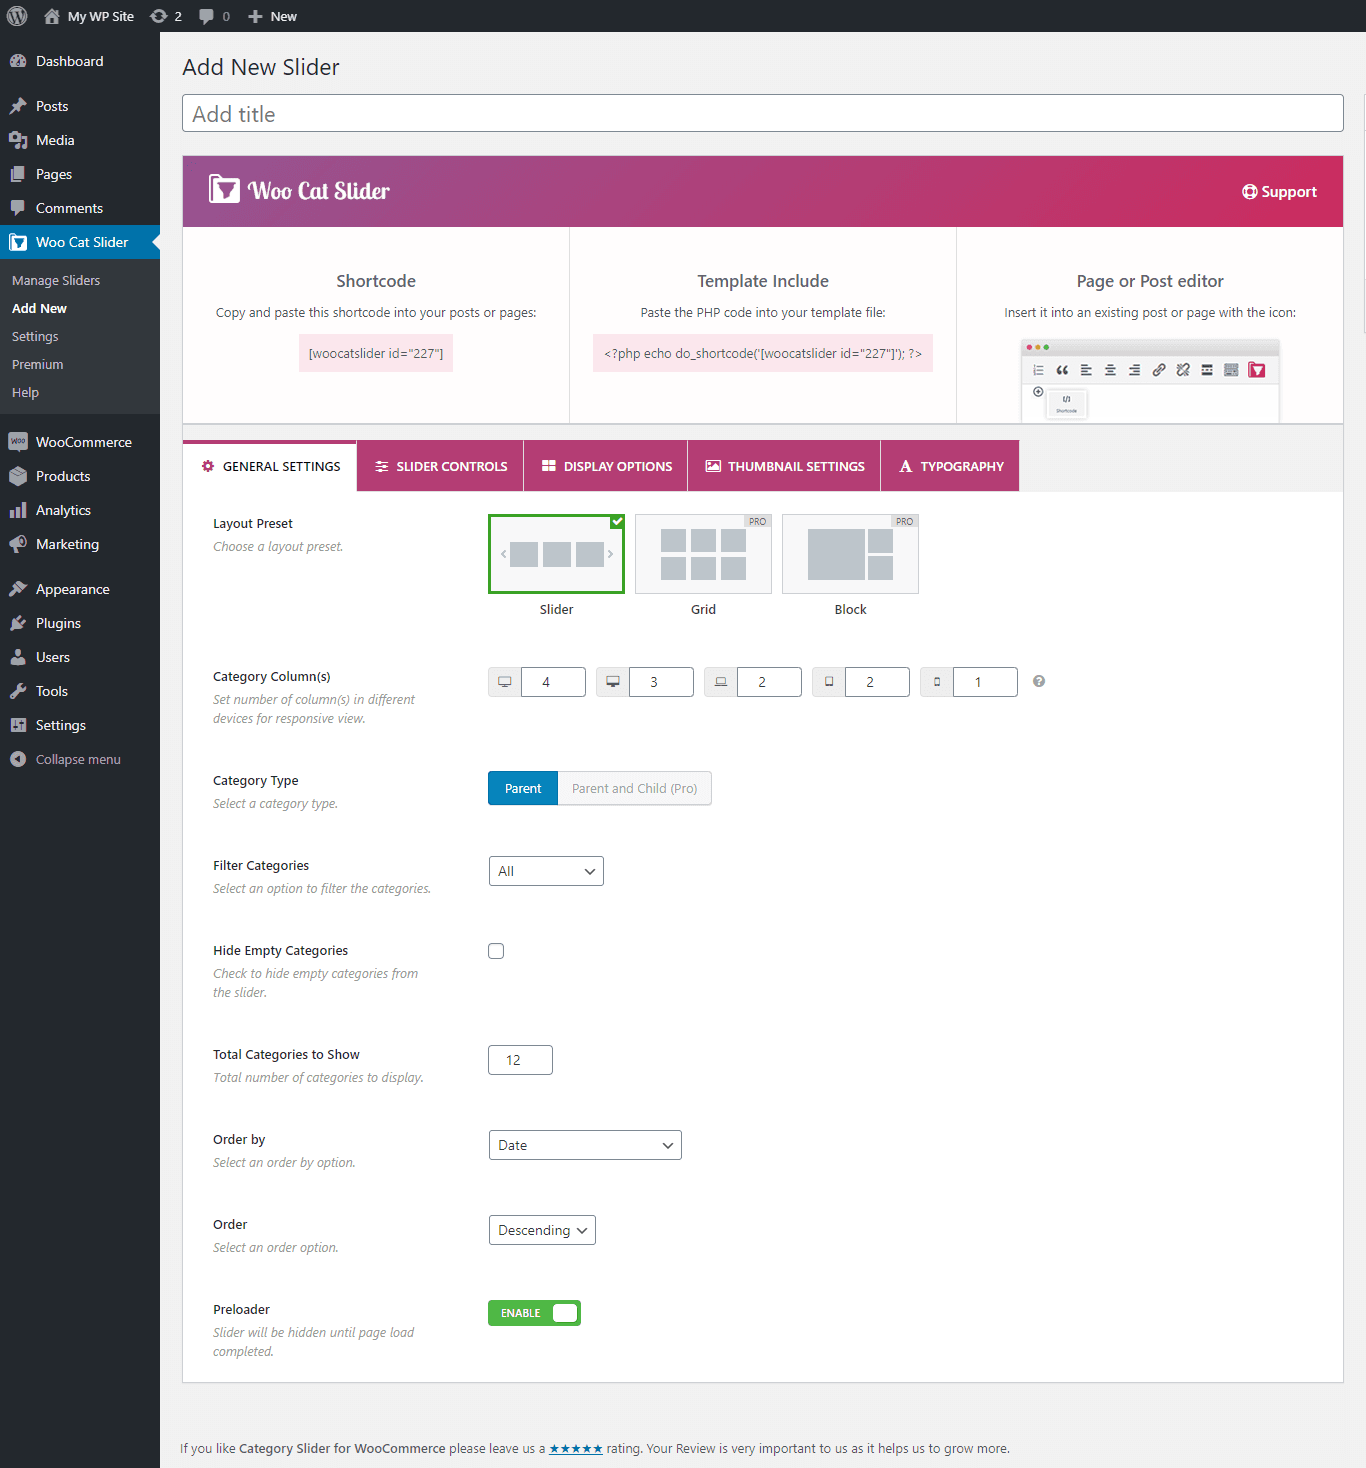
Now, it is time to create our expected category slider. If you installed and activated the Category Slider for the WooCommerce plugin, you will find an admin menu in your dashboard named Woo Cat Slider. So, simply click on the Add New under the menu. Consequently, you will land on an interface with multiple options for the slider. Provide a title for the slider. The most important part is to filter the category to create the slider. You will find this option under the GENERAL SETTINGS tab. However, you can select all categories or some specific categories as per your need. It looks like the following screen-
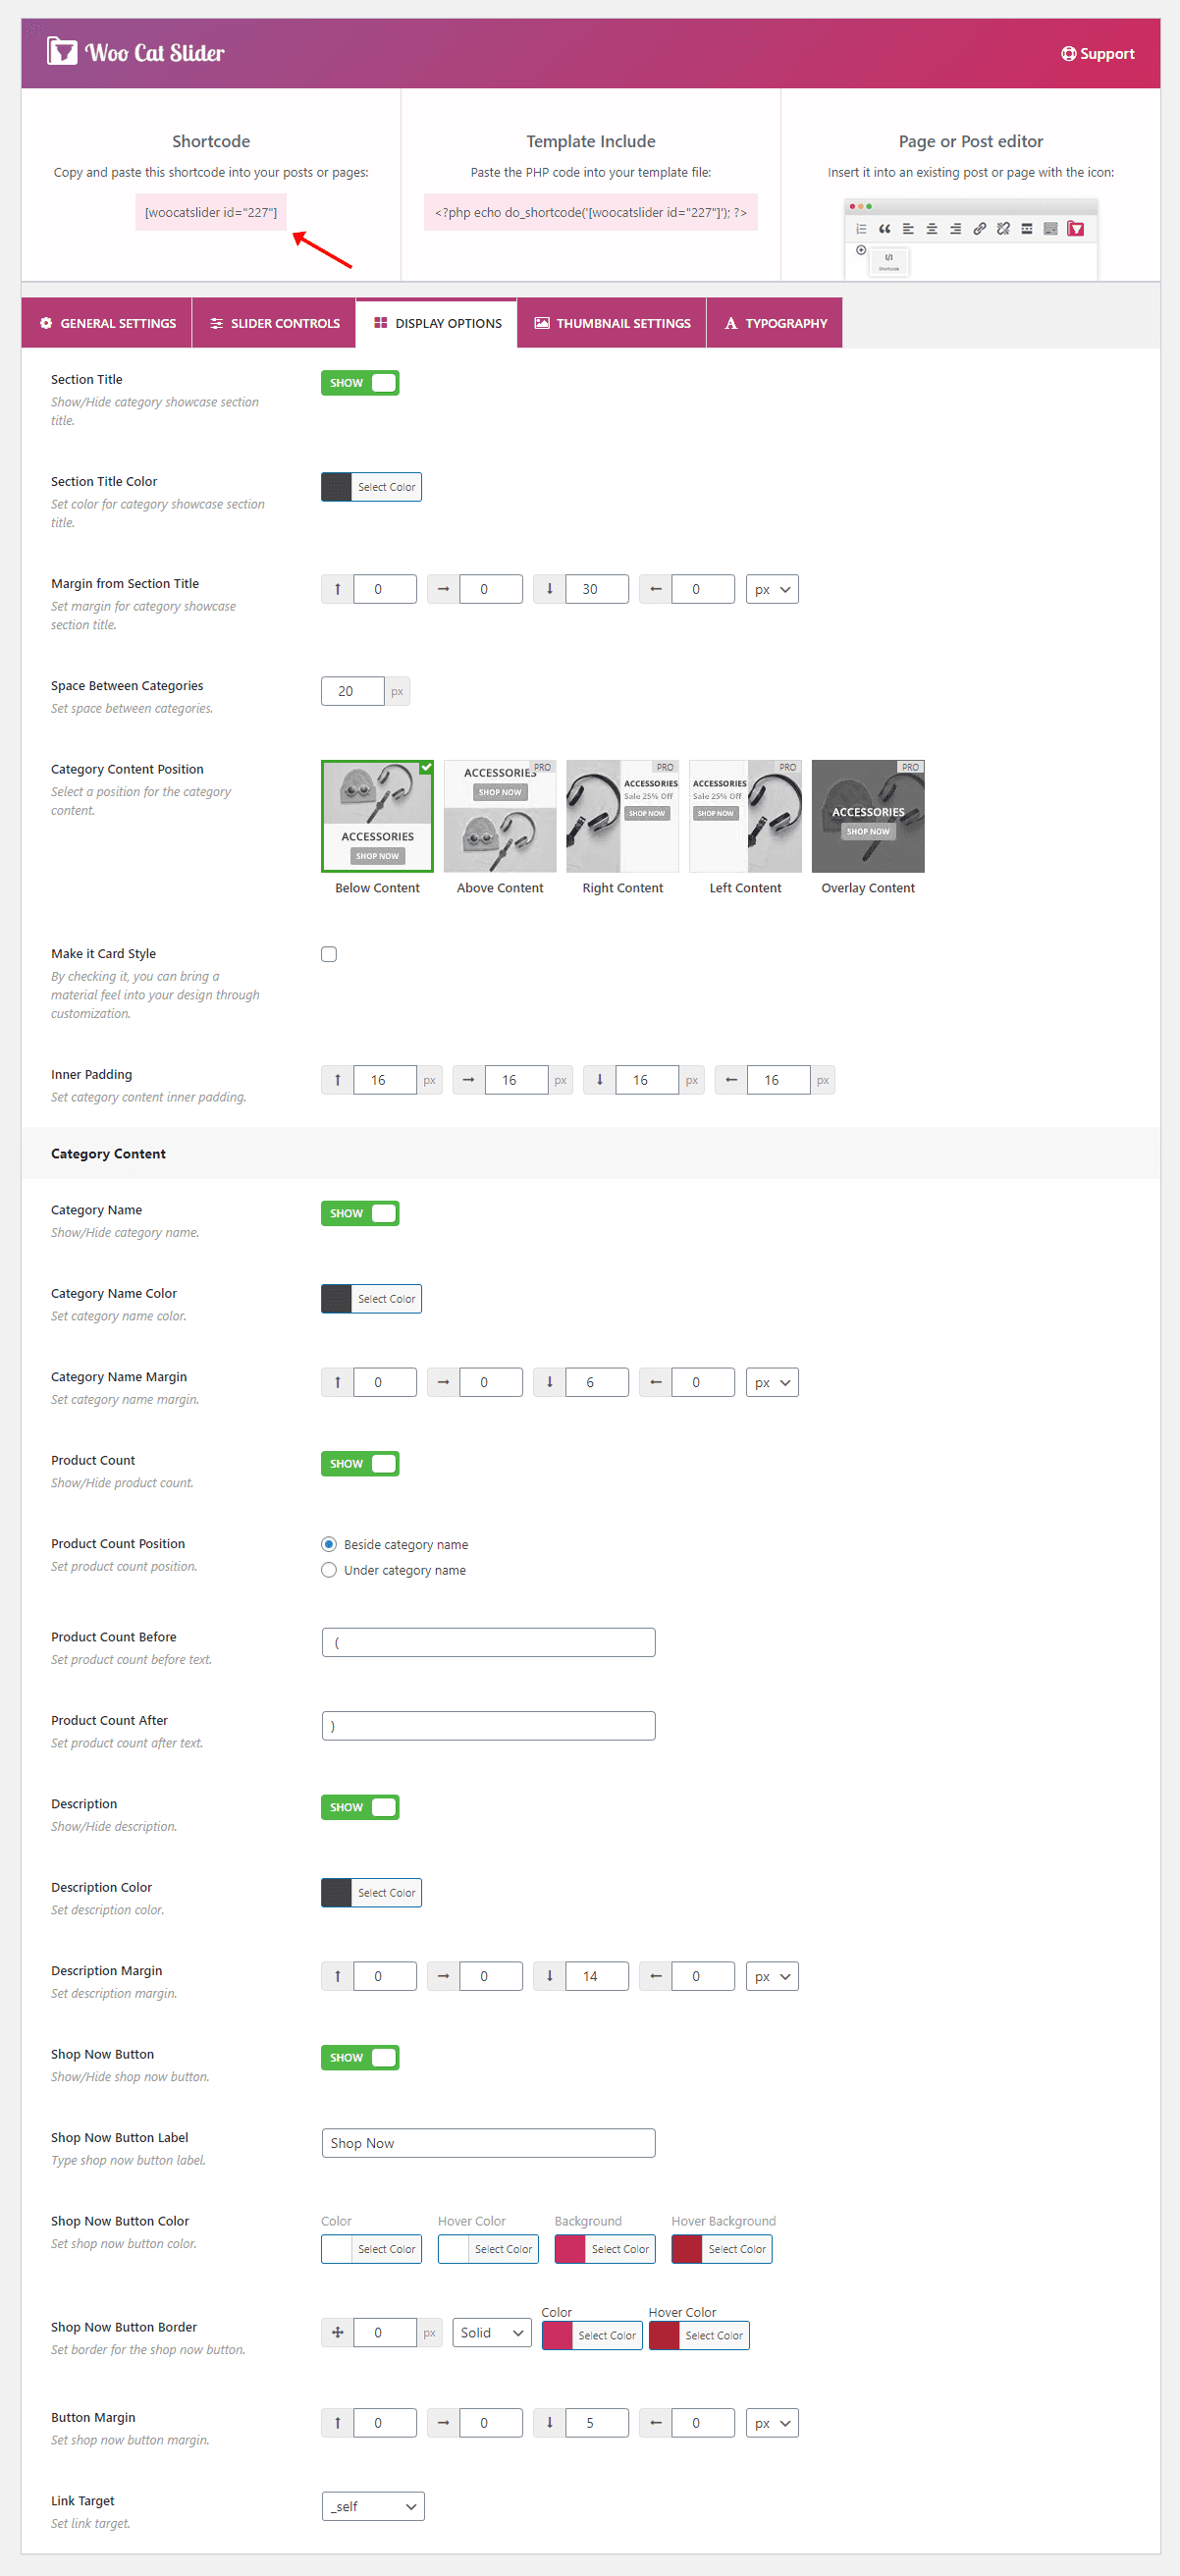
As I have already mentioned to you that this plugin is highly customizable. You can navigate to the other tabs to customize the different options for the slider. Once you finish your customization, simply you need to publish it.
Step 4: Publish your category slider
I hope you have successfully created your expected category slider. Now, it is high time to display the slider on the expected location. However, you will find there is a smart shortcode. Now you need to copy the shortcode and paste it anywhere you want to display the category slider.
I have also followed this whole process and created my own category slider. Finally, I have copied and pasted the shortcode on my own page and found the following result.
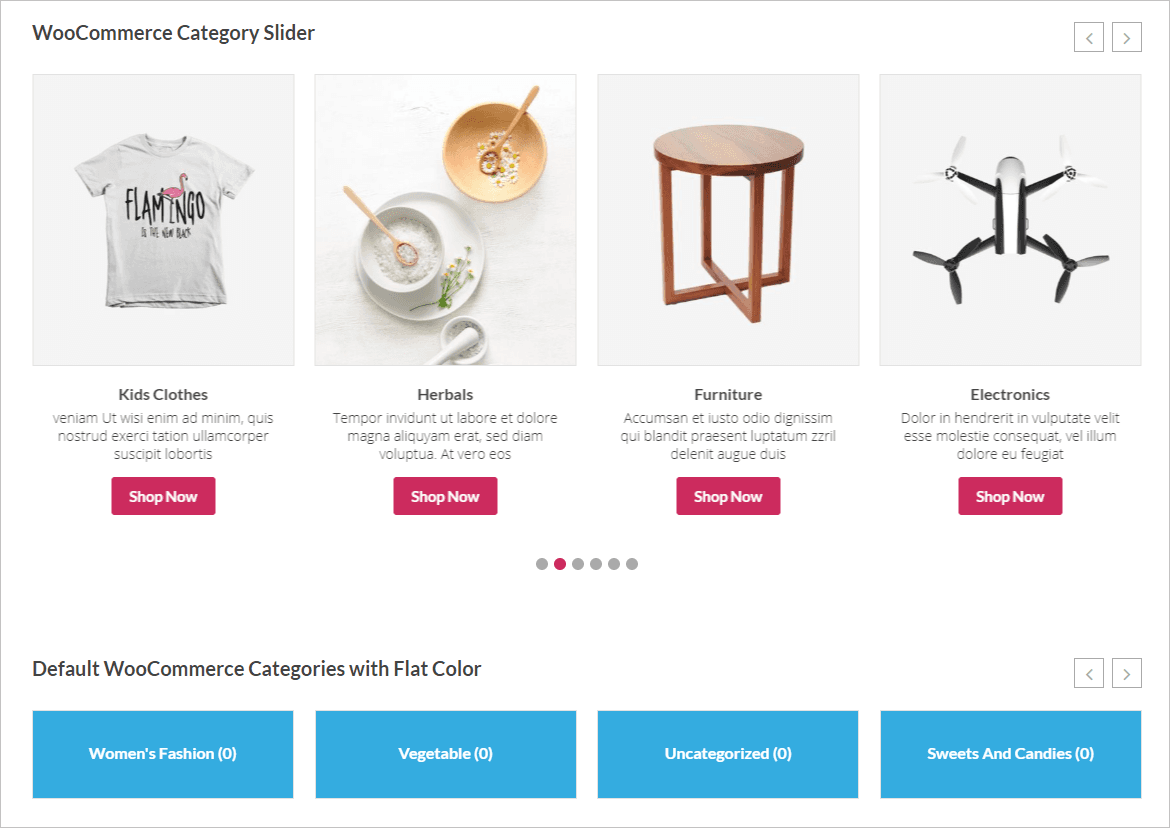
Great. We have successfully created our expected slider. It was a really very simple and easy process. Therefore, if you followed all my steps one by one, I hope you have also got your expected result and you have enjoyed it.