This section describes how to install the plugin and get it working.
1. Automatic Installation (Easiest Way)
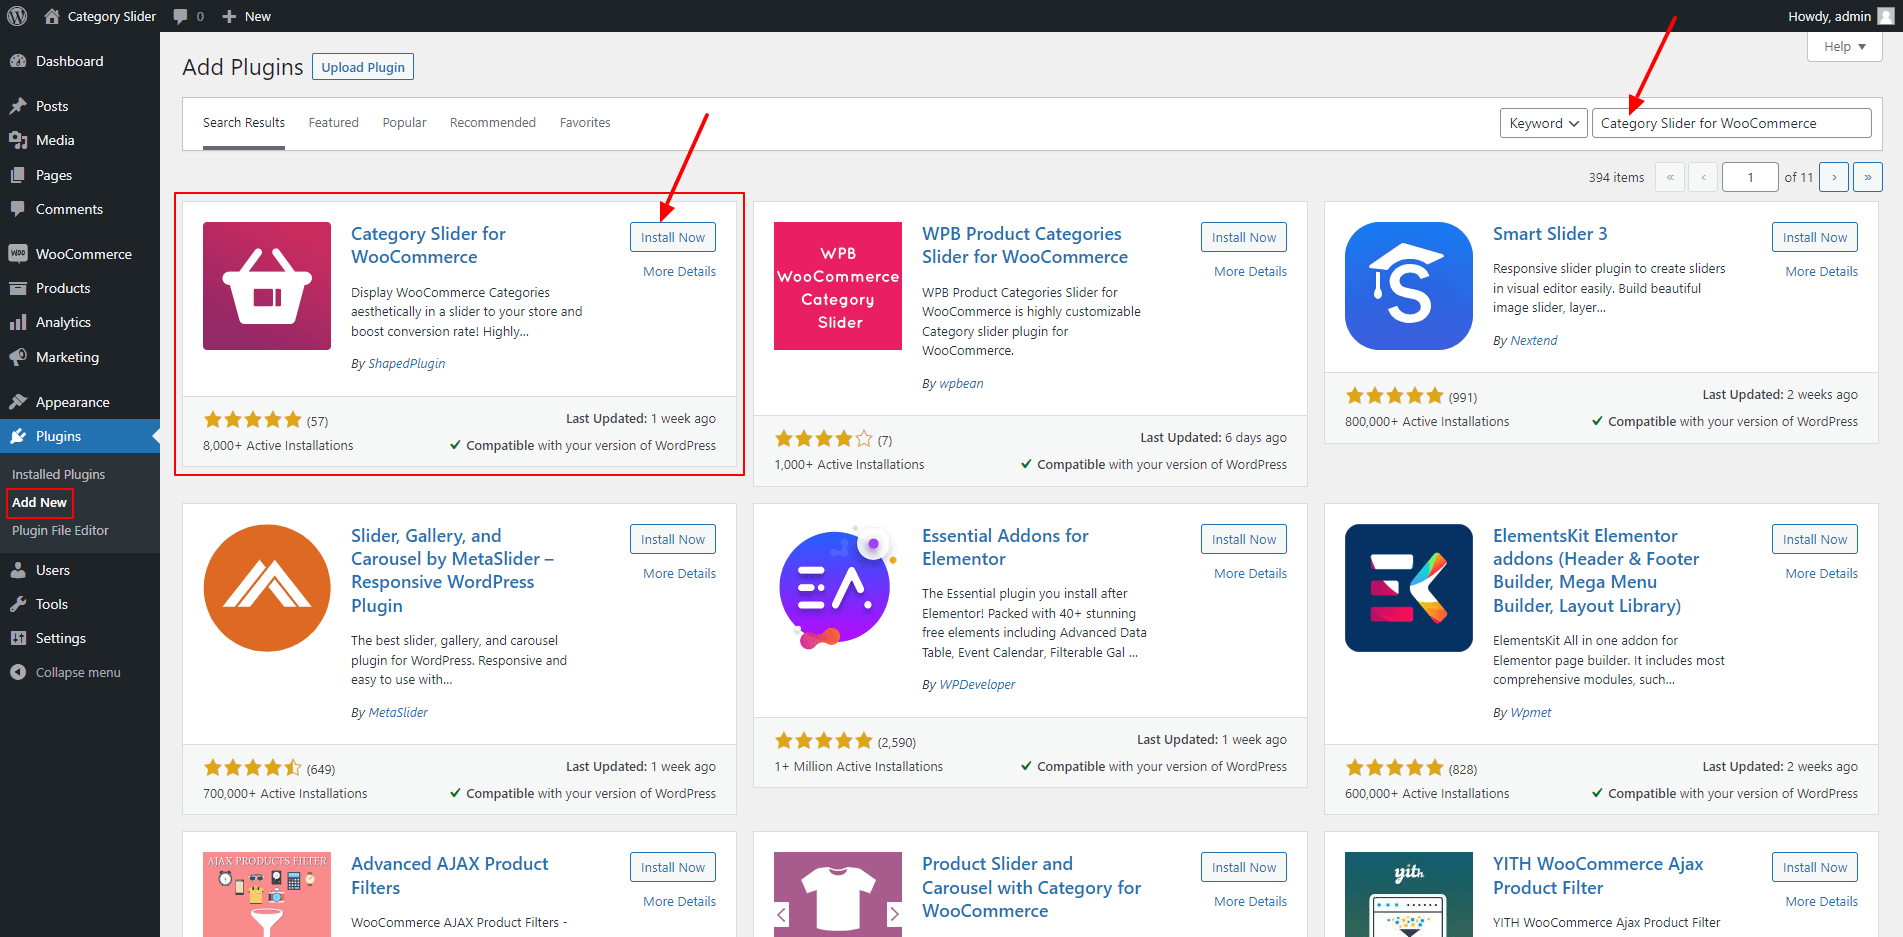
To do an automatic install of Category Slider for WooCommerce follow the process below:
- Login to the WordPress Dashboard.
- Navigate to the Plugins → Add New → write ‘Category Slider for WooCommerce‘ on the right keyword searching field.
- The ‘Category Slider for WooCommerce’ by ShapedPlugin will be visible in the first place.
- Now, click on the ‘Install → Active‘ button.
2. Manual Installation
A. Uploading in WordPress Dashboard
- Log in to the WordPress Dashboard.
- Navigate to the Plugins → Add New → Upload Plugin.
- Click on ‘Choose File‘ and select the zipped file named ‘woo-category-slider.zip‘.
- Click on ‘Install Now‘.
- Click on the ‘Activate Plugin‘ button.
- After activating the Category Slider for WooCommerce plugin, you are ready to add a slider in your post, page, widget, or anywhere you like.
B. Using FTP
- Download woo-category-slider.zip from WordPress.org.
- Extract the woo-category-slider directory to your computer.
- Upload the woo-category-slider to the /wp-content/plugins/directory
- Activate the plugin in the Plugin dashboard.
The WordPress codex contains instructions on how to install a WordPress plugin.