
Beautify your WordPress website with a WordPress Image Carousel with a lightbox. Because the WordPress image carousel will help you represent your site images in an impressive and smart way. As a result, it will attract your visitor. In addition, you can simply draw the attention of your visitor. However, if you are interested in the WordPress image carousel and willing to create one for your website, this article is for you. Because the article guides you step by step on creating a WordPress image carousel with a lightbox.
So, to create an image carousel in WordPress, we will use the WordPress Carousel Pro plugin. It is a multi-purpose WordPress plugin that allows you to create the image carousel easily. Moreover, we have to follow the following steps to move forward-
Step-1: WordPress Carousel Pro Installation and Activation
Step-2: Create an Image Carousel
Step-3: Enable Lightbox for the Image Carousel
Step-4: Display the Image Carousel
Step-1: WP Carousel Pro Installation and Activation
The installation and activation of a WordPress plugin similar to all. So, I hope you are well known about this installation and activation process. Moreover, if you need any help with the installation and activation process, you can check out this installation guideline, so that you can understand the process.
Step-2: Create an Image Carousel
Once you finish the installation and activation of the WordPress Carousel Pro plugin, you will find the WP Carousel Pro menu. So, click on the Add New menu. Consequently, it will open an interface with a number of setting fields. Now, give a title for the carousel. However, we have to add the images to create the carousel. For this reason, click on the Add Image button, under the Gallery Images section. So, add images as per your need.
Step-3: Enable Lightbox for the Image Carousel
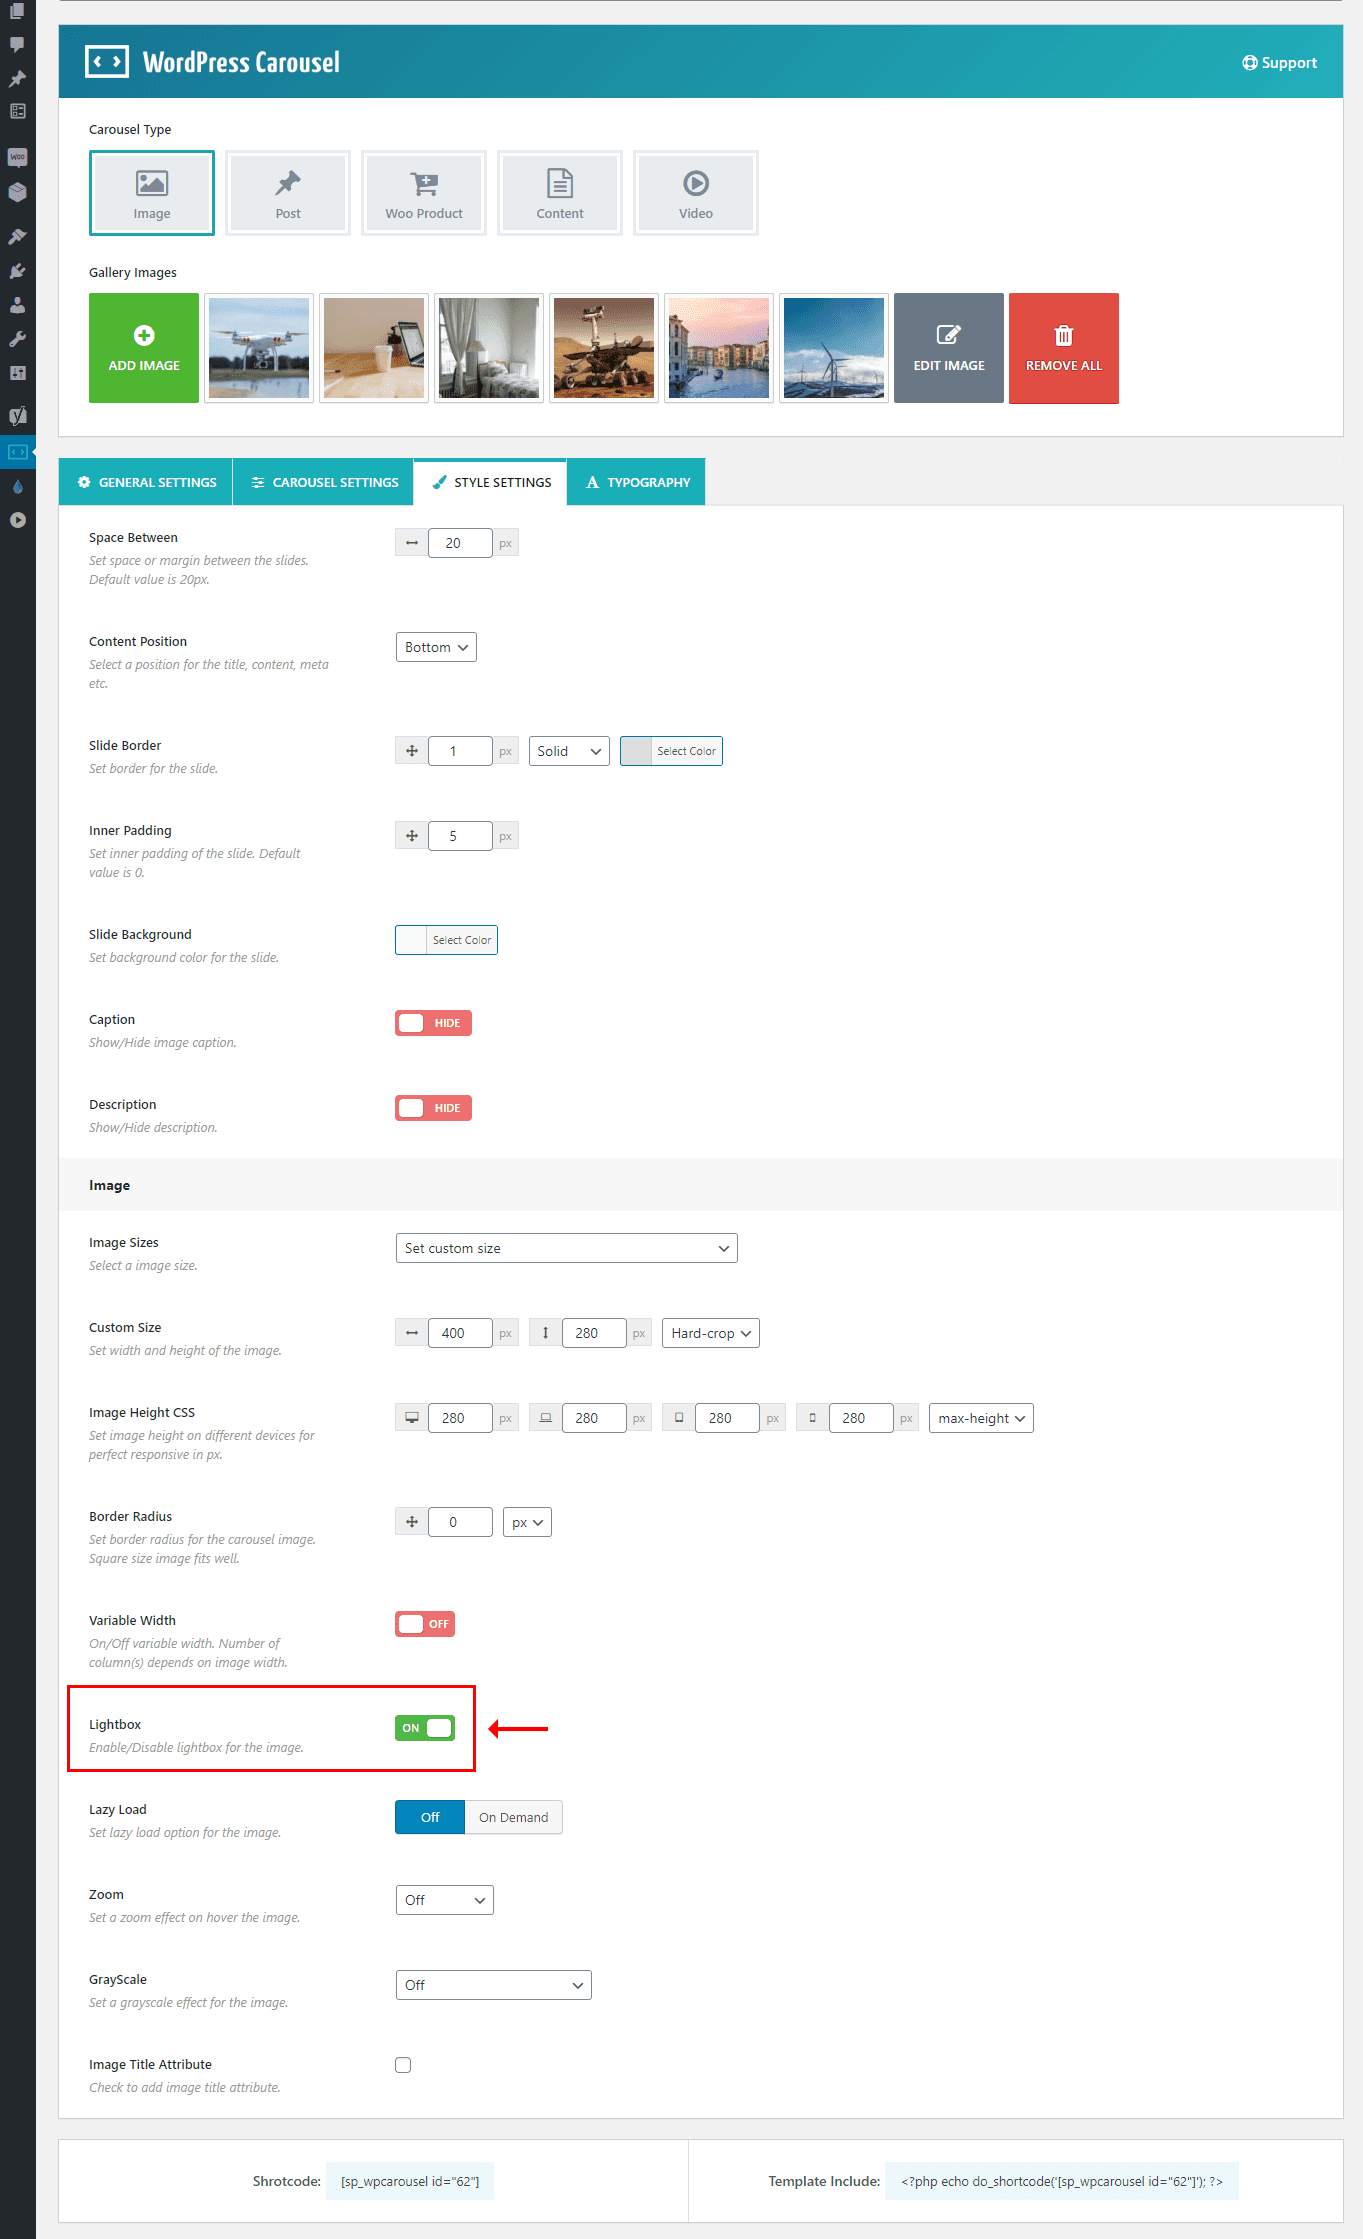
Now, you will find 4 different tabs to customize the carousel. Since our goal is to create an image carousel with a lightbox, now we have to enable the lightbox for the image. So, to enable the lightbox, we have to navigate to the STYLE SETTINGS tab and under the Image section, you will find an option to enable the lightbox for carousel images. So, simply enable it by turning on it.
Finally, you have done everything you need. So, it is time to publish the carousel. However, one thing I want to inform you that, you have the flexibility of the customization of this carousel as per your need. For this reason, you just need to follow the customization fields.
Step-4: Display the Image Carousel
I hope you have successfully created your image carousel and enable the lightbox for the carousel images. Therefore, we have just a last step and that is to display the image carousel in our expected place. Once you publish the carousel, you will find a smart shortcode to display the carousel anywhere you need. So, copy the shortcode and paste anywhere you want.

I have copied and pasted the shortcode in a page and found the following result on my webpage.

Now, I want to show you how the lightbox works with the images. For this reason, you have to click on the carousel images. So, once you click on the carousel image, it opens the following lightbox. Consequently, you can easily slide your images with this lightbox.

That’s it. It is a really very simple and easy process to create and display an image carousel with a lightbox in WordPress. Therefore, if you followed my all steps one by one, I hope, you have also got your expected result with your own images. Finally, I hope, you have enjoyed it.
Leave a Reply