
Are you looking for a way to collect testimonials from your customers? If so, you’ll want to check out this tutorial on how to build testimonials collection form.
This form will make it easy for your customers to submit their feedback. Moreover, it will help you gather valuable data to improve your business.
So, if you’re ready to get started, keep reading!
How to build testimonials collection form
The testimonial collection form is an excellent way to collect users’ feedback. It takes review collection to the next level. Moreover, it increases the review collection rate significantly.
So, if you want to increase user reviews, a testimonial form can be a helpful aid. But every WordPress testimonial plugin lacks the form feature.
However, the Real testimonials pro plugin includes the review collection form. You can use this form to collect users’ feedback from anywhere on your website.
I will use the Real testimonials pro plugin to build users’ opinion collection form in this article.
Install and activate the Real testimonials pro plugin.
Step 1: Build the form
In this step, I will build a testimonial collection form. Here is how to build testimonials collection form with Real testimonials Pro.
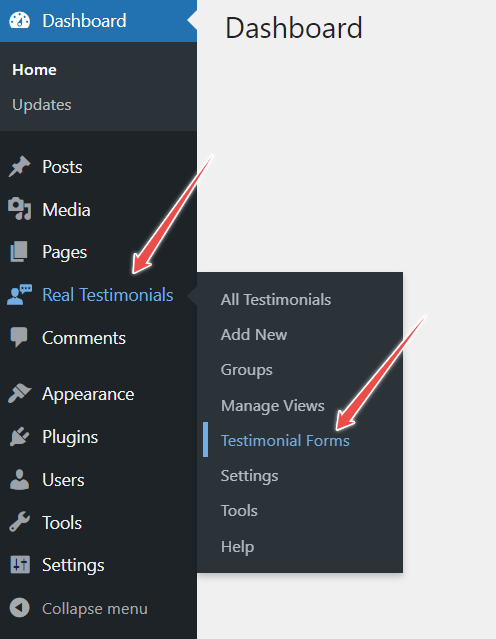
First, go to the WordPress dashboard, then navigate to Real testimonials. After that, click on Testimonial Forms.

Now, click on Add New and type the form’s title.

Build a form according to your needs using the Form Editor. Choose your required fields from the Form fields. If you want to choose any field, tick mark that field.
This plugin offers 16 fields. These fields include full name, email address, identity or position, company name, testimonial title, testimonial, groups, image, location, phone or mobile, website, video URL, rating, social profile, checkbox, and reCAPTCHA.
If you want to collect video testimonials, use the video URL field. For collecting social media profiles, use the social profile field.
You can use the Group field to gather testimonials for several products. Users can submit testimonials to a group or category of their choice.
You can change the field name and placeholder text. If you want to hide the label text, leave it empty. Moreover, tick the Required option to make any field mandatory.
For changing field position, just drag and drop. You can place fields anywhere.
That’s all for form creation.
Step 2: Set message
If you select the Same Page as Redirect, you will have the option to set a successful submission message. It will show after successful submission.

You can set the successful message and its position.
Moreover, if you choose Redirect To a page, it will show all available pages. You can choose one according to your wish.

Furthermore, if you choose Redirect To a custom URL option, you will get the option to set a custom URL.

I will keep the default setting, which is the Sample Page. I will also add an excellent greeting message.
Step 3: Configure Notification
It is a crucial part of the testimonials collection form. The Notification option lets you set the approval status of testimonials.
The Testimonial Status setting offers four options. These options include Pending Review, Auto Publish, Private, and Draft.

If you choose Pending Review, you must publish testimonials manually after receiving them. But, if you choose Auto Publish, testimonials will publish automatically after submission.
Regarding the Draft option, testimonials will store as a draft after submission. You will have to publish them manually.
When you choose the Private option, testimonials will publish privately after submission. In this case, you have to publish them publicly.
Enable Email Notification to receive notification in your email after successful testimonial submission.
You can customize the email heading, subject, text, and notify email.
I don’t want to receive notification emails, so I will disable it.
*Note: if you don’t want to customize the testimonials collection form’s appearance, you can skip step 4.
Step 4: Customize the testimonials collection form’s appearance
You can customize the field label and submit button color using the Stylization option.

You can change the button’s color, background color, and hover and hover background color.
So, customize the review collection form’s appearance as you wish.
Now, hit the publish button and you are done with building testimonials collection form.
Step 5: Display testimonials collection form
Finally, the testimonials collection form building is finished. It is time to display and collect testimonials using this form.

You can display the testimonials collection form anywhere you want. Copy the shortcode from the How To Use section and paste it where you want to show the form.
Here is the testimonials collection form look;

Final words
Testimonials form is a great way to collect reviews from your customers.
It will help you gather feedback; it can also help increase conversions. Moreover, it can also help to boost social proof.
By following this step-by-step guide on how to build testimonials collection form, you can create a testimonials form that customers can use easily. Plus, customers can provide valuable information for you.
Have you tried creating a testimonials form on your website? What tips would you add?
Leave a Reply