In today’s digital business, visuals are crucial for capturing visitors’ attention and driving sales. Whether you have an online store, portfolio, or blog, presenting your services to the targeted customers is important. To do this, one of the best ways is to create an image carousel with links in wordpress.
Creating an image carousel allows you to showcase multiple images and redirect visitors to essential pages or products through clickable images. To create an image carousel in WordPress, we will use a powerful, multi-purpose carousel plugin, such as WP Carousel. It allows you to add and display multiple image carousels easily— no coding required.
Furthermore, this Best WordPress Carousel plugin not only showcases your targeted services, but also improves your service conversion rate and increases sales.
In this blog, I’ll show you how to create an image carousel with links using the WP Carousel in 5 easy steps.
Why Use an Image Carousel in WordPress?
Before diving into the steps, let’s understand why an image carousel is so helpful for any wordpress website:
- Improves Visual Appeal: A well-designed carousel enhances the visual appeal of your site, making it more dynamic and professional.
- Saves Space: Using an image carousel lets you showcase multiple images in the same section without cluttering the page.
- Boosts Engagement: Interactive and clickable carousels encourage users to explore more.
- Drives Traffic: Adding links to carousel images helps redirect visitors to key pages, such as products, services, or blog posts.
- Adds Diversity: Perfect for displaying portfolios, client logos, featured posts, or testimonials.
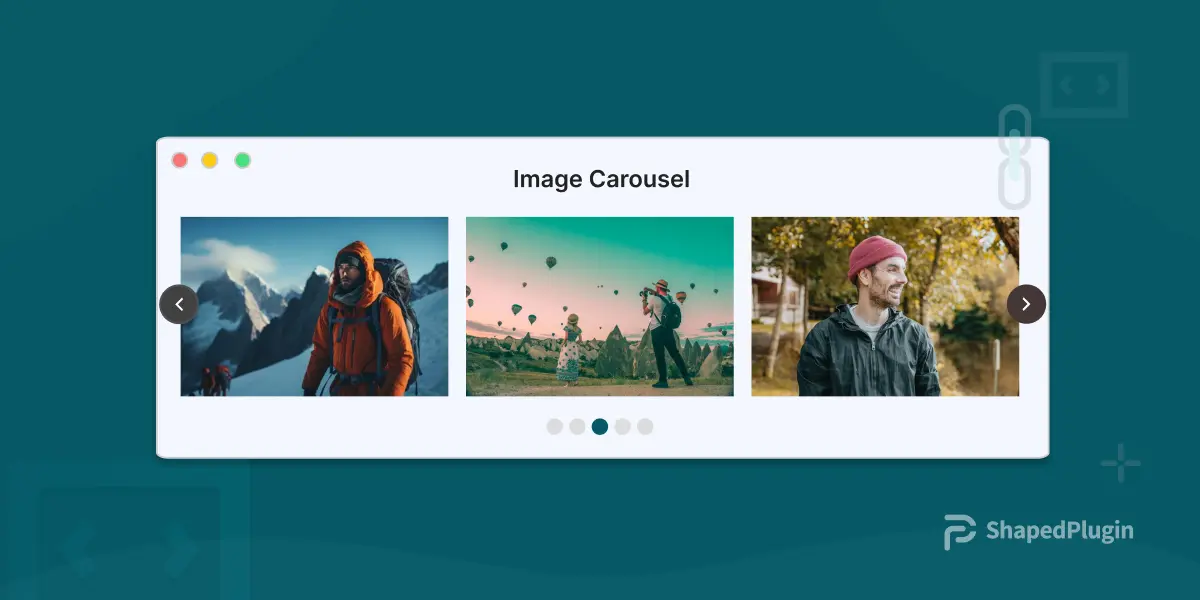
By integrating images with clickable links, you create both visual attraction and functional navigation effortlessly. So, don’t wait, create an image carousel like the one below.
To create an image carousel, follow the five simple steps below.
- Step 1: Install and Activate WP Carousel
- Step 2: Create a New Image Carousel
- Step 3: Add Links to Images Carousel
- Step 4: Enable How the Image Links Work
- Step 5: Customize Image Carousel General & Display Settings
Step-by-Step Guide: How to Create an Image Carousel in WordPress
Step 1: Install and Activate WP Carousel
Among the best carousel plugins, WP Carousel is the most powerful and multipurpose WordPress image carousel plugin. It offers you the easiest way to create mesmerizing image carousels, sliders, and galleries with images, videos, audio, posts, products, content, mixed content, and external content in the following layouts: Carousel & Slider, Thumbnail Slider, Grid, Tiles, Masonry, and Justified.
So, let’s install WP Carousel and activate it on your WordPress site. It only takes a minute! Once activated, you’ll find a new menu called WP Carousel in your dashboard.
If you’re new (Future Master) to this plugin, check out this step-by-step installation guide here.
Step 2: Create a New Image Carousel
Now it’s time to create your first image carousel.
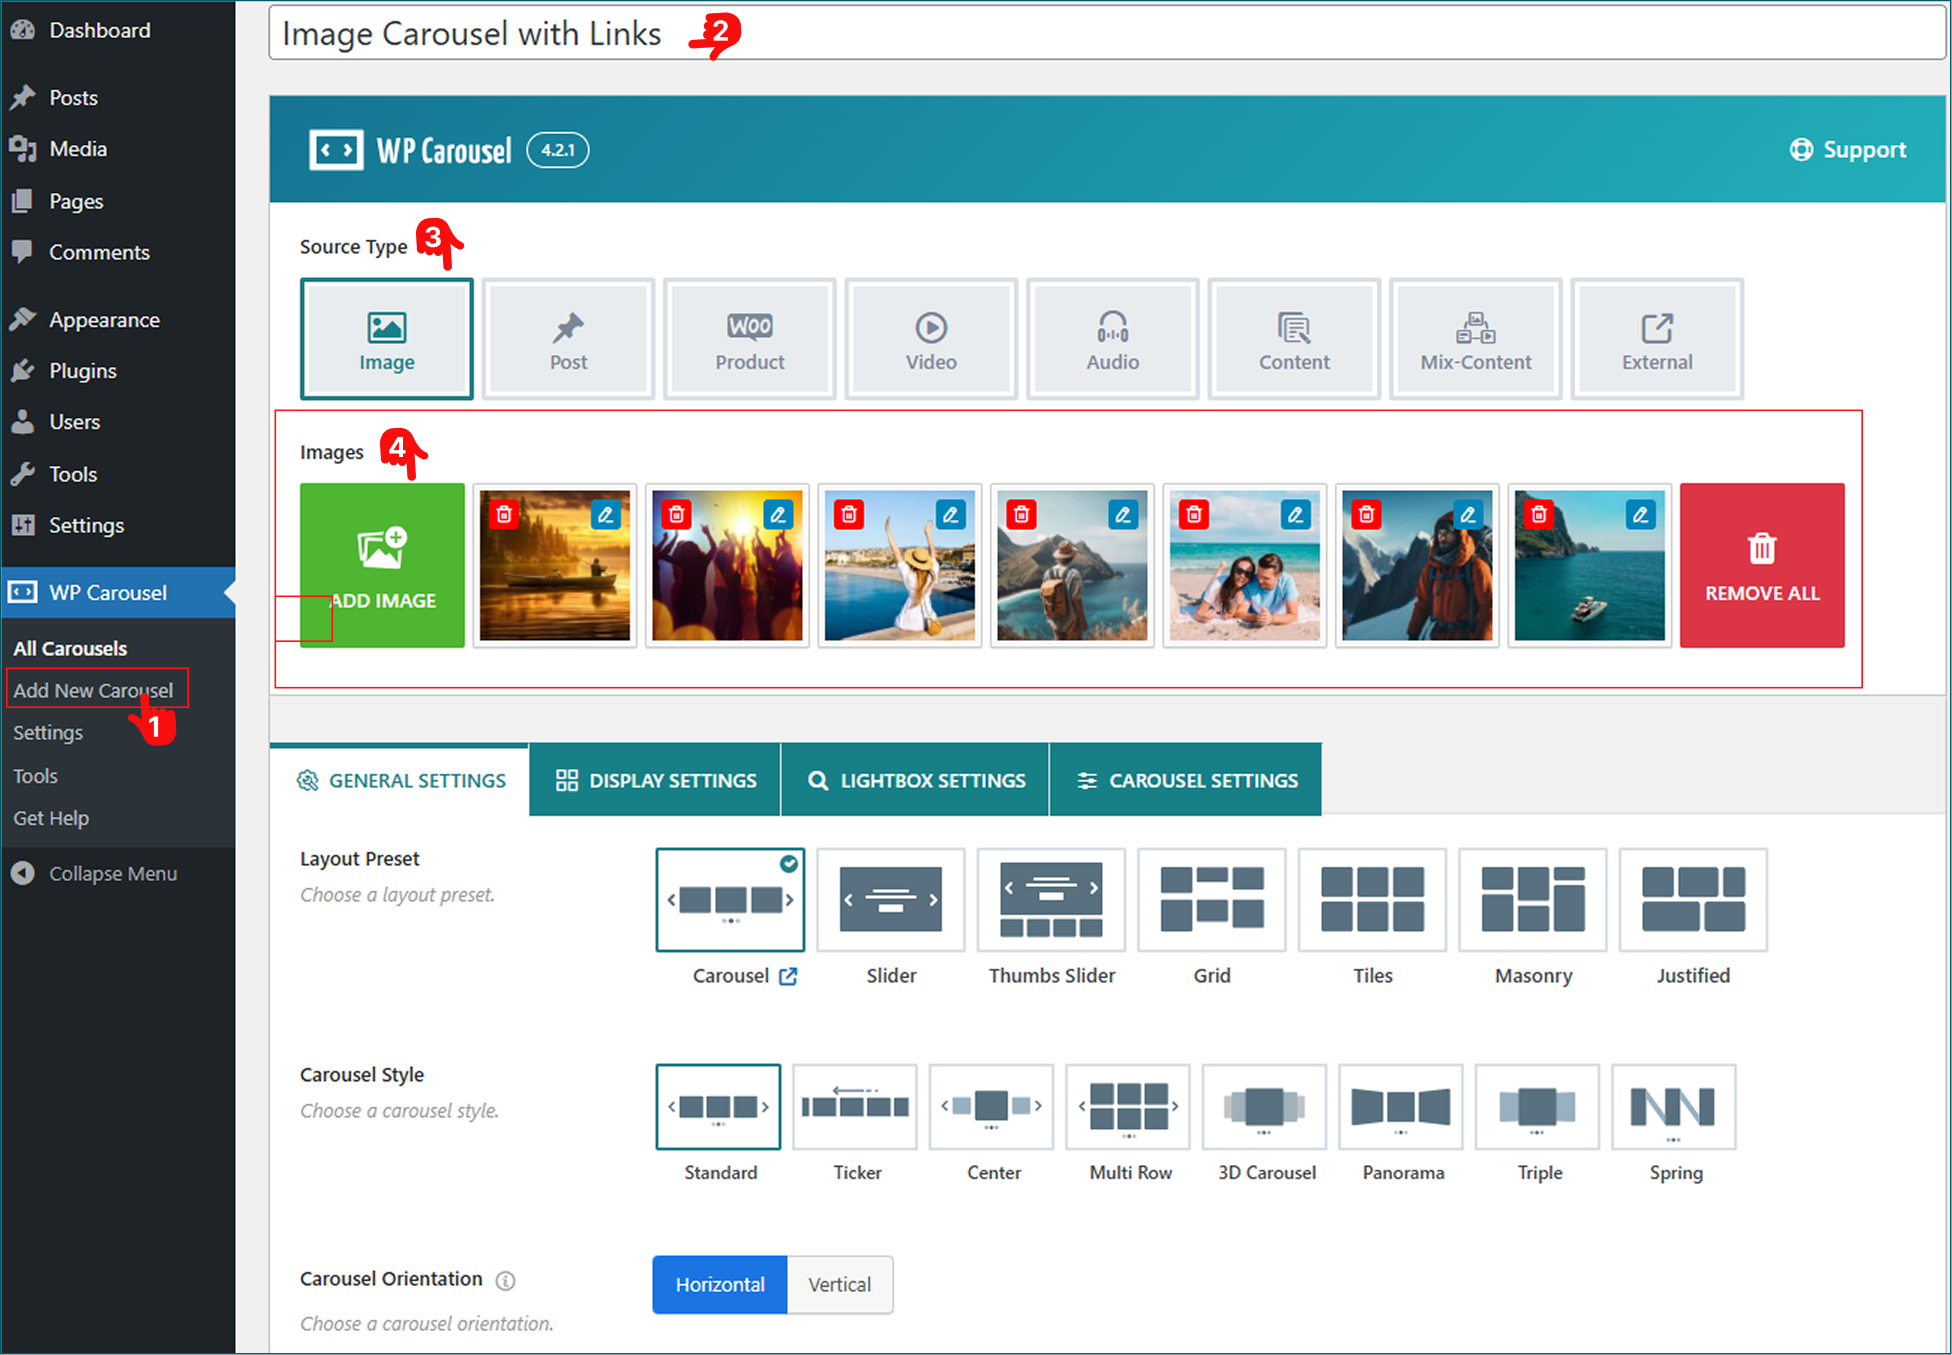
- From your WordPress Dashboard, go to WP Carousel → Add New, and give it a title (like “Homepage Gallery” or “Product Highlights”).
- Then, pick your content source type as Image. When you select the content type, you will see Add Image under the Gallery Images section.
- Click on it, and select or upload your favorite images from the WordPress media library — and that’s it!
Step 3: Add Links to Images Carousel
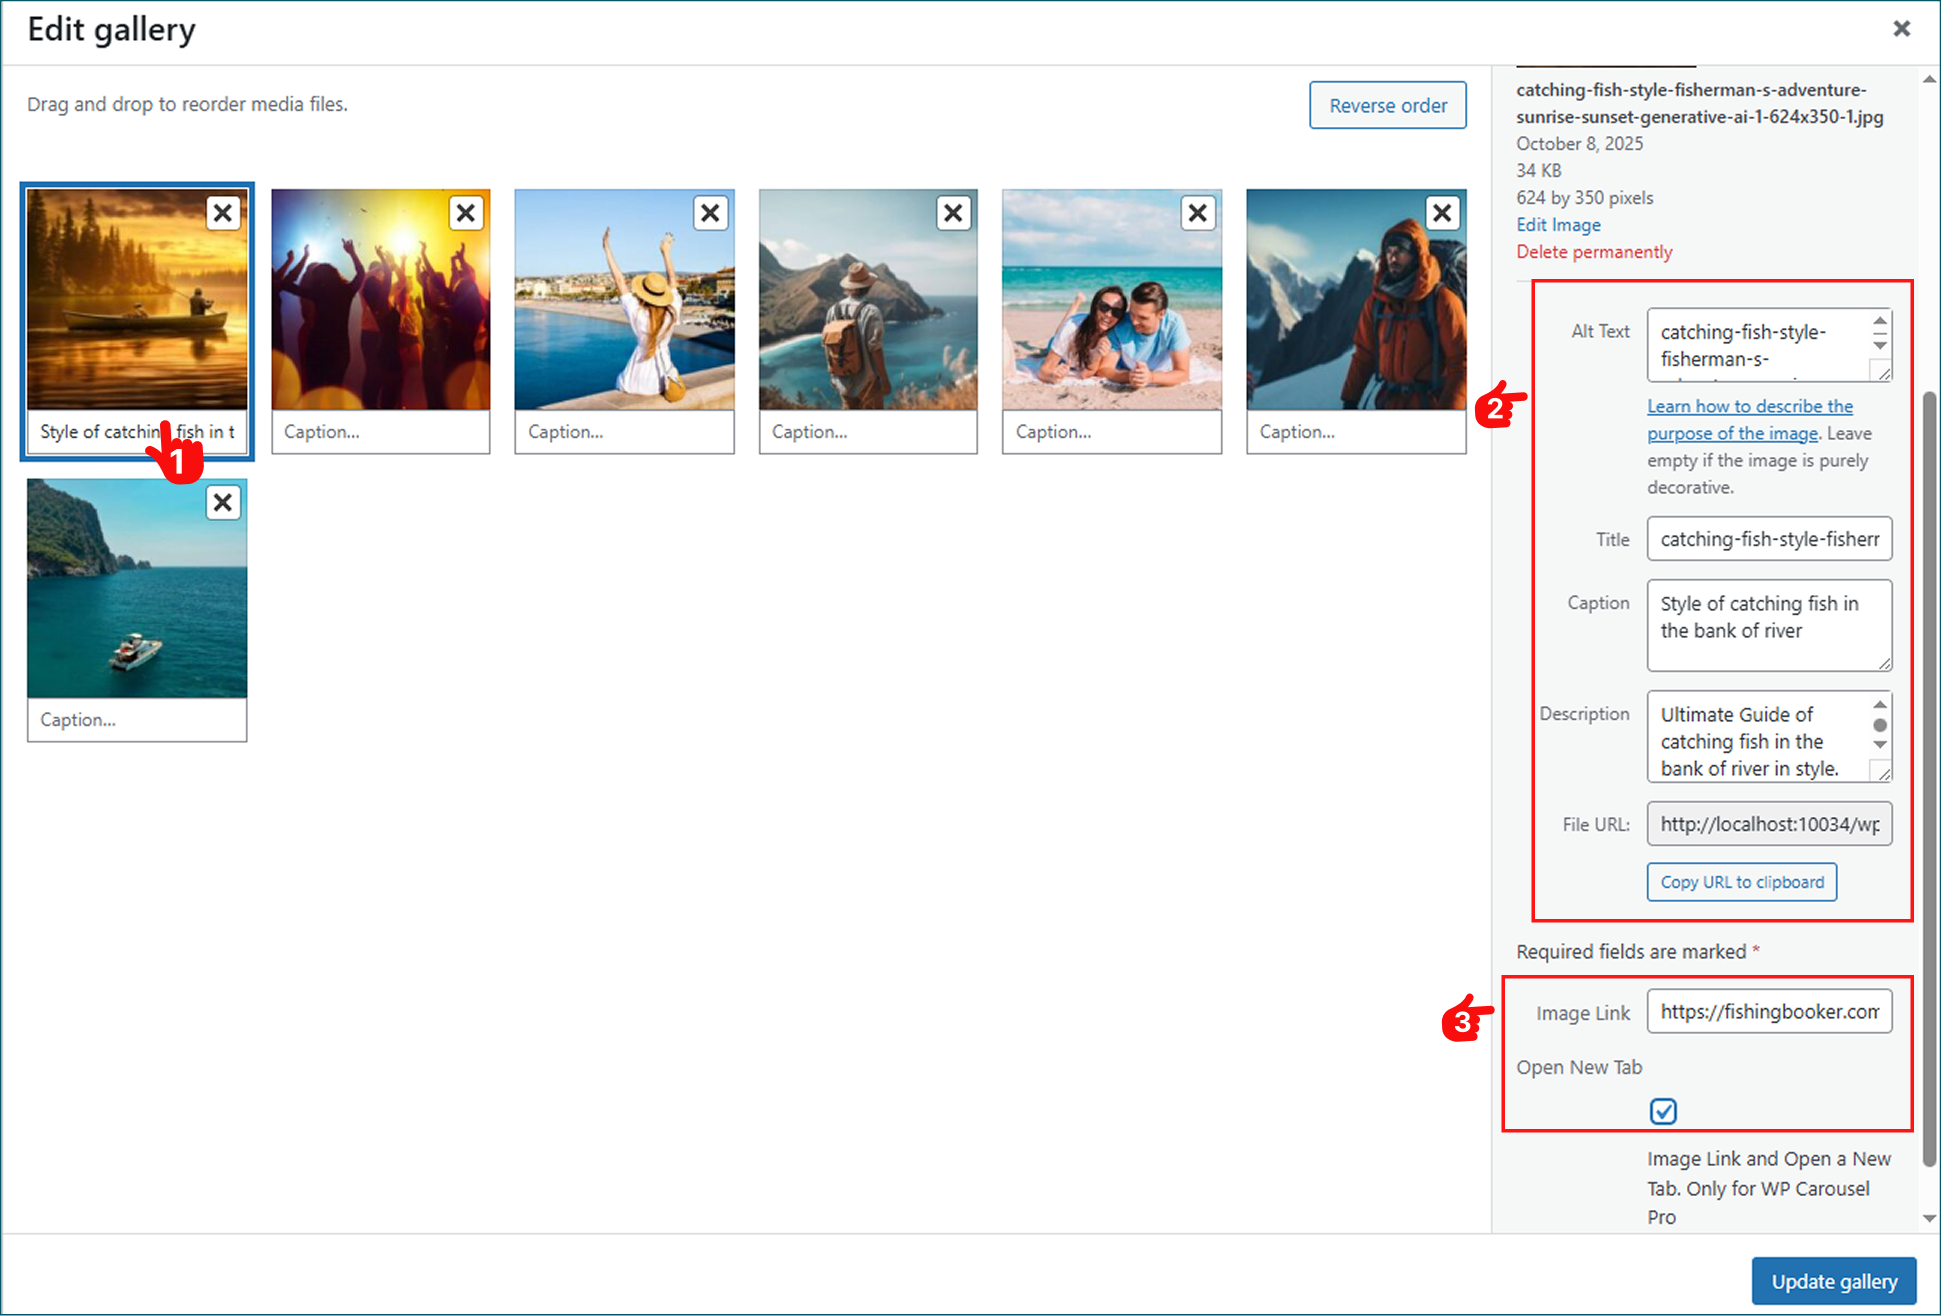
As we want to create an image carousel with links, it’s now time to follow this step carefully. First, when you’re uploading and reordering images from the Image Gallery, you will find the options for adding links there. How?
- Once you upload or select an image, you will see multiple options to add Image Alt Text, Title, Caption, and Description.
- Below these options, you’ll find an option called Image Link. Just paste the link you want that image to open when clicked.
- For instance, you can add any specific product page, a blog article, or even an external site. Importantly, check how this link opens. To do this, check the New Tab.
Step 4: Enable How the Image Links Work
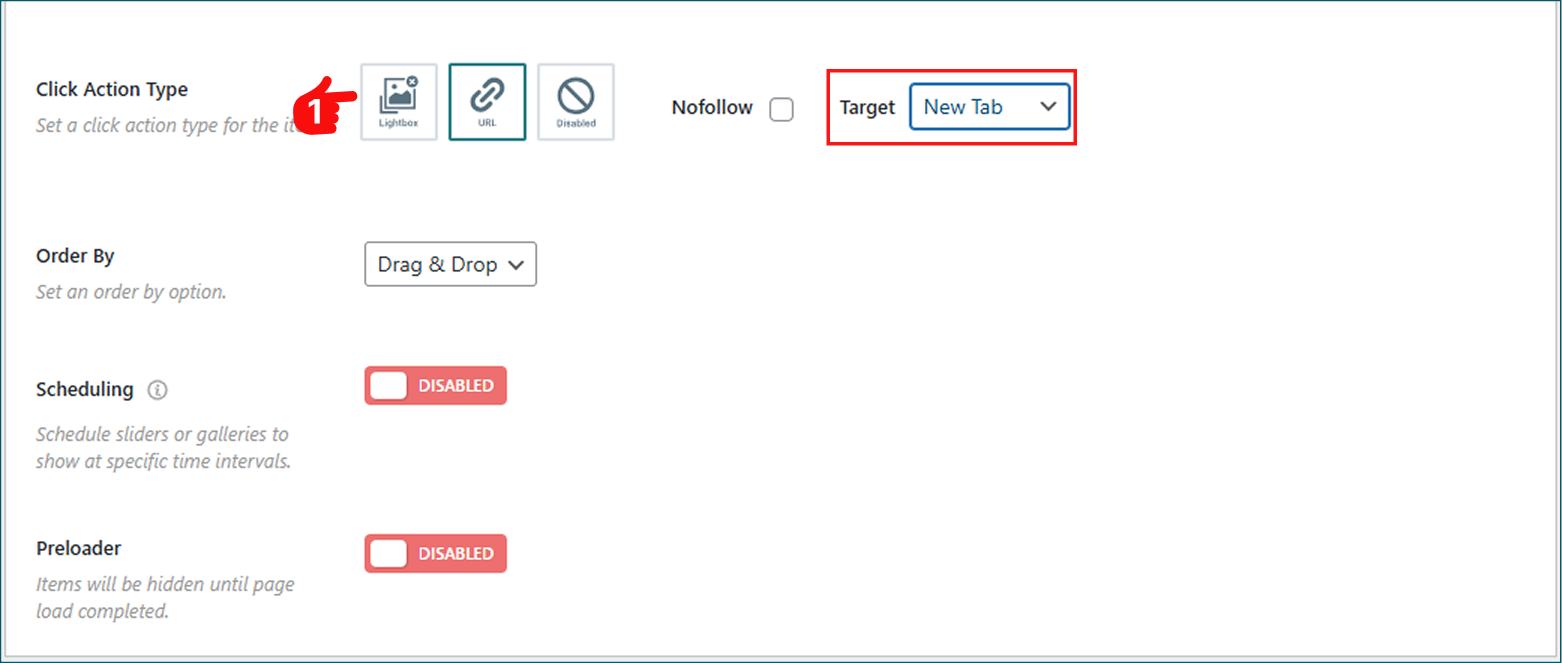
- Next, move to the General Settings tab.
- Scroll down, and find the Click Action Type.
- Here, you will see three options: LightBox, URL, and Disabled. Select the URL and choose how this tab will open.
Step 5: Customize Image Carousel General & Display Settings
What’s more? WP Carousel supports responsive layouts, lazy loading, and multiple display options — giving you complete control over how your carousel appears. Let’s explore how we can design an image carousel.
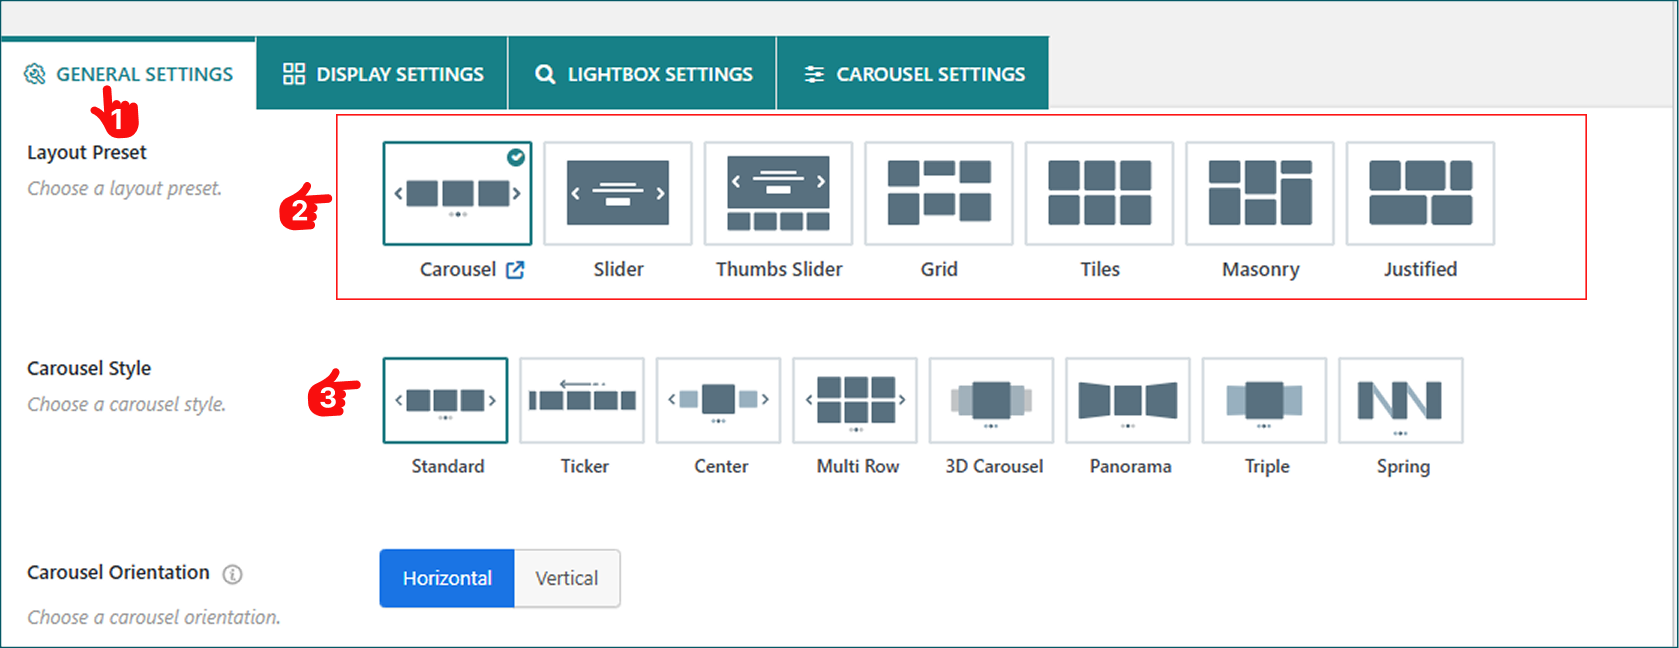
1. Once you embed a link to the images, you can customize the Carousel General Setting Tabs as you want. Every Source type has its own settings.
- For the image carousel, you will find the following layouts: carousel, slider, thumbnail slider, grid, tiles, masonry, and justified.
- Select one layout preset as your preferred option.
- Configure other settings, carousel styles, orientations, set columns, and more with ultimate control over you.
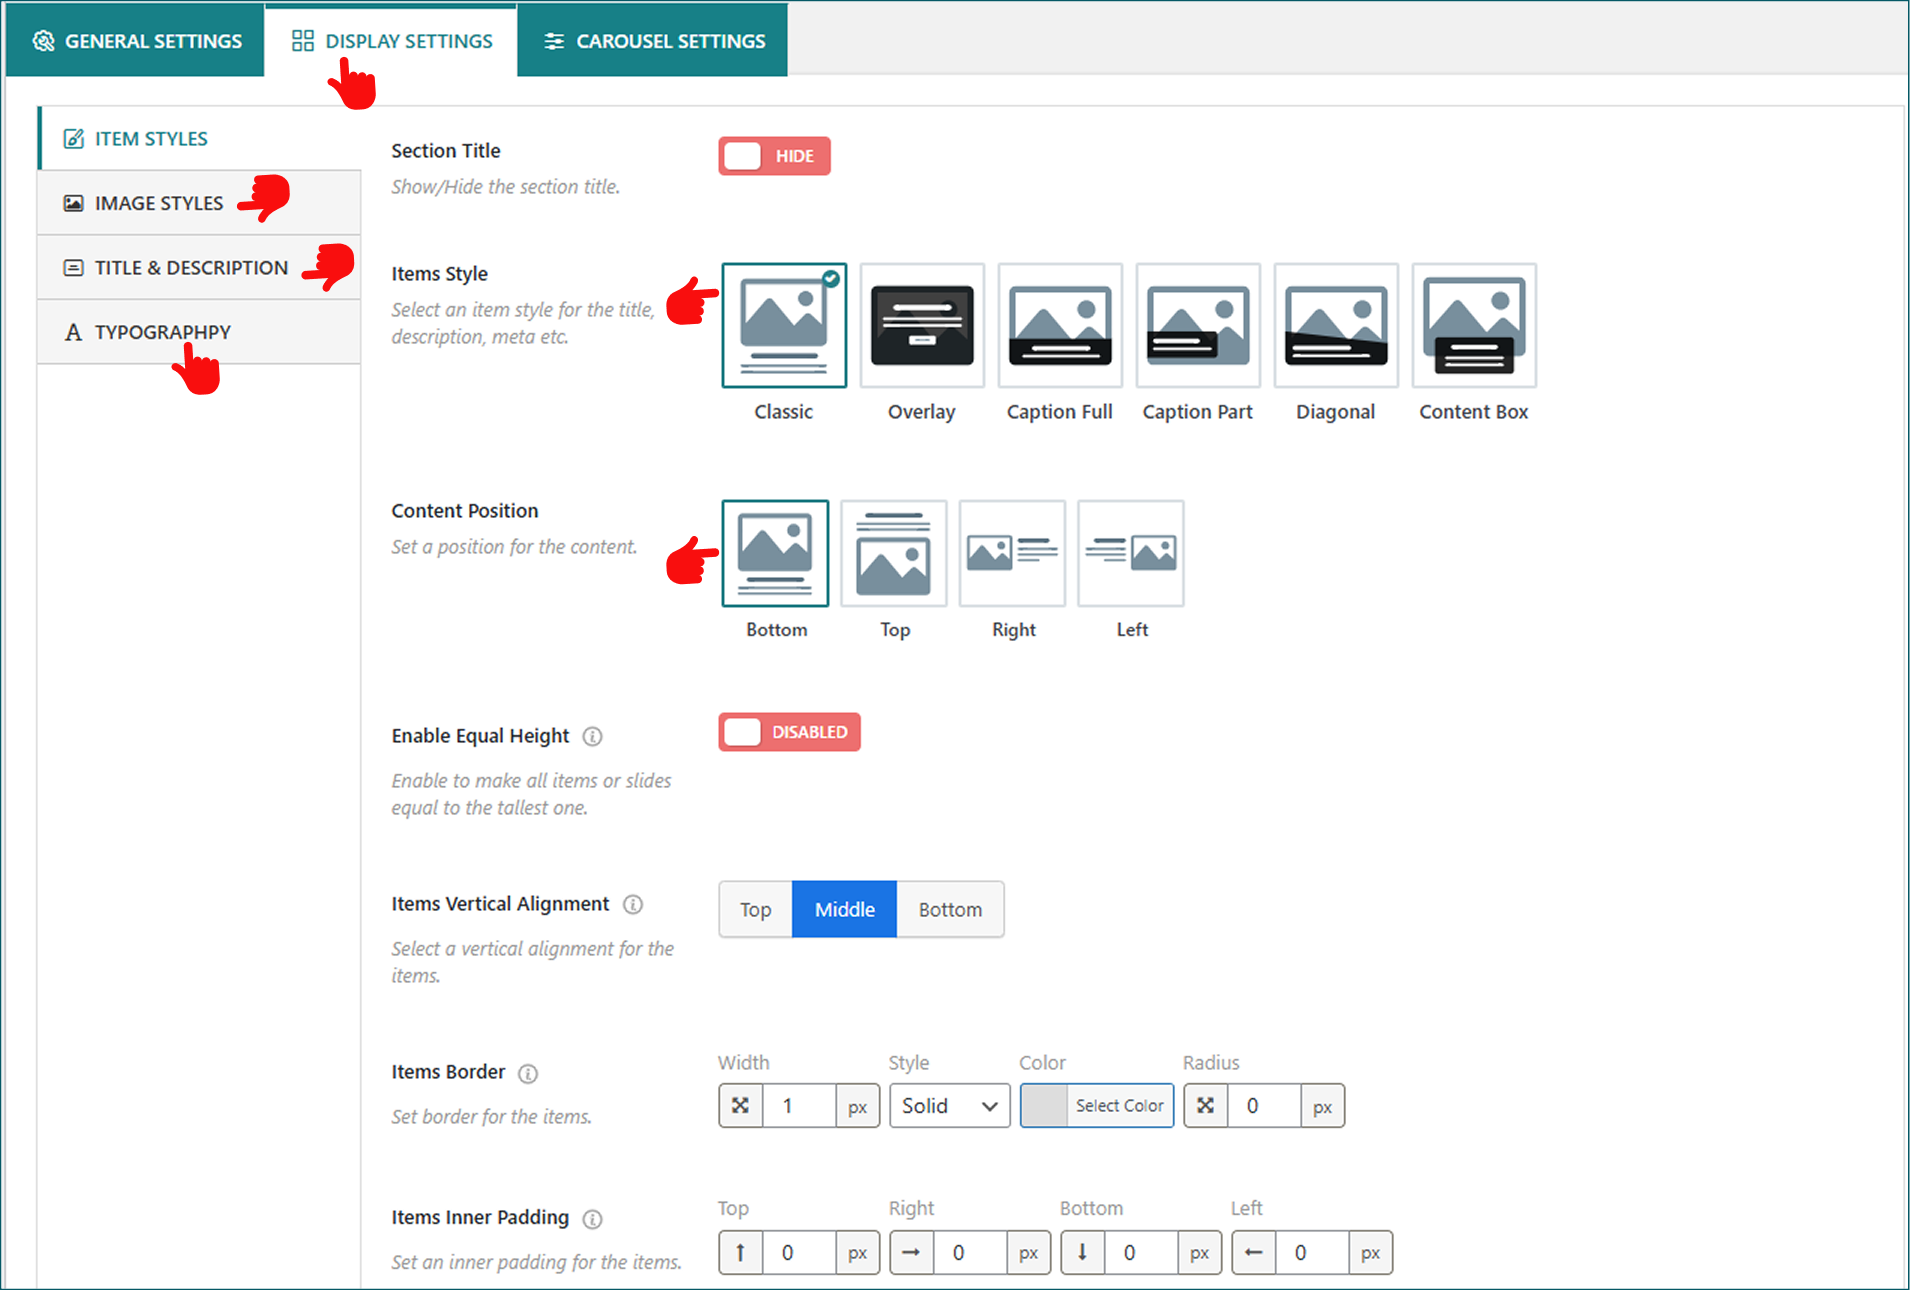
2. Now, decide how your image carousel will be displayed.
- Move to the Display Settings & Configure Item Styles, Image Styles, Title, Descriptions, and Typography from flexible customization options.
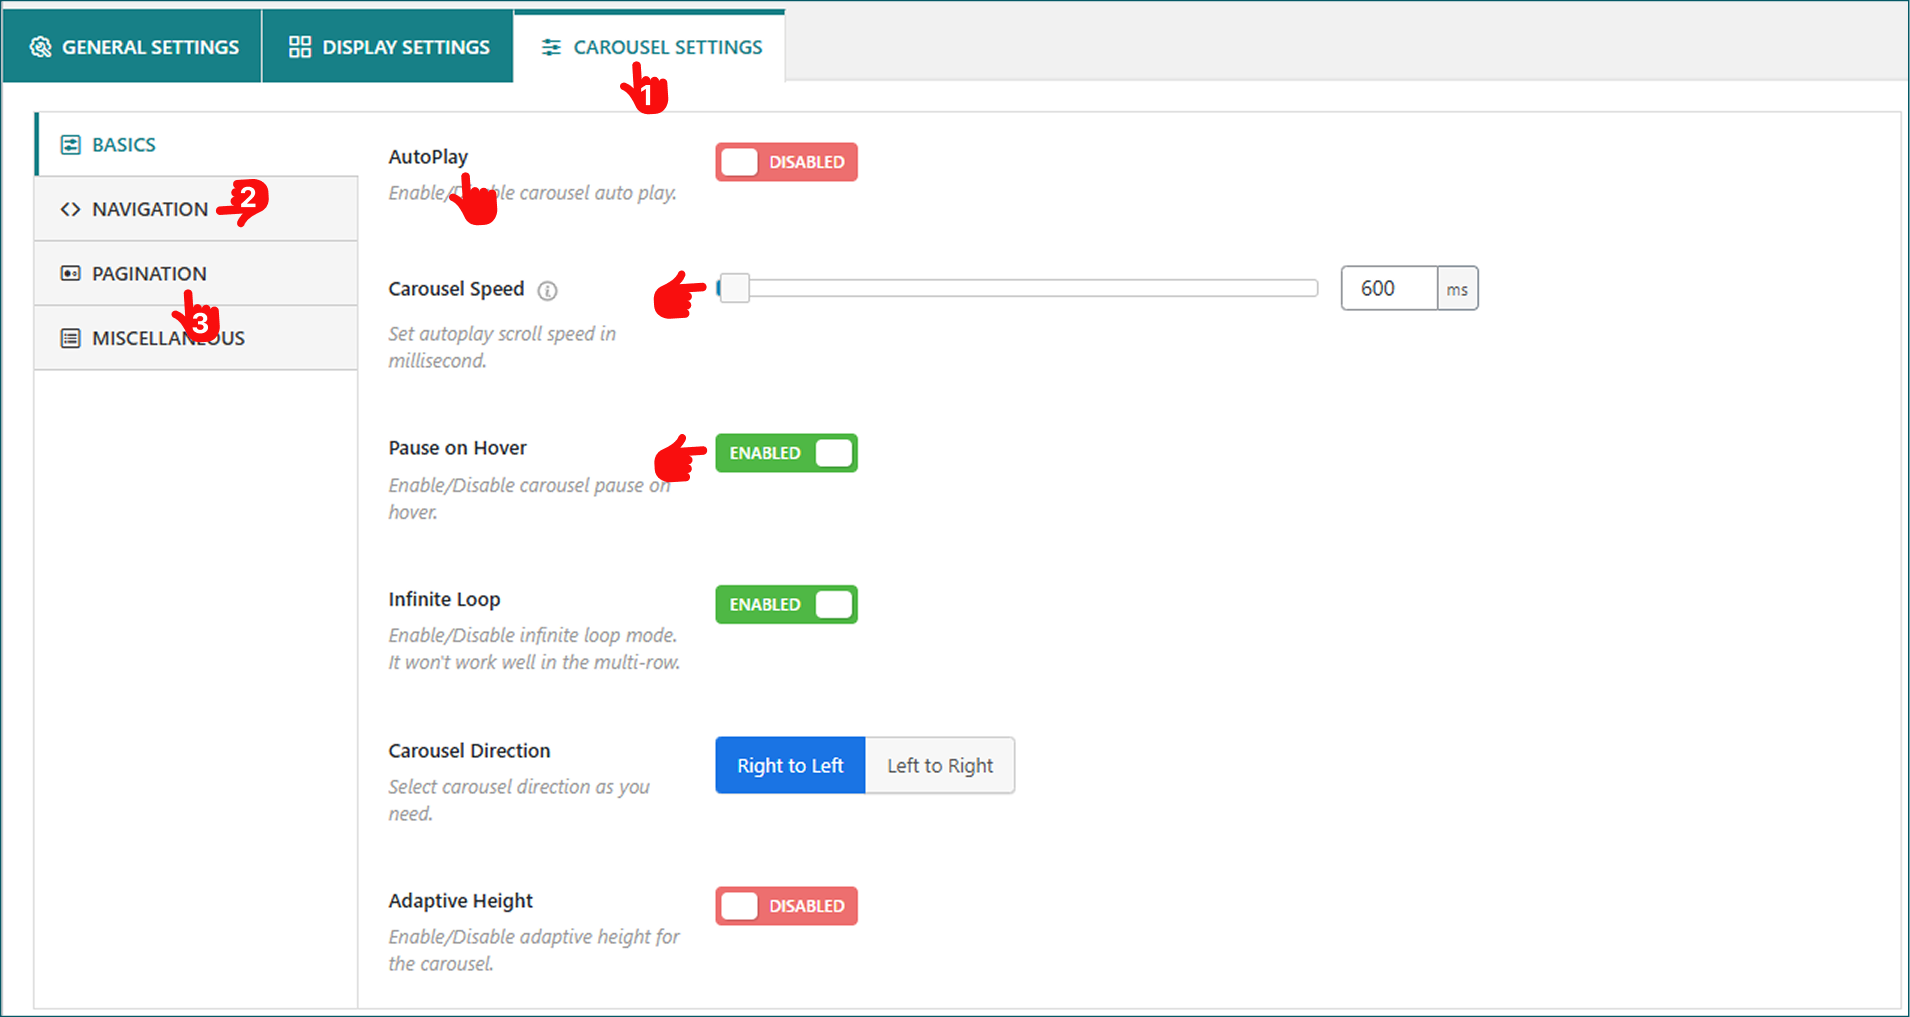
3. After you have designed the image carousel, you can also configure Carousel Settings
- Navigate to settings such as Carousel Speed, including Pause on Hover, Carousel Direction, and more.
- Moreover, it provides you with ultimate flexibility to choose from various navigation and pagination styles, each with extensive customization options.
You’re almost done! Congratulations. Click Publish, and a shortcode will appear. Copy that shortcode and paste it wherever you want the carousel to show up — inside a post, page, or even a widget area.
For example:

Now preview your site — hover your mouse over the images, and you’ll notice they’re clickable and redirect to the links you set earlier.
Let’s see a live demo by clicking on the button below.
5 Pro Tips for Optimizing Your Image Carousel for Better Performance
To make the most of your carousel, keep these best practices in mind:
- Use Optimized Images: Compress images to maintain speed without losing quality.
- Maintain Consistent Dimensions: Uniform image sizes create a more balanced layout.
- Limit the Number of Slides: Too many images can slow down loading and distract visitors.
- Add Captions or Alt Text: Helps with SEO and accessibility.
- Preview Responsiveness: Ensure your carousel looks great on both mobile and desktop screens.
To Sum Up
That’s It! Congratulations. I hope you’ve successfully created an image carousel with links in WordPress using the WP Carousel plugin. And remember to follow the pro tips to optimize your image carousel in WordPress.
So, don’t wait. Download WP Carousel Today and start showcasing your business images beautifully and effortlessly. It’s quick, easy, and adds a professional touch to your website, helping visitors explore your content more smoothly.
Leave a Reply