
Let your visitors find what they are looking for quickly. It is always a good practice for better user experiences. The less time your visitors have to spend to find their desired piece of content, the better. In that case, the post grid with ajax filter is one of the best options. Most importantly, it reduces the bounce rate and enhances user engagement on your posts.
You might or will have a lot of content on your website. However, It doesn’t make sense if your visitors don’t find them seamlessly. On the other hand, when they see your content well-organized with filtering options, they can navigate to their necessary content quickly and love to spend more time. As a result, your conversion rate grows. That’s all about this blog. So keep reading to get a complete guide on creating a post grid with ajax filter.
Table of contents
4 Steps to create a post grid with ajax filter
Follow these four easy steps to create a professional post grid with ajax filter in a few minutes. It doesn’t require coding knowledge.
Step 1: Install and activate Smart Post Show
Firstly, you need to install and activate Smart Post Show Pro. It helps you to create a post grid with ajax filter on your WordPress website with no code. Besides grid layout and ajax filter, you will get tons of features to make your post showcase how you want. To install and activate this powerful plugin, please watch this video tutorial.
After you successfully install and activate, Smart Post Show Pro will be available on your WordPress admin.
Please contact the support team if you need help in installing and activating it.
Step 2: Design your post grid
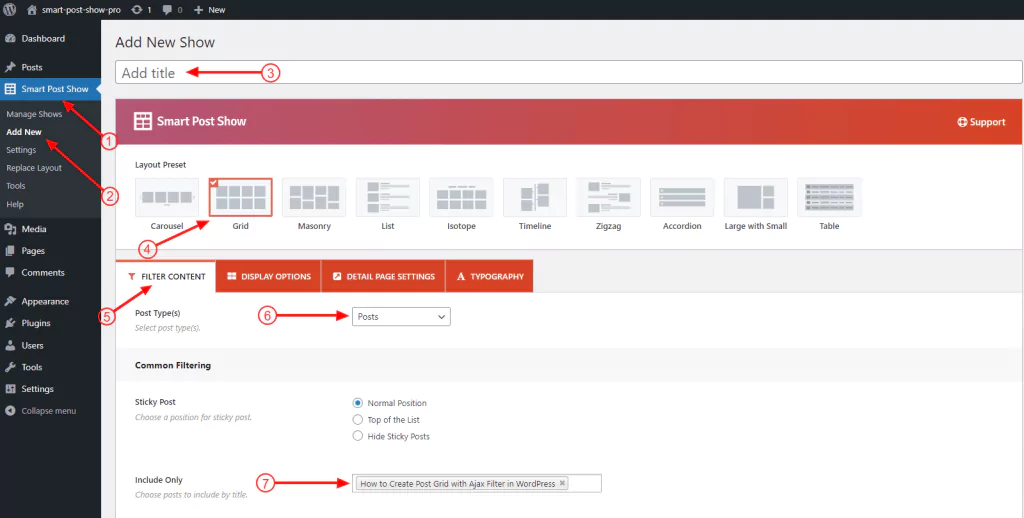
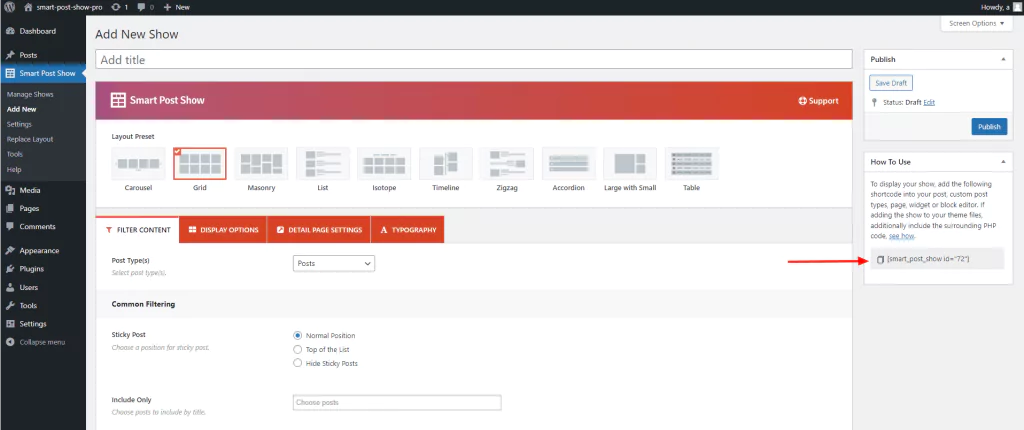
Secondly, you have to include posts and design your post grid with the robust features of Smart Post Show. However, once you install and activate the plugin, it will be available on your WordPress menu bar. First, click Smart Post Show Pro, then Add New. Please give it a title. Next, select Grid from Layout Presets. Apart from the Grid, Smart Post Show offers you nine layouts:
- Carousel
- Masonry
- List
- Isotope
- Timeline
- Zigzag
- Accordion
- Large with small
- Table
Big bonus, right? Next, Select FILTER CONTENT tab. After that, select post from Post Types. Next, find the Include Only option a bit lower. Type the titles of the posts you want to show in the text field.
Click Steps
Smart Post Show→ Add New→ Add title→ Grid→ FILTER CONTENT→ Posts→ Include Only text field (type the titles of post you want to show) →….Design your post grid…..
However, you will see a setting tab bar just after the layout presets. It contains five tabs FILTER CONTENT, DISPLAY OPTIONS, CAROUSEL CONTROLS, DETAIL PAGE SETTINGS, and TYPOGRAPHY.
Every tab has a lot of setting properties. They give you complete freedom to create post showcases as you can imagine. So explore them attentively and try them out as per your need and preferences.
Step 3: Configure the ajax filter
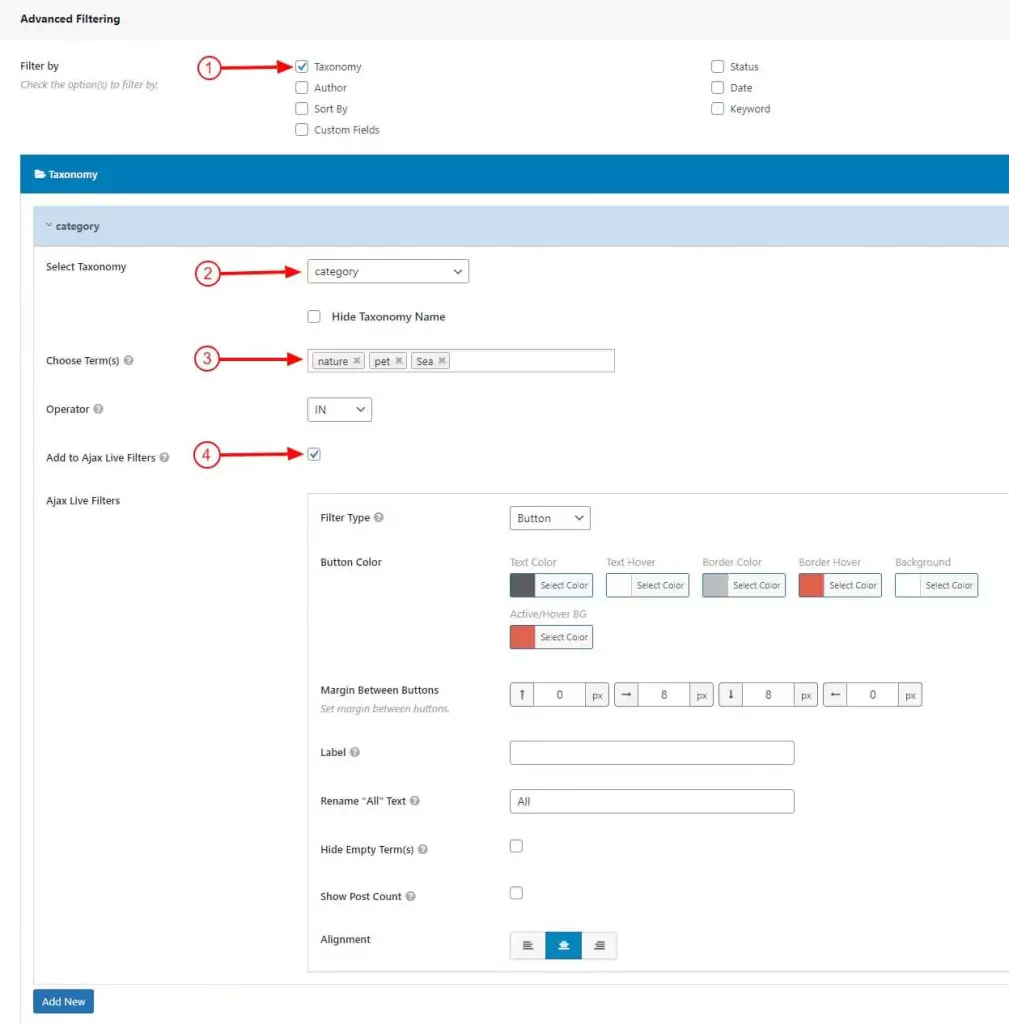
Thirdly, you have to configure the ajax filter. So find the Advanced Filtering section at the bottom of the FILTER CONTENT section. Next, click the Taxonomy checkbox. Select a taxonomy. Initially, choose the Category. You can mark the Hide Taxonomy Name checkbox if you don’t want to show it.
After that, click Choose Term(s) and pick the terms you want to show as ajax filters. Next, check the Add to Ajax Live Filters checkbox. Once you check the box, it will offer you some configuration settings. With them, you can configure your ajax filters as per your needs. After configuring, a primary post grid with ajax filter is ready to publish.
Click Steps
Taxonomy→ Category→ Choose Terms (Category) → Check Add to Ajax Live Filters ( try ajax filter styling options)→SHOW PREVIEW (optional)→ Publish/Update (see the next image).
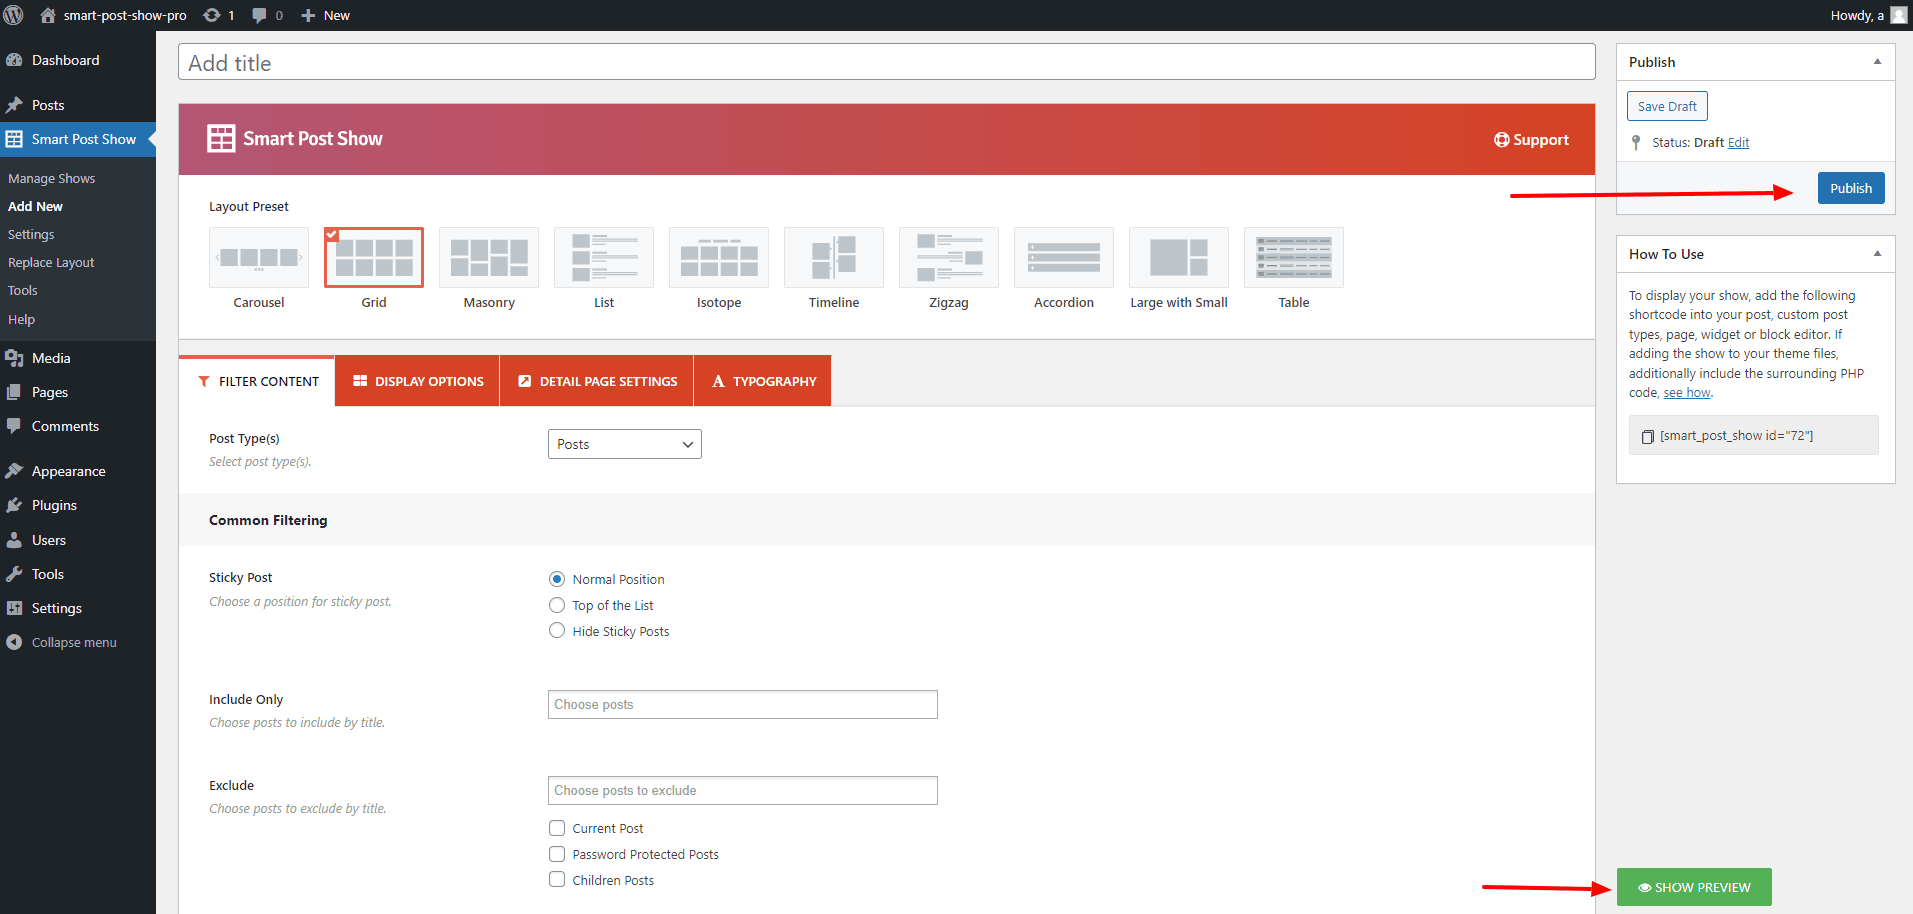
Now you can see the preview. If it is how it should be, hit the Publish or Update button at the upper right corner to publish your post grid with the ajax filter’s shortcode.
Step 4: Publish your post grid with ajax filter
Finally, you can publish it in two ways – with the Smart Post Show Gutenberg block and the shortcode.
Smart Post Show Gutenberg block
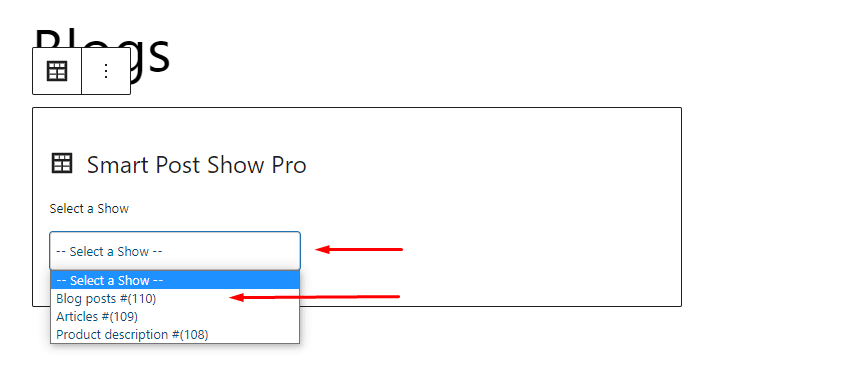
First, go to the page you want to display your post grid with ajax filter. Next, click the plus icon, then type smart post show. Next, click the Smart Post Show block. After that, click Select a Show and pick the show title of your post grid with ajax filters you want to publish. Finally, if everything looks good, you can hit the Publish or Update button at the upper right corner.

Click Steps:
Go to the page/post→ Plus icon→ Type Smart Post Show in the search field → Smart Post Show block→ Select a Show→ Pick the post grid title→ Publish / Update
Great! Now it’s live and looks fantastic.
Or,
Copy-paste the shortcode
Alternatively, copy the shortcode from the right sidebar. Next, go to the page you want to display your post showcase. After that, paste the shortcode in a text or shortcode block. Finally, hit the Publish or Update button at the top right side.
Take away
Post grid with ajax filter benefits you in many ways. Above all, it helps your visitors to find their desired content within a shorter time. Moreover, it improves your user experience and satisfaction rate. As a result, your bounce rate decreases. Most importantly, it increases user engagement and conversion rate.
So, let’s start creating your beautiful post grid with ajax filter now.
Thanks for reading. We really appreciate your comments and queries. It will be our great pleasure to read and reply.
Leave a Reply