
Are you looking to add a stunning image gallery to your WordPress website that not only showcases your visual content but also directs your visitors to specific destinations?
If so, you’re in for a treat! In this comprehensive guide, I will show you how to add image gallery with custom link in WordPress .
Images are a powerful tool for captivating your audience, but their potential doesn’t end there. You can drive traffic to important pages, products, or promotions on your website by adding custom links to your image gallery. This will effectively increase engagement and conversions.
By the end of this article, you will have the knowledge to add an image gallery that meets the objectives of your website, whether you are a blogger or a small business owner, or a web developer.
Let’s dive in and unlock the full potential of your website with a custom-linked image gallery!
Why should you add an image gallery with custom link in WordPress?
Call-to-action opportunities
An image gallery with custom links offers powerful call-to-action (CTA) opportunities by strategically placing clickable links on images. By directing users to specific landing pages, products, or promotions, you can prompt them to take desired actions, such as making a purchase, signing up for a newsletter, or exploring more content. This interactive approach increases click-through rates and encourages user engagement, ultimately leading to higher conversions.
Custom links in an image gallery serve as effective CTAs, guiding visitors toward valuable content or actions that align with your website’s goals.
Showcasing products
A custom-linked image gallery is a powerful tool for effectively showcasing products. Each image can be linked to the corresponding product page, allowing visitors to explore and learn more about the items displayed. By providing direct access to product information and purchase options, the gallery streamlines the browsing process and enhances user experience.
Branding and personalization
Including an image gallery with customized links on a website can enhance branding and personalization. It enables website owners to guide users toward branded landing pages or personalized content. By associating specific images with relevant destinations, businesses can reinforce their brand identity and messaging.
How to add image gallery with custom link in WordPress
WordPress’s default functionality allows you to add an image gallery and even add custom links to the images in the gallery. However, this process may not be very convenient.
To add an image gallery with custom links, you can use an image gallery or image showcase plugin. In this article, I will use the popular content showcase plugin called WP Carousel Pro.
Step one: Install and activate WP Carousel Pro Plugin
To begin, you must first install and activate the WP Carousel Pro plugin. This can be downloaded from the official WP Carousel Pro website. Once you have the plugin downloaded, proceed to install and activate it.
After activating the plugin, you will have the ability to create and manage image galleries with ease.
Step two: Create an image gallery
You have successfully installed and activated WP Carousel Pro. It’s time to dive into creating an attractive image gallery with this remarkable tool.
To get started, go to your WordPress dashboard and find WP Carousel Pro. Click on “Add New” to begin making your image gallery. Type the title into the designated box.
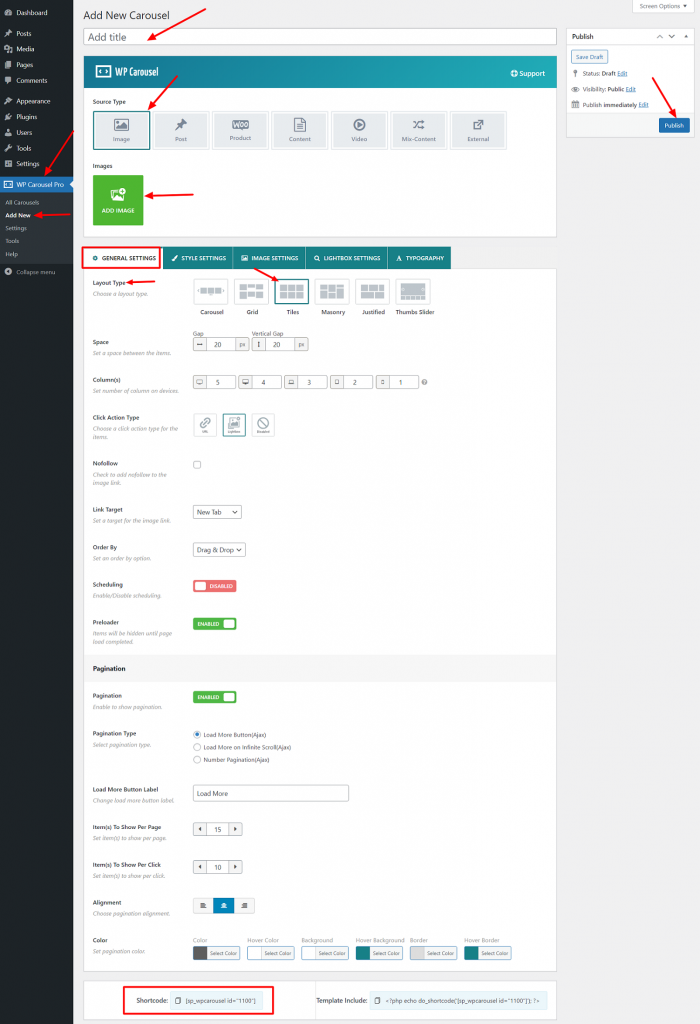
Next, select “Image” as the source type and upload your desired images. You can choose to add images from your computer or access them directly from the media library.
Then, head over to the “General Settings” section. From there, locate the “Layout Type” option and select the layout that best suits your needs. For an image gallery, I recommend choosing “Tiles” as your layout.
Once you’ve completed the necessary steps, simply click the “Publish” button and your image gallery will be fully prepared to captivate and engage your website visitors.
With WP Carousel Pro, you have the freedom to customize your image gallery to your preferences using a variety of powerful options.
Note: If you don’t want to customize the image gallery, you can skip step three.
Step three: Customizing image gallery
WP Carousel Pro makes it effortless to tailor your image gallery to your exact specifications. Let’s delve into its numerous customization options and craft a gallery that is simply flawless.
To change the spacing between images and determine the number of columns per device, navigate to the General Settings section. Here, you can also modify the click action type, link target, and ordering. Furthermore, you can choose to activate or deactivate scheduling and the preloader.
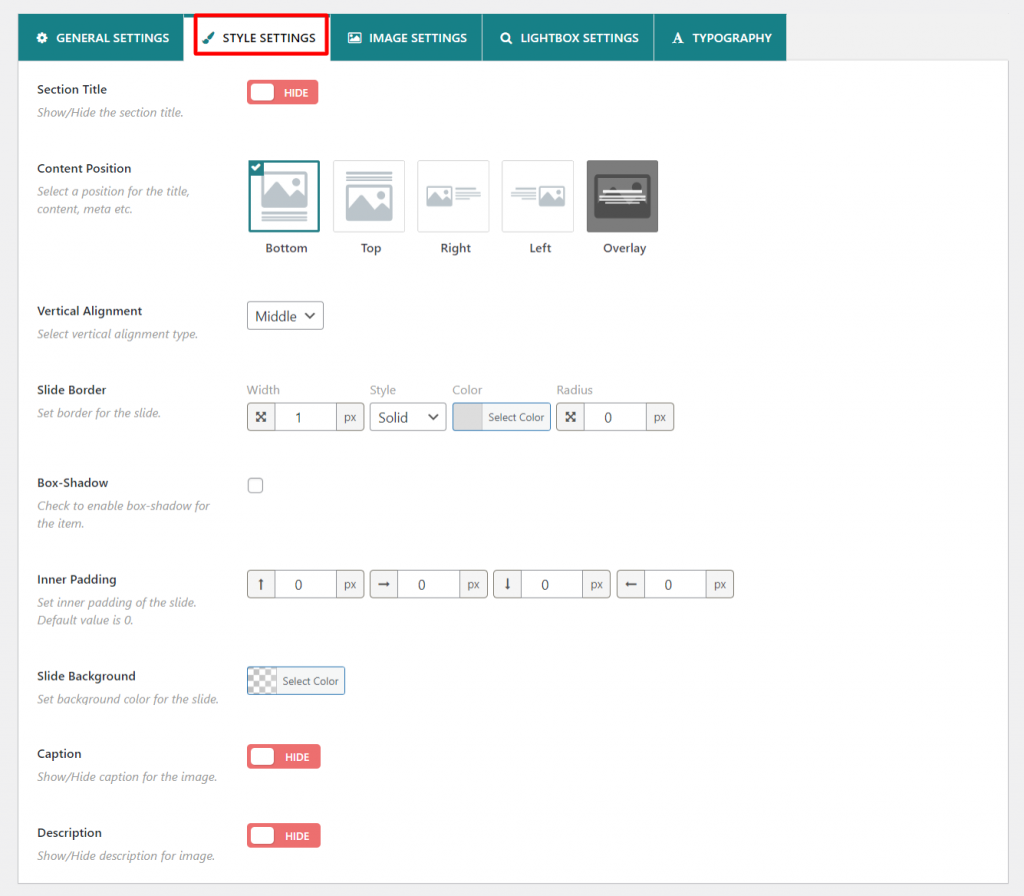
With the style settings, you can personalize how your section looks by choosing which elements to display such as the title, caption, and description. You can also adjust the vertical alignment, content position, slide border, inner padding, and slide background. If you prefer, you can even enable a box shadow effect.
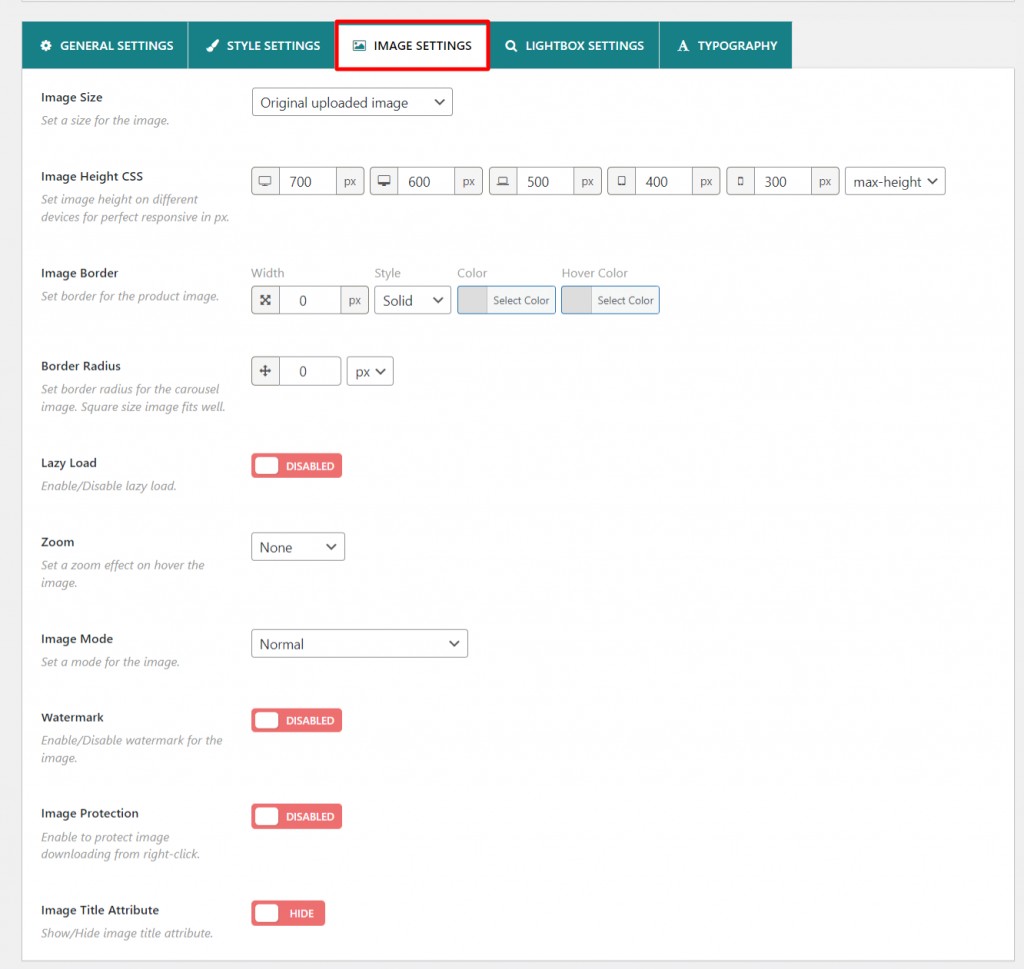
Customize the appearance of your images using the Image Settings. This feature allows you to adjust the image size, height on devices, border, border radius, zoom, and image mode. You also have the option to enable or disable lazy load, watermark, and image protection. Furthermore, you can choose to show or hide the image title attribute.
The Lightbox Settings allows you to customize the lightbox icon. In addition, you can customize the lightbox overlay background color. Moreover, you can show/hide lightbox image caption, image counter, bottom thumbnails gallery, zoom button, full screen button, slideshow play button, social share button, download button, and close button. Furthermore, you can enable/disable loop and keyboard navigation.

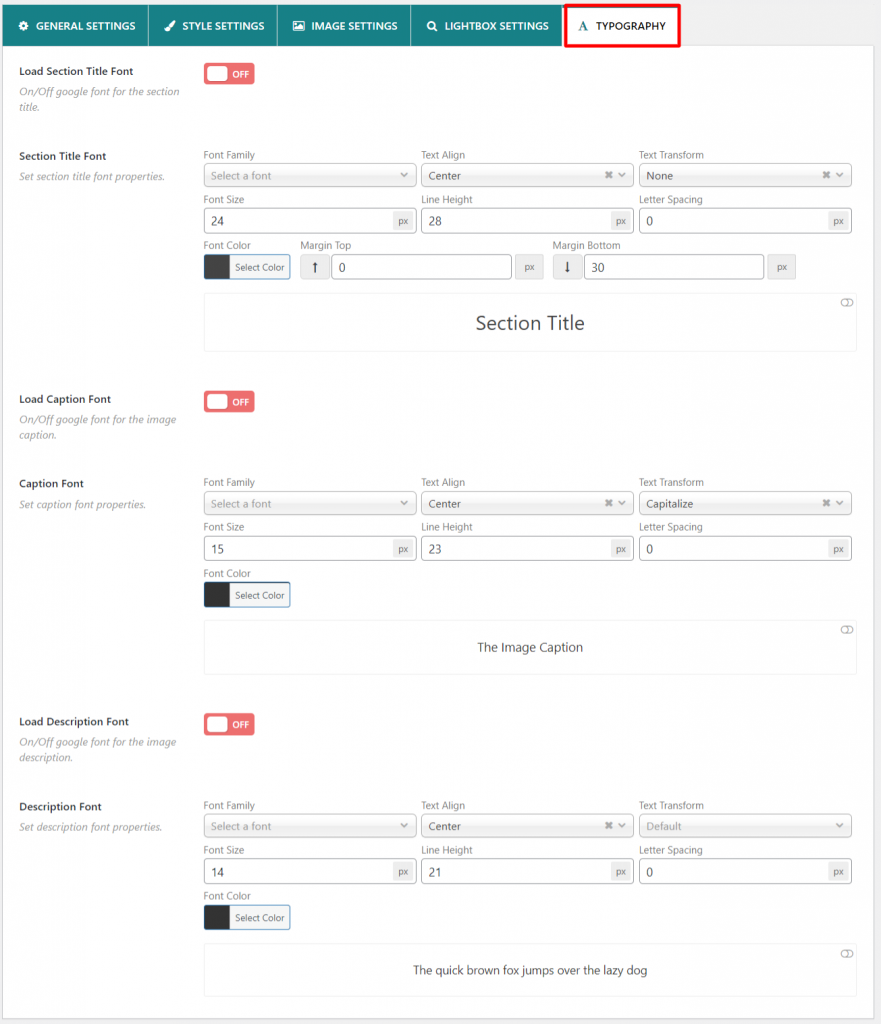
Customize the fonts for section titles, captions, and descriptions using the Typography settings. You have the option to use Google fonts for these elements as well.
To save changes, simply click on the update button.
Step four: Adding custom link to the image gallery
Adding custom link to image gallery is super easy with WP Carousel Pro. Here is how to do it:
Go to the Images and click on Edit Images. It will take you to the gallery editing page.

Next, click on an image and scroll down to locate Image Link.
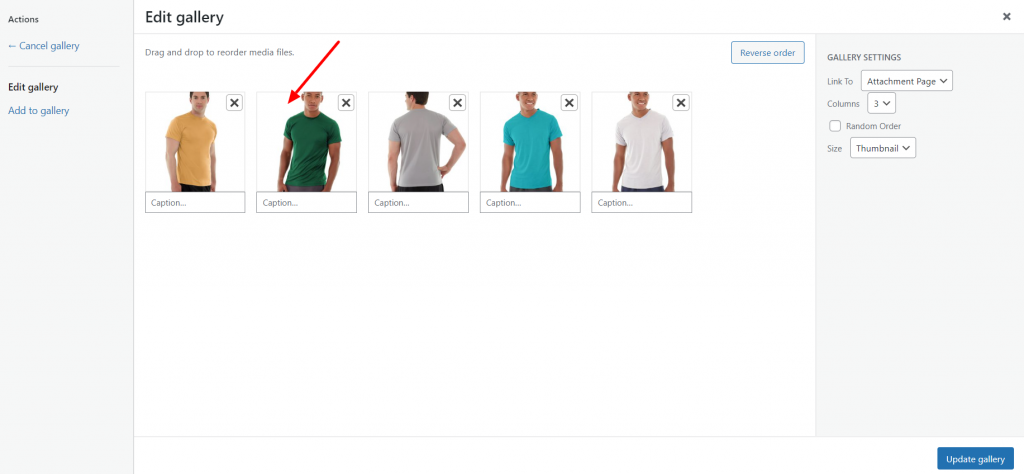
Then, paste the link into the image link box and update the gallery. Repeat the process for adding links to other images.

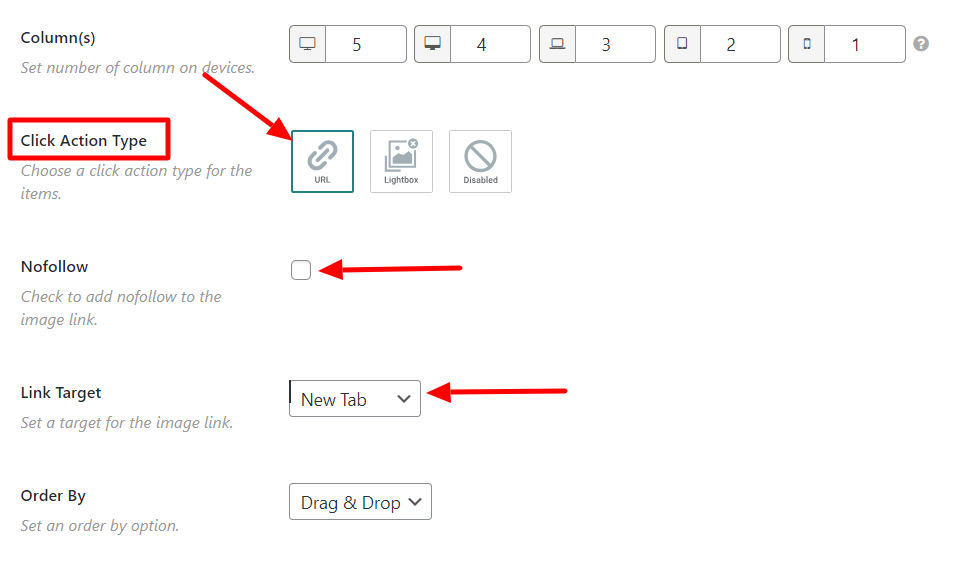
After that, go to General Settings and locate Click Action Type. Now, select the URL. If you want to make the link Nofolow tickmark the Nofollow option. From the Link Target option, choose the current tab if you want to open the link in the current tab. Select the New tab, if you want to open the link in a new tab. Finally, hit the update button and you are done with adding an image gallery with custom link in WordPress.
This is how you can add custom link to the WordPress image gallery.
Step five: Displaying image gallery with custom link
Now that you’ve created and customized your image gallery with custom links, it’s time to display it. Here’s how to do it:
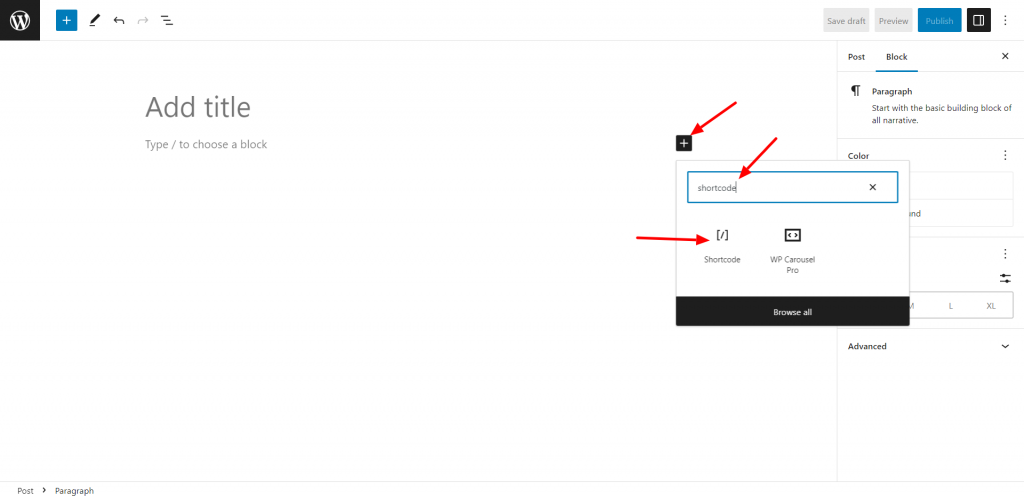
To display the image gallery with custom links, start by copying the gallery shortcode. Next, go to the page or post where you want to add the gallery and edit it. Then, click on the block inserter button and search the shortcode block. After that, add the block to the content area where you want the gallery to appear.
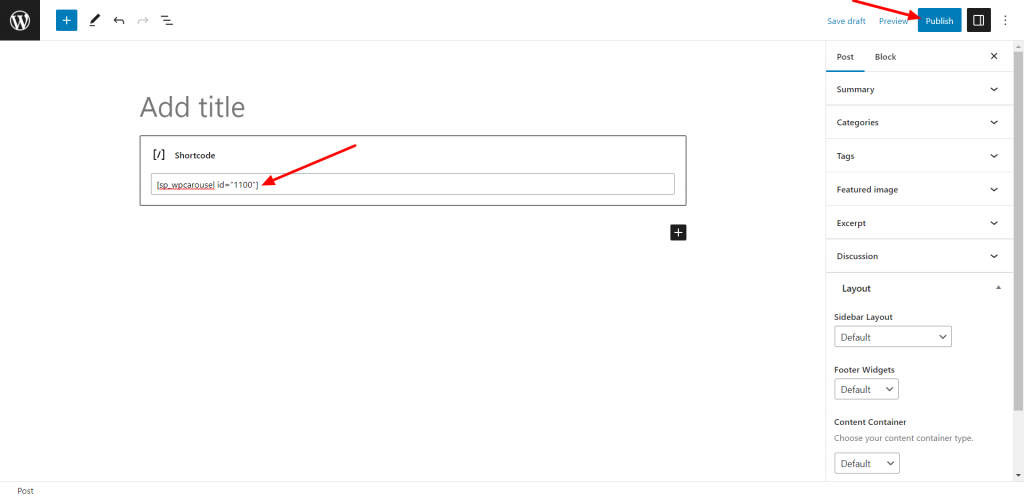
Now, paste the shortcode into the shortcode block. Once you have done this, update the page/post, and you are finished! The image gallery will now be displayed on your website.
Final Words
Adding an image gallery with custom link in WordPress is a relatively easy process. By following the steps outlined in this article on how to add image gallery with custom link in WordPress , you can add a gallery of images to your website that is both visually appealing and informative.
Additionally, by adding a custom link to each image, you can direct visitors to a specific page on your website or to an external website. This can be a great way to promote your products or services or to provide additional information about a topic.
Leave a Reply