A blog slider, also known as a blog carousel, on your WordPress website effectively helps to bring more readers to your blogs. For instance, you may have a good number of blogs and articles on your site. Creating a blog carousel with them at the bottom of your homepage, landing page, and relevant pages helps get more readers.
A slider or carousel with informative and helpful blogs grabs your visitors’ attention and stops them from leaving your website. Once they find helpful and easy-to-understand blogs, they love to read and get converted. That’s all about this blog. So, keep reading. In this blog, I’ll show you how to create an attention-grabbing blog slider or carousel in WordPress step-by-step.
Table of contents
4 easy steps to create a blog slider in WordPress
These four easy steps will take a couple of minutes. In addition, you can create a mesmerizing blog post carousel without a line of code.
Step 1: Install and activate Smart Post Show
First, you need a good plugin that helps you create a blog slider effortlessly with no code. In that case, Smart Post Show can be your best choice. Thousands of WordPress lovers love this plugin too. Its powerful and easy-to-use features made it a favorite.
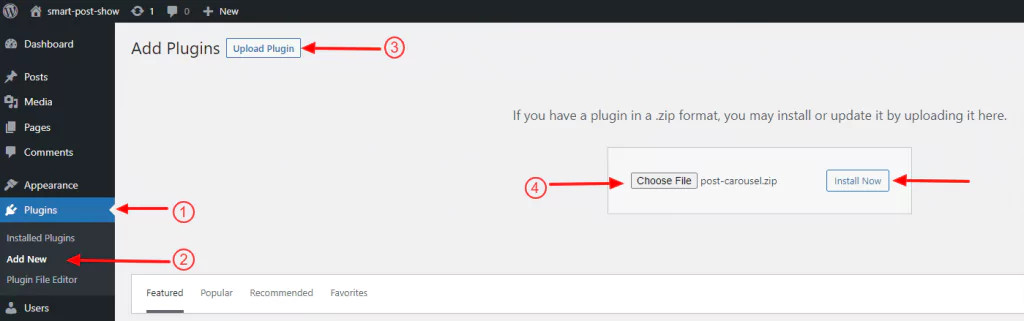
It’s so simple to install it. First, download Smart Post Show. Next, go to your WordPress admin. After that, click Plugin, then Add New. Next, click Upload Plugin, then click Choose File. It will take you to your downloads. Select the post-carousel zip file. Next, click Open. After that, click Install Now, then Activate Plugin. It will be activated.
Click steps:
Download Smart Post Show→ WordPress admin sidebar→ Plugins→ Add New→ Upload Plugin→ Choose File → post-carousel→ Open→ Install Now→ Activate Plugin.
Once you successfully install and activate Smart Post Show, It will be available on your WordPress admin sidebar.
Or,
Alternatively, you can get Smart Post Show from your WordPress dashboard. First, click Plugins, then Add New. Next, type Smart Post Show in the search bar at the upper right side. After that, click Smart Post Show, then Install Now. Finally, click Activate Plugin to add it to your WordPress admin sidebar.
Click steps:
WordPress Dashboard→ Plugins→ Add New→ Search Smart Post Show→ Smart Post Show→ Install Now →Activate Plugin.
Step 2: Add blogs to the slider
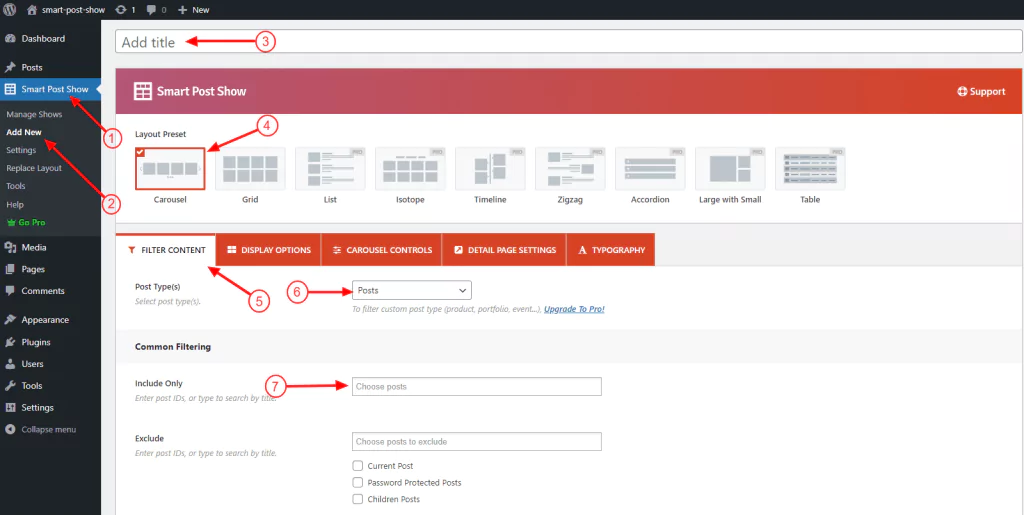
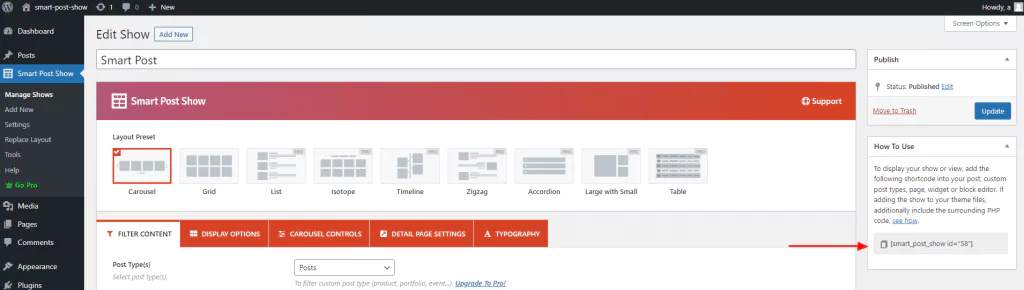
Great! We have already installed and activated Smart Post Show. Now it’s time to add the blog posts you want to create a blog slider with. To add blogs, click Smart Post Show on your WordPress admin sidebar, then click Add New. Next, give your blog carousel a name. After that, select the Carousel from the layouts.
As you can see, there are five tabs next to the layouts. Select the first one – Filter Content. Next, select Posts from the post types. After that, click the Include Only text field and type the content titles you want to include. After including all the blogs you want to add to your blog carousel, dive into designing it with the robust features of Smart Post Show.
Step 3: Design your blog slider
As I’ve mentioned above, there are five tabs just after the layout presets.
- FILTER CONTENTS
- DISPLAY OPTIONS
- CAROUSEL CONTROLS
- DETAIL PAGE SETTING
- TYPOGRAPHY
Each has tons of design options. With them, you can design your WordPress blog carousel exactly how you want. So, if you are here for the first time, explore them individually and try them out as per your needs and preferences.
You can watch the following video tutorial to learn more.
After designing your blog slider, hit the Publish or Update button in the upper right corner.
Step 4: Publish your blog slider
Now it’s time to publish your blog slider finally. You can publish it in two ways – with the Gutenberg Smart Post Show block and the shortcode. However, before you hit the Publish button, you can see the preview by clicking the SHOW PREVIEW button at the bottom right. If everything looks how you expected, go ahead.
Publish with the Gutenberg Smart Post Show block
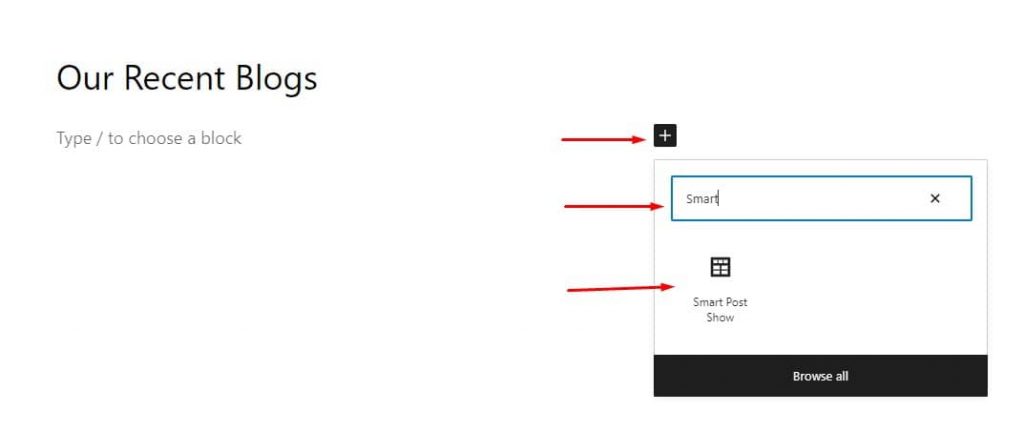
First, go to the page or post you want to display your blog slider. Next, click the plus icon, then type Smart Post Show. After that, click Smart Post Show. Next, click Select a Show. Once you click it, it will show the list of your all shows (shortcodes). Next, click the show (logo slider) title you want to display. It plays. Doesn’t it? If everything sounds good, hit the Publish or Update button finally.
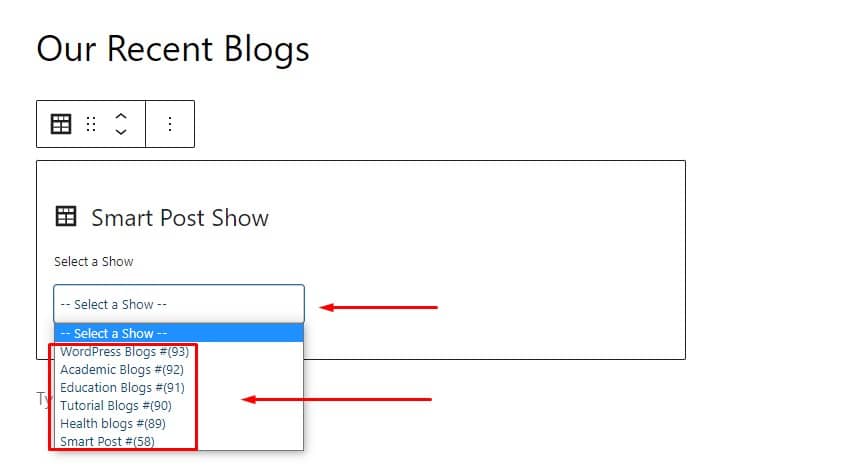
Click steps:
Go to the page/post→ Plus icon→ Search for Smart Post Show→ Smart Post Show→ Select a Show(shortcode)→ Pick the blog slider title→ Publish / Update
Publish with the shortcode
First, copy the shortcode available on the right side after the Publish or Update button. Next, go to the page or post you want to show your carousel and paste it in a text or shortcode block. Finally, click the publish button. Great! Your blog slider is playing.
After you publish your blog slider, it will look like
Take away
A blog slider or carousel benefits in many ways. Above all, it grabs your visitors’ attention and brings them to your blogs. They read your blogs and understand the necessity and importance of your services and products. Consequently, they get converted, and your business grows.
So, no more delay. Create your blog slider now in minutes with no code.
Thanks for reading. We love to hear your words and queries. Please leave them below. It will be our great pleasure to read and reply.
Leave a Reply