A beautiful, responsive WordPress blog grid can make your blog archive page more organized and engaging. Also, you can place blog grids and sliders anywhere on your site.
In this blog, I’ll show you how you can create a beautiful blog grid and organize your blog archive page proficiently to increase engagement. Moreover, you can accomplish it all in minutes with no code.
So, let’s dive in.
Table of contents
4 Easy Steps to Create a WordPress Blog Grid
Step 1: Activate Smart Post Show
Smart Post Show is the best plugin for organizing and managing blogs, articles, news, and any type of posts in WordPress. This highly feature-rich, lightweight, and easy-to-use plugin helps you create well-organized grids with blogs, articles, and more to help visitors easily navigate your blogs.
Moreover, you can create attention-grabbing bog sliders to highlight your featured blog posts and increase engagement.
Not only grid and sliders, It lets you display your blogs in the following layouts:
- Grid, Hierarchical Grid (Large with small)
- Glossary, Isotope (blog grid with filters)
- Masonry grid
- Slider & carousel
- ZigZag, Timeline
- List, Table, Accordion
Most importantly, it offers complete creative freedom with a wide range of simple customization. So, even beginners can effortlessly create visually appealing and interactive blog grids and sliders.
Let’s install and activate Smart Post Show. It’s simple.
Step 2: Choose a ready layout
Once you have installed and activated Smart Post Show, it must be on your WordPress admin sidebar, as seen below. Navigate to it and move on.
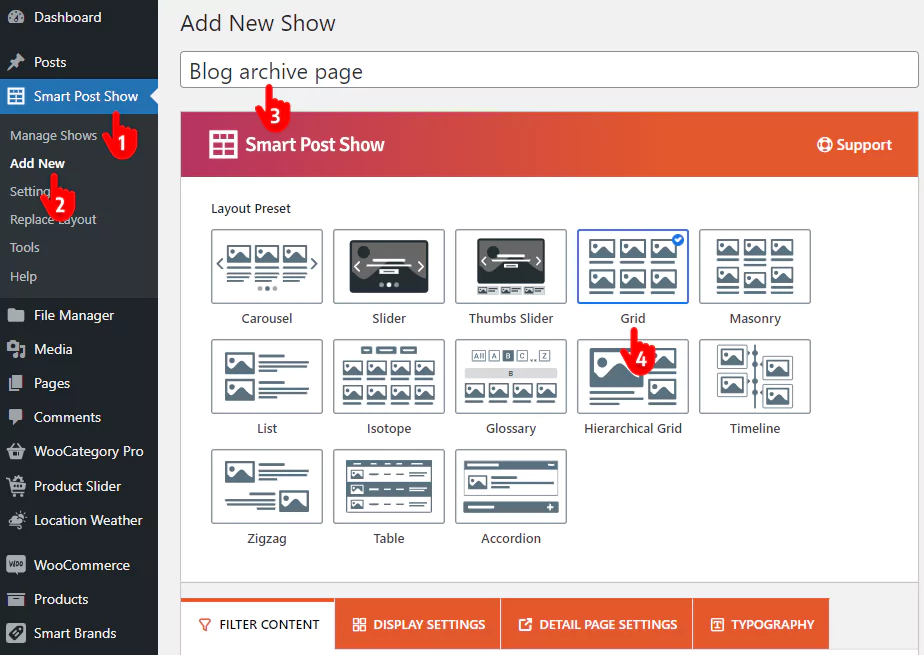
- First, Navigate to your WordPress admin sidebar and click Smart Post Show.
- Click Add New.
- Give your blog grid shortcode a name.
- Choose the Grid layout. You can also choose the Isotope layout to create a post grid with Ajax filters.
- Please scroll down and increase the Limit. You can filter what blogs you want to display and what not.
Step 3: Customize the Blog Grid
Smart Post Show offers an extensive range of robust features and easy customizations to make your blog archive pages exactly how you wish. You will find all the features and customization nested into these five tabs.
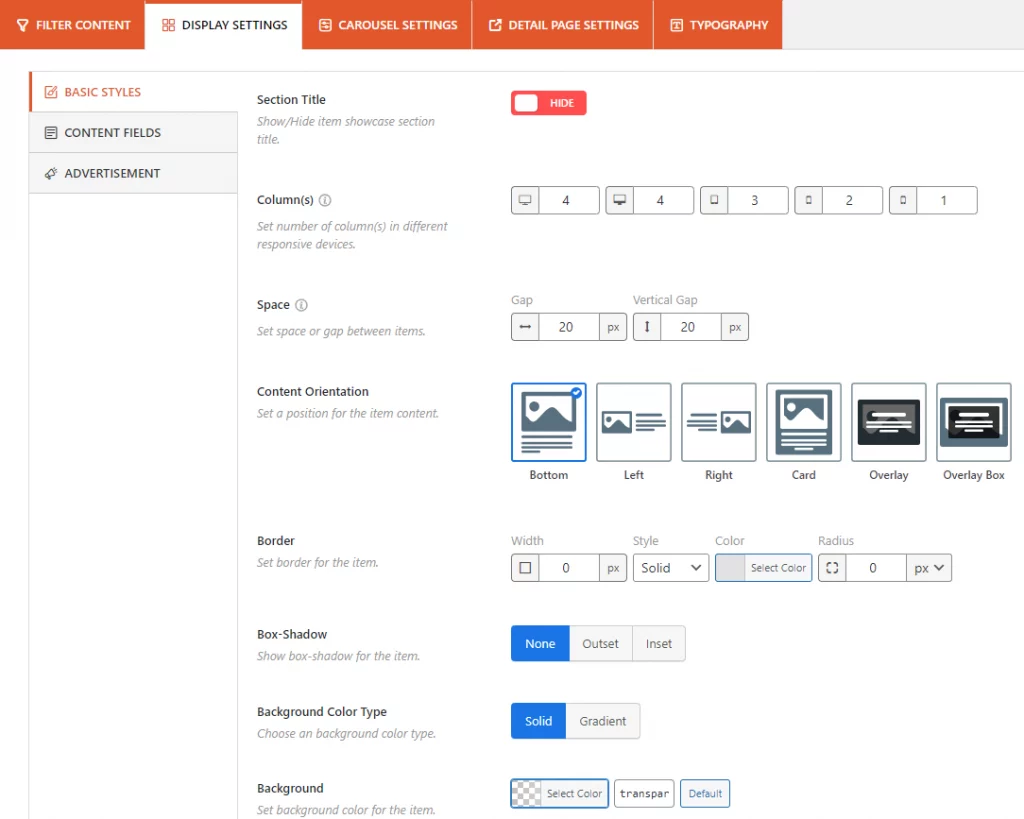
Navigate through the tabs, explore every feature and customization, and use them according to your requirements and preferences. They are so intuitive and user-friendly that even a beginner can make the most out of the plugin.
However, the following tutorial can help beginners (future masters) quickly understand the plugin’s customizations.
Step 4: Publish the Blog Grid in WordPress
If your blog grid or carousel looks awesome and interacts perfectly, it’s time to hit the Publish or Update button.
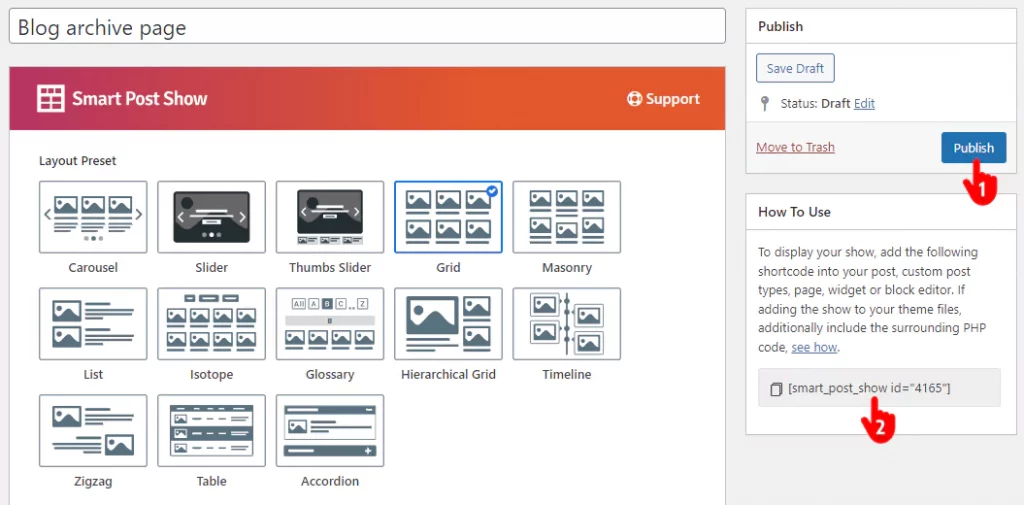
- Click the Publish or Update button at the top right.
- Copy the shortcode.
- Go to the page or post you want to publish your blog grid.
- Paste the shortcode and hit the Publish or Update button.
Great! Your blog grid is live now.
This is how a basic blog grid looks.
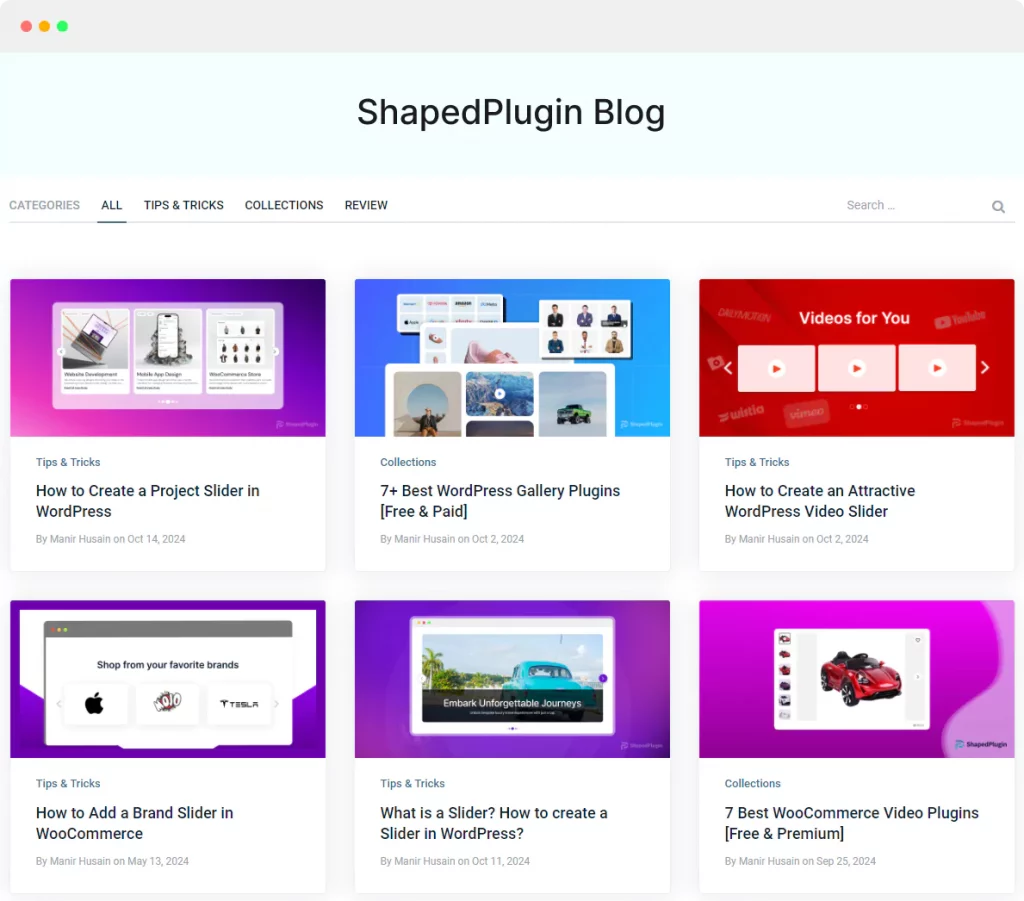
That said, you can make your blog grid aesthetically and functionally better by utilizing your creative power.
An organized blog grid page attracts visitors, helps them easily browse the blogs, and increases readability.
So, let’s create a beautiful and interactive blog grid for your site today.
Leave a Reply