Want to learn how to collect video testimonials from customers?
Curious about how other businesses use video testimonials to grow their customer base?
If so, you’re in the right place. In this blog post, I’ll discuss how to collect video testimonials from customers.
Stay tuned!
How to collect video testimonials from customers
Testimonials are great for increasing conversion and sales. Video testimonials are more effective than text feedback.
You can use WordPress plugins for collecting and displaying video testimonials. However, most plugins lack features for collecting and displaying video reviews.
Don’t worry!
Thanks to the Real testimonials pro. You can collect and display video reviews using this plugin. Also, this plugin comes with a lot of exciting features. These features take video testimonials marketing to the next level.
So, install and activate the Real testimonials pro plugin.
The Real testimonials pro has a great feature called Testimonial Forms. It helps to collect text and video reviews from customers.
In this article, I will use this feature for video review collection.
To collect users’ video reviews, follow the below’s step-by-step guide correctly.
Step 1: Build a video testimonials collection form
With the Real testimonials plugin, you can build video testimonials collection form. Here is how to build customers’ video review collection form;
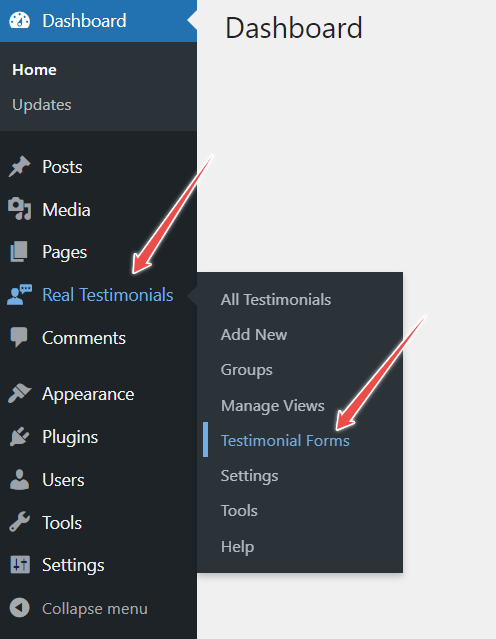
First, go to the WordPress dashboard and navigate Real testimonials. Then, click on Testimonials Forms.
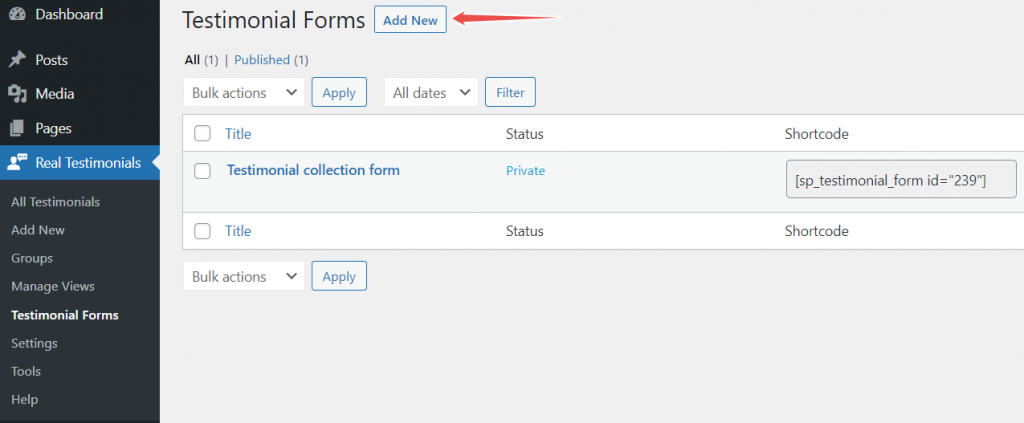
After that, click on Add New. Then, type the testimonials form’s title.
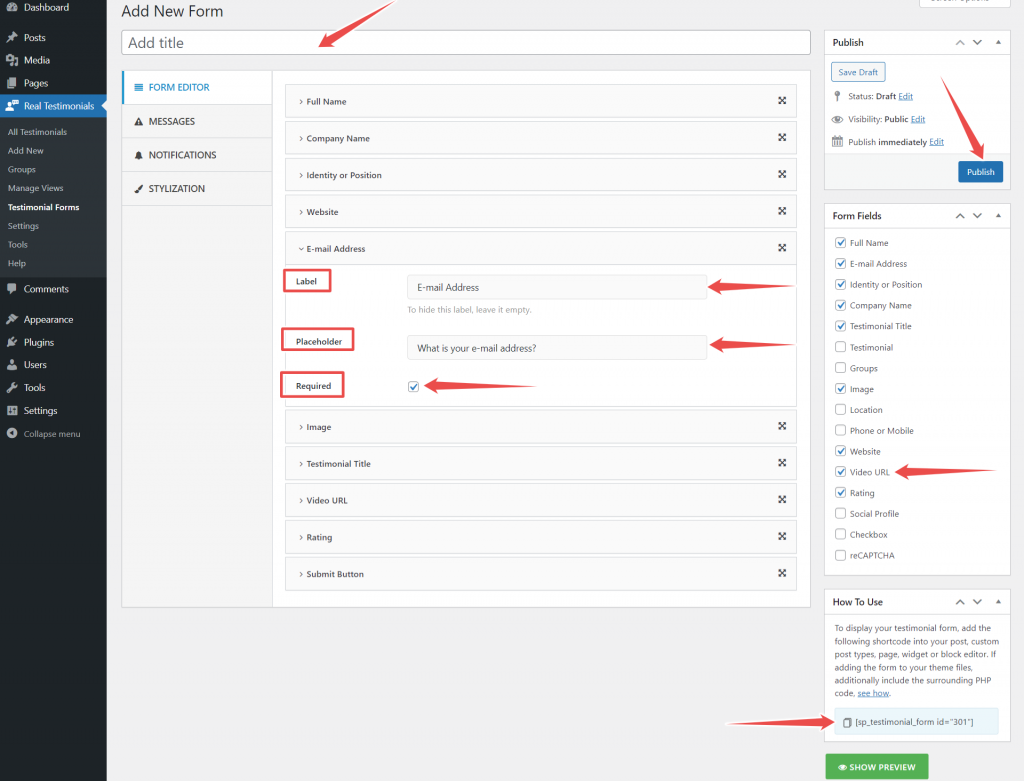
Now, go to the From Editor and select the Video URL from the Form Fields. Just tick mark the Video URL field to add it to the video testimonials collection form.
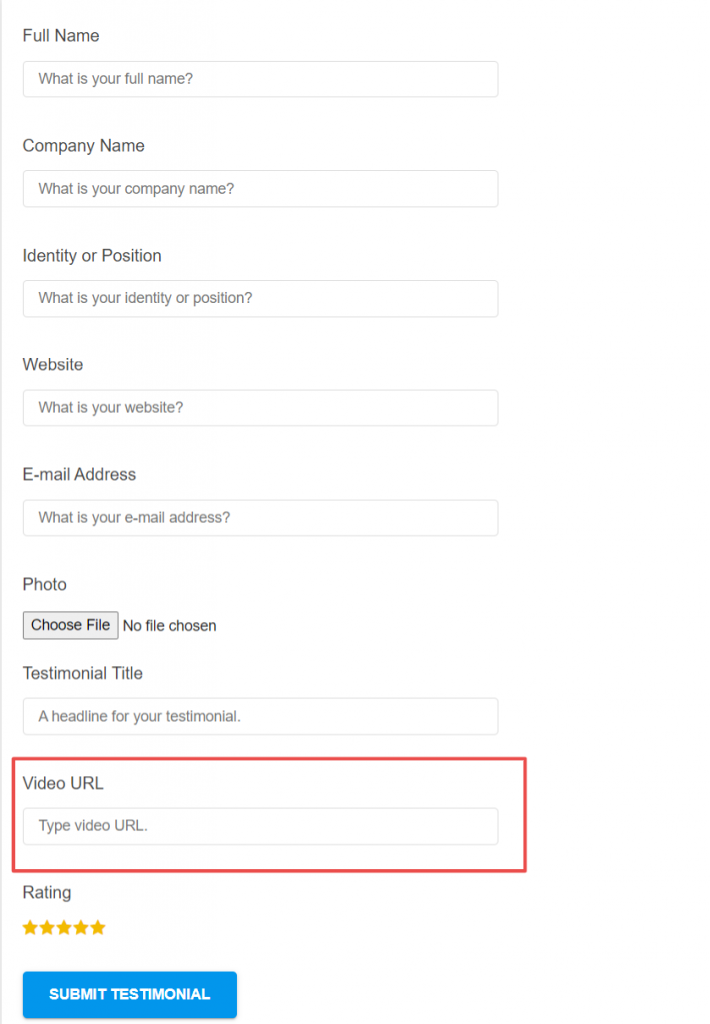
Your customers need to add their review video’s URL in the Video URL field for submitting video testimonials. They can add video from sites like YouTube and Vimeo.
If you want to collect more information along with video reviews, you can do that by adding more fields.
This plugin offers sixteen fields for collecting different information.
Use the Groups field to collect video reviews for a particular product.
You can change the field’s Label and Placeholder text. If you want to hide the Placeholder text, then leave it empty. Tick mark the Required option to make any field mandatory.
If you want to change the field’s position, just drag and drop the field. You can place any field anywhere you wish to.
This is how you can build a video reviews collection form.
Step 2: Set message for successful video testimonials submission
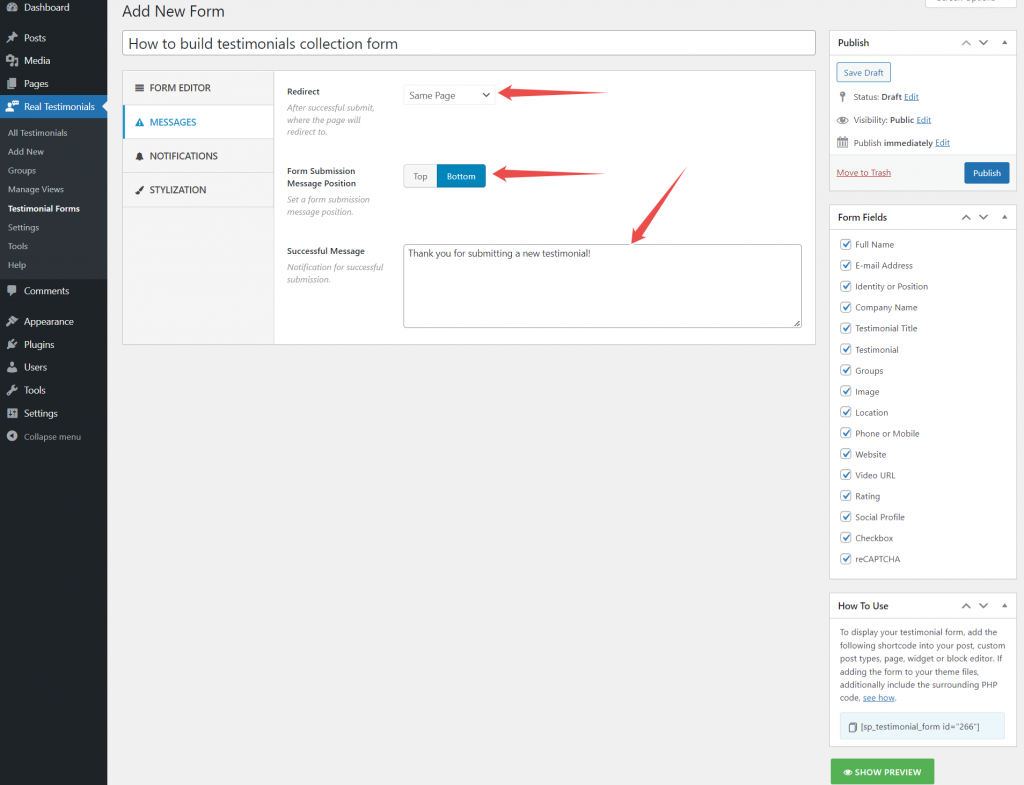
It is time to configure the message option. Go to the Message option and navigate the Redirect option.
You have three options to choose from as redirect; Same Page, To a Page, and To a Custom URL.
If you choose the Same Page as a redirect, you will have the option to set a successful message.
If you select To a Page as a redirect, you will have the option to choose from available pages.
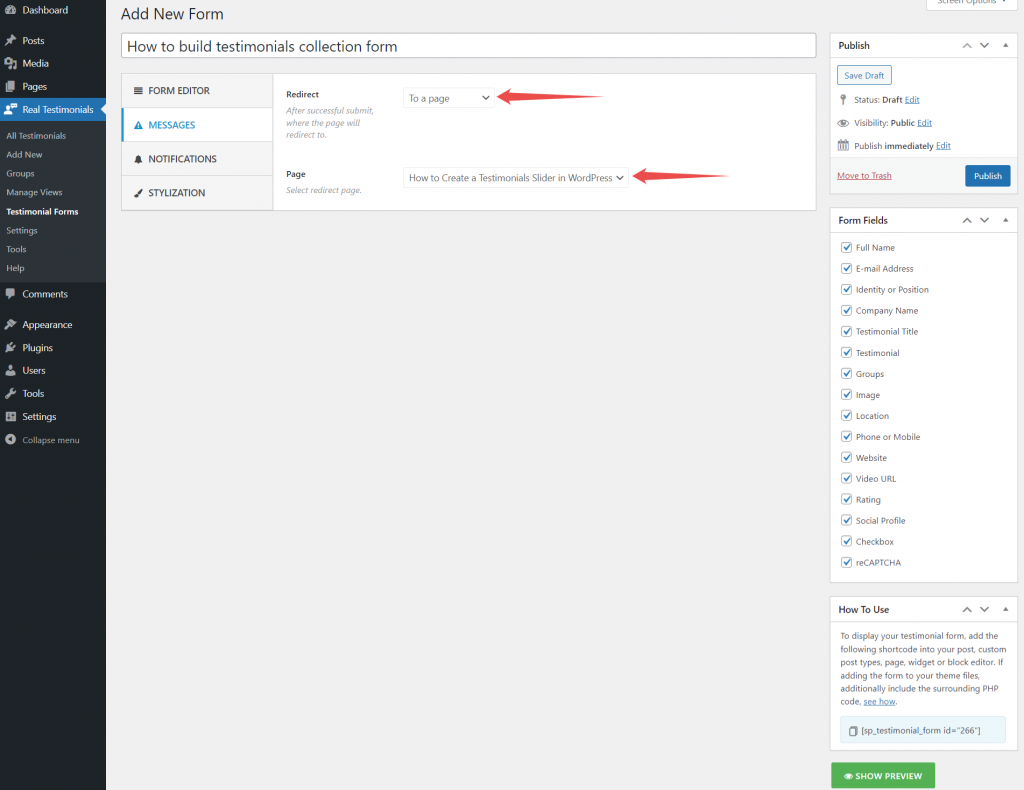
Moreover, if you select To a Custom URL, you will have the option to set a custom URL.
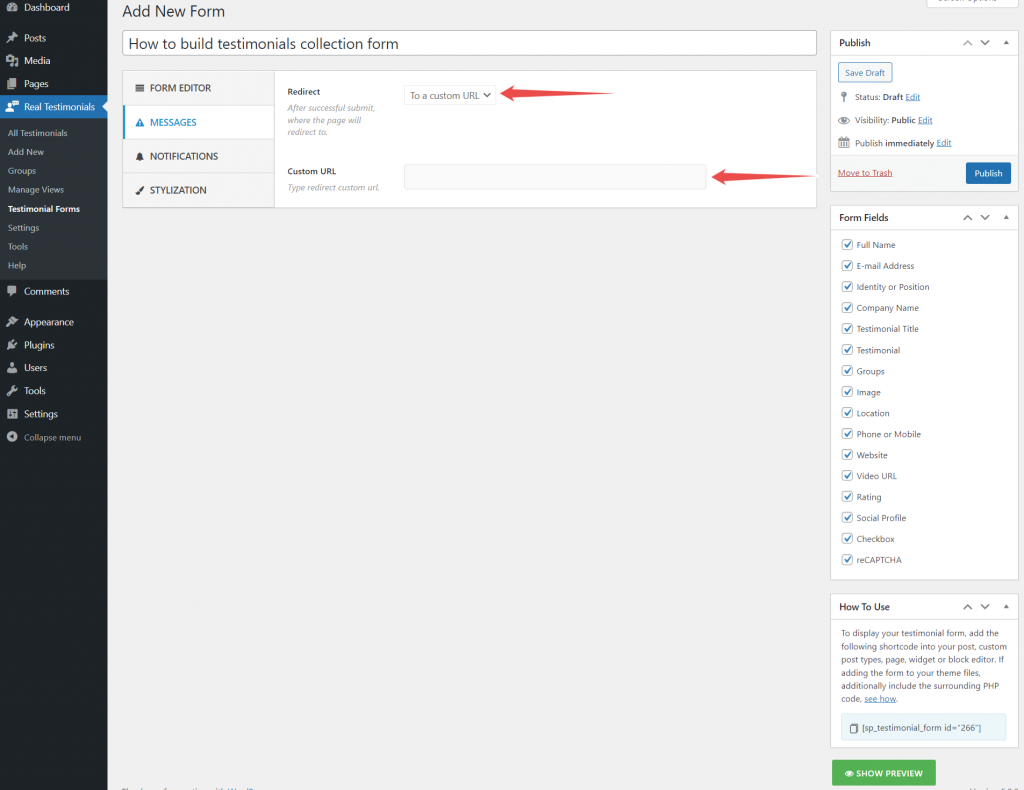
So, choose a redirect option that you think would be best.
Step 3: Set video testimonials approval status from Notification
Now, go to the Notification option. Here you can choose the video reviews’ approval status.
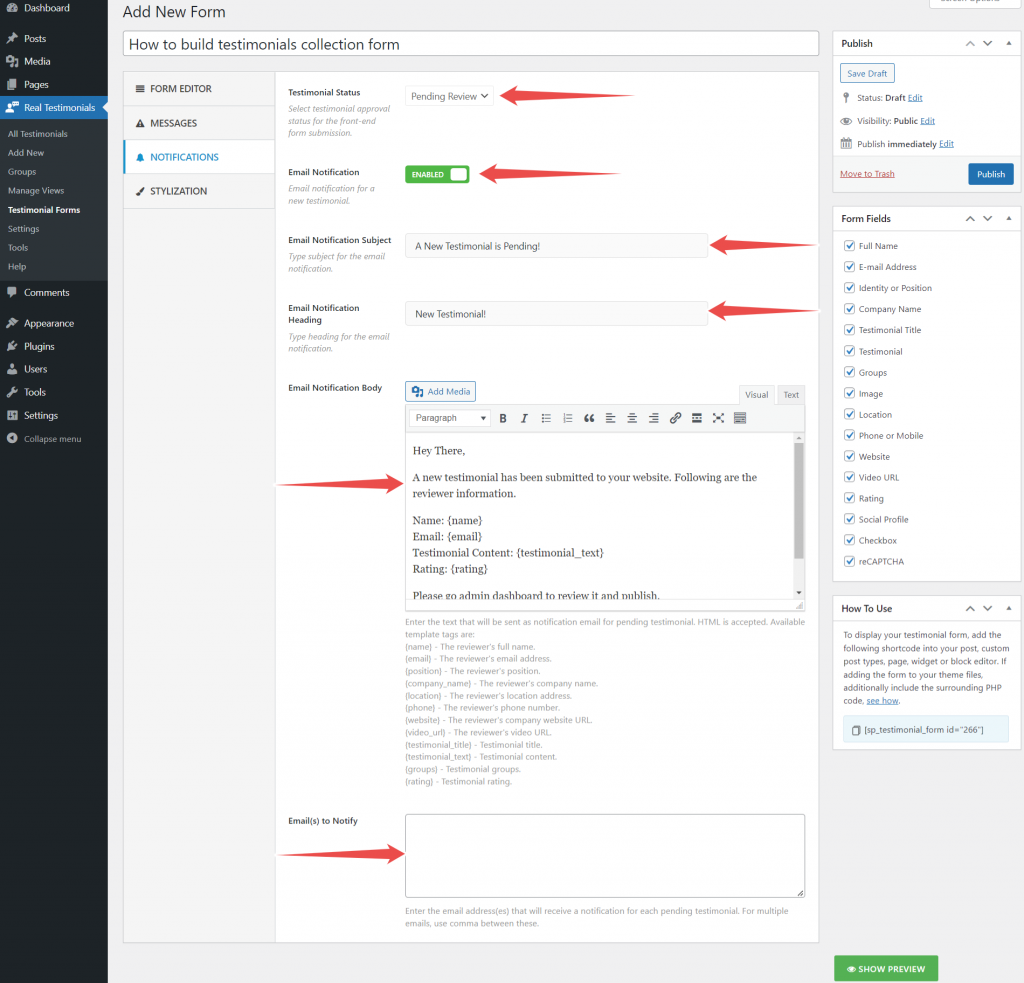
This plugin offers four approval statuses; Auto Publish, Pending Review, Private, and Draft.
If you choose Auto Publish, video reviews will publish automatically after submission.
If you select Pending Review, then you must publish video reviews manually.
When it comes to the Private option, reviews will publish privately after submission. In this case, you must publish video reviews publicly.
Regarding the Draft status, reviews will store as drat, and you must publish them manually.
Select the testimonial status that suits best for you.
If you want to get the notification after video review submission, enable Email Notification.
After enabling the email notification, you can set the notification email subject, heading, body text, and notify email.
*Note: If you don’t want to customize the video reviews collection form, you can skip step 4.
Step 4: Video testimonials form’s appearance customization
Use the Stylization option to customize the video review collection form’s appearance.
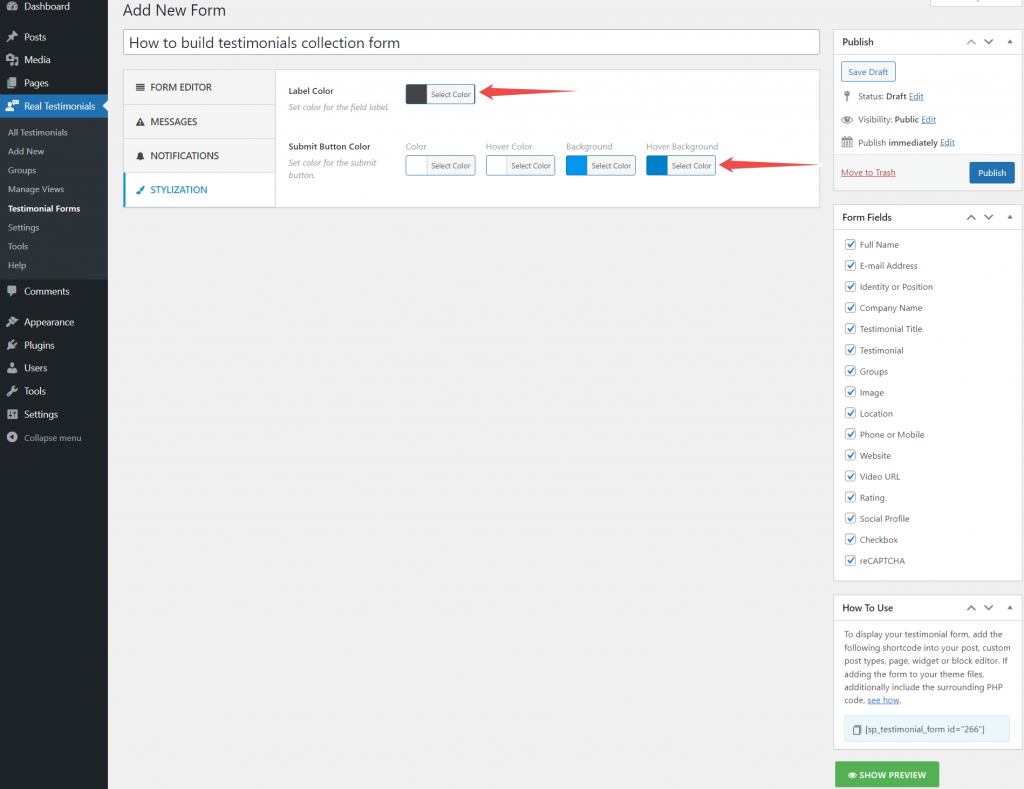
You can change the Label and Submit Button color.
Regarding Submit Button, you can change it’s color and background color. Also, you can change its hover and hover background color.
Step 5: Display the video testimonials collection form for collecting video testimonials
Now, hit the Publish button. After that, copy the shortcode from the How To Use section. Then, paste the shortcode in places from where you want to collect video reviews.
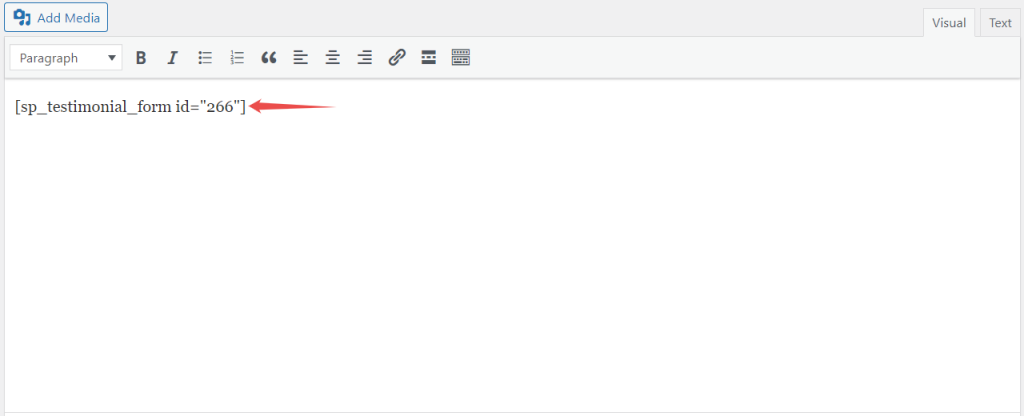
You can display the video review collection form in different places—for example, posts, pages, custom pages, and more.
This is how you can collect video reviews from your customers.
Here is how the video review collection form looks;
Final words
Video testimonials are great for increasing trust and social proof of your business.
This guide on how to collect video testimonials from customers makes the video review collection process more straightforward.
Be sure to have a plan in place for how you will use these collected video reviews.

Leave a Reply