
Do you want to hunt more clients by showcasing your projects on an attention-grabbing superb project slider in WordPress?
The more attention-grabbing your project showcase is, the more projects you will get.
In this blog, I’ll show you how to create a dynamic project slider to attract more clients and accelerate your business growth.
Let’s dive in.
4 Easy Steps to Create a Project Slider in WordPress
Step 1: Install and activate Smart Post Show
Smart Post Show is the best post slider and management plugin for WordPress. This highly feature-rich, easy-to-use, lightweight plugin helps you create sliders with projects, blogs, articles, and more. If you want to make a dynamic (linked to project details or case study) slider, nothing can help you better than this powerful plugin. However, if you want to create a static images project slider, WP Carousel can be your best option.
Project sliders grab visitors’ attention, impress them, and turn them into your clients.
It lets you display your projects in the following layouts:
- Slider & carousel
- Post Grid, Masonry, Isotope to organize all your projects.
- ZigZag
- List
- Timeline
- Accordion
- Large with small
In addition, it gives you full creative freedom with a wide range of easy customizations and filterings. So, even a beginner can easily filter specific projects and make your project sliders and showcases highly aesthetic and interactive.
Let’s install Smart Post Show. It’s simple.
Step 2: Choose a Layout and Add Projects
Now, we have Smart Post Show, as seen in the next image. Follow the easy steps below.
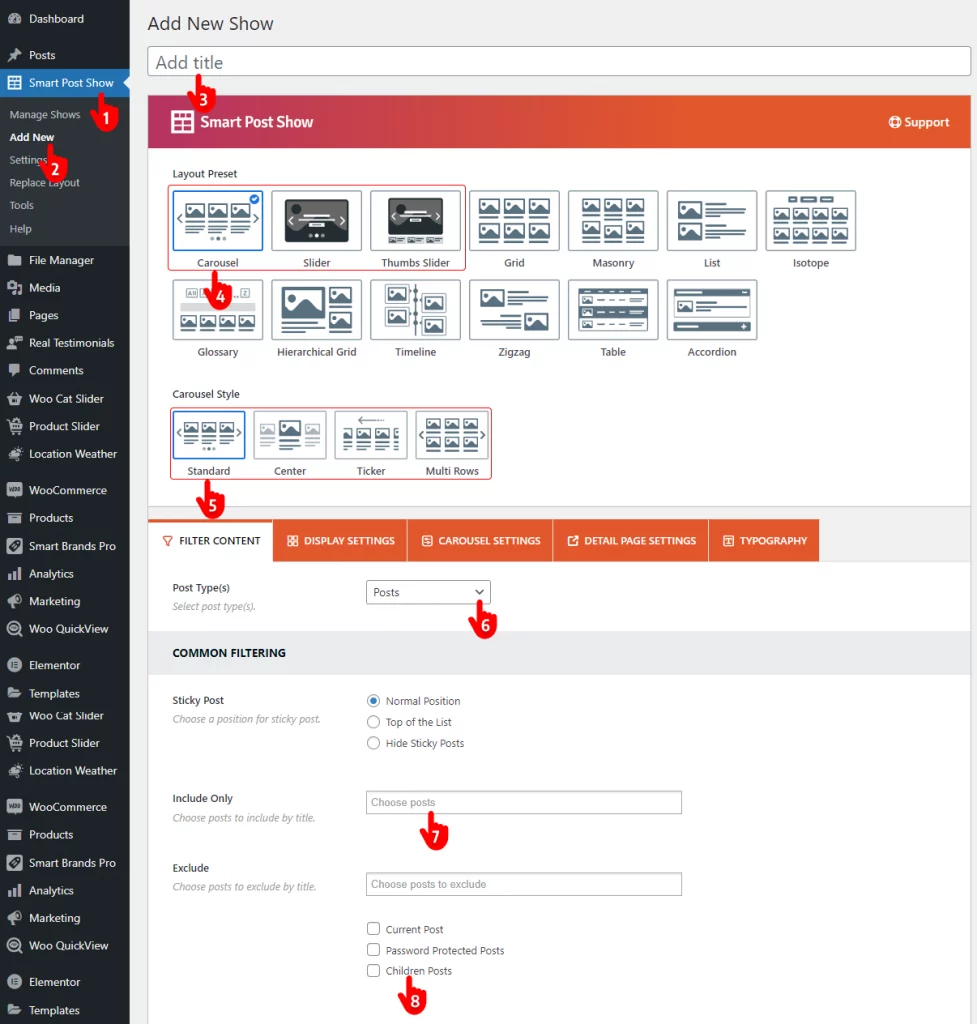
- First, navigate to Smart Post Show on your WordPress dashboard’s left-hand menu.
- Click Add New.
- Give your project slider a title.
- Select the carousel or a slider layout.
- Choose a style.
- Choose your project post type.
- You can display all of your projects, leaving this field empty, or some specific projects picking them up here.
- You can exclude particular projects by picking them up or checking the boxes.
Step 3: Customize Your Project Carousel
Smart Post Show offers a massive range of customizations that are very easy to use. So you can design your project slider exactly how you want.
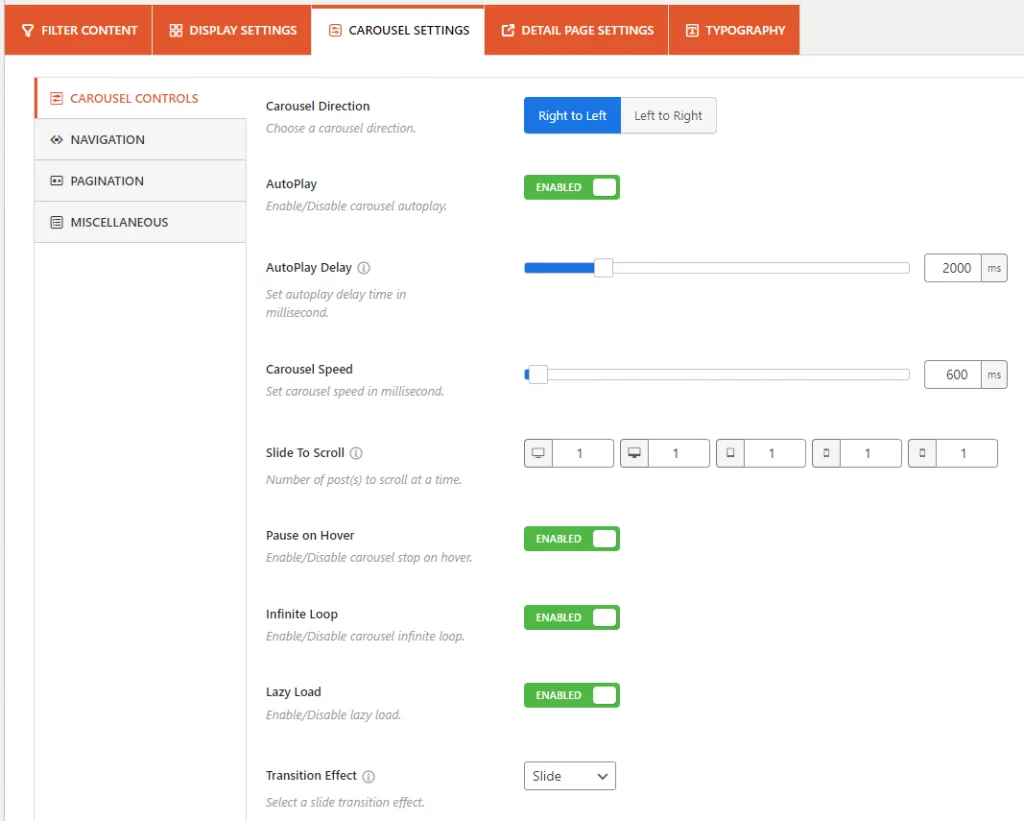
Navigate every tab above to explore the features and try them out based on your requirements and visitors’ preferences.
You can watch some videos to learn more.
Step 4: Publish the Project Slider in WordPress
If your project slider or carousel sounds perfect, it’s time to hit the Publish or Update button.
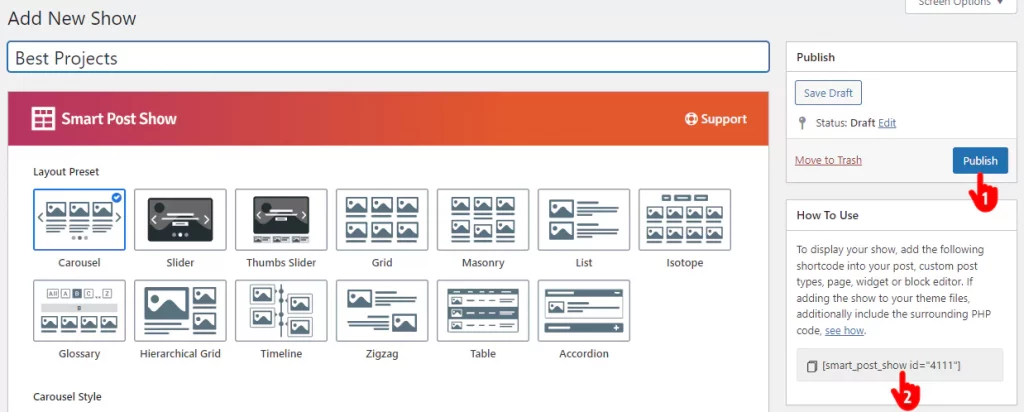
- Click the Publish or Update button at the top right.
- Copy the shortcode.
- Go to the post or page you want to publish your project carousel.
- Paste the shortcode and hit the Publish or Update button.
All done! Your project slider is live now.
This is how a basic project slider looks.

However, you can make your project slider functionally and aesthetically more pleasing by utilizing your creativity and the robust features of Smart Post Show. The best slider practices also can help you a lot.
A well-crafted project slider attracts visitors, impresses them with your success stories, and gets you more project opportunities.
So, let’s create a gorgeous project slider to grow your business today.
Leave a Reply