Creating a WooCommerce Category Slider, Grid or Block is super easy and fast. It can be done within a minute.
STEP 1: GENERATE CATEGORY SLIDER SHORTCODE
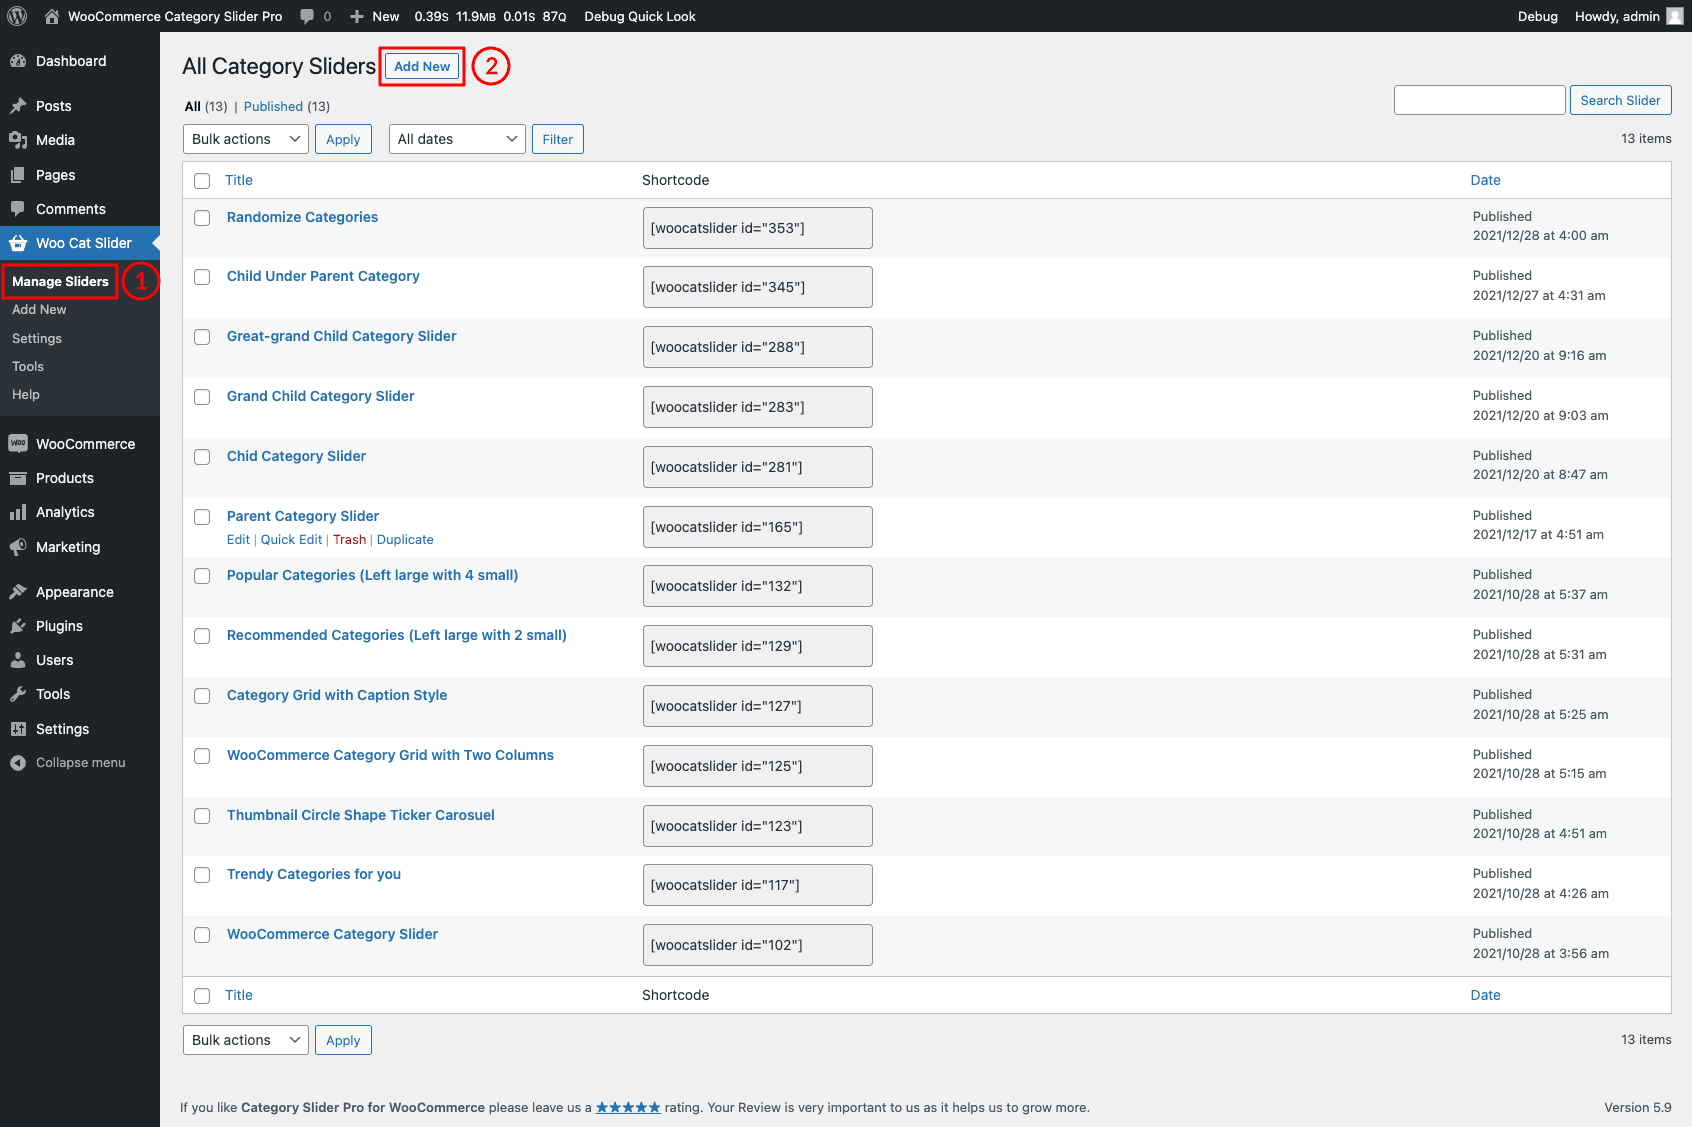
(1) Click on the Manage Sliders menu.
(2) Click on the Add New button.
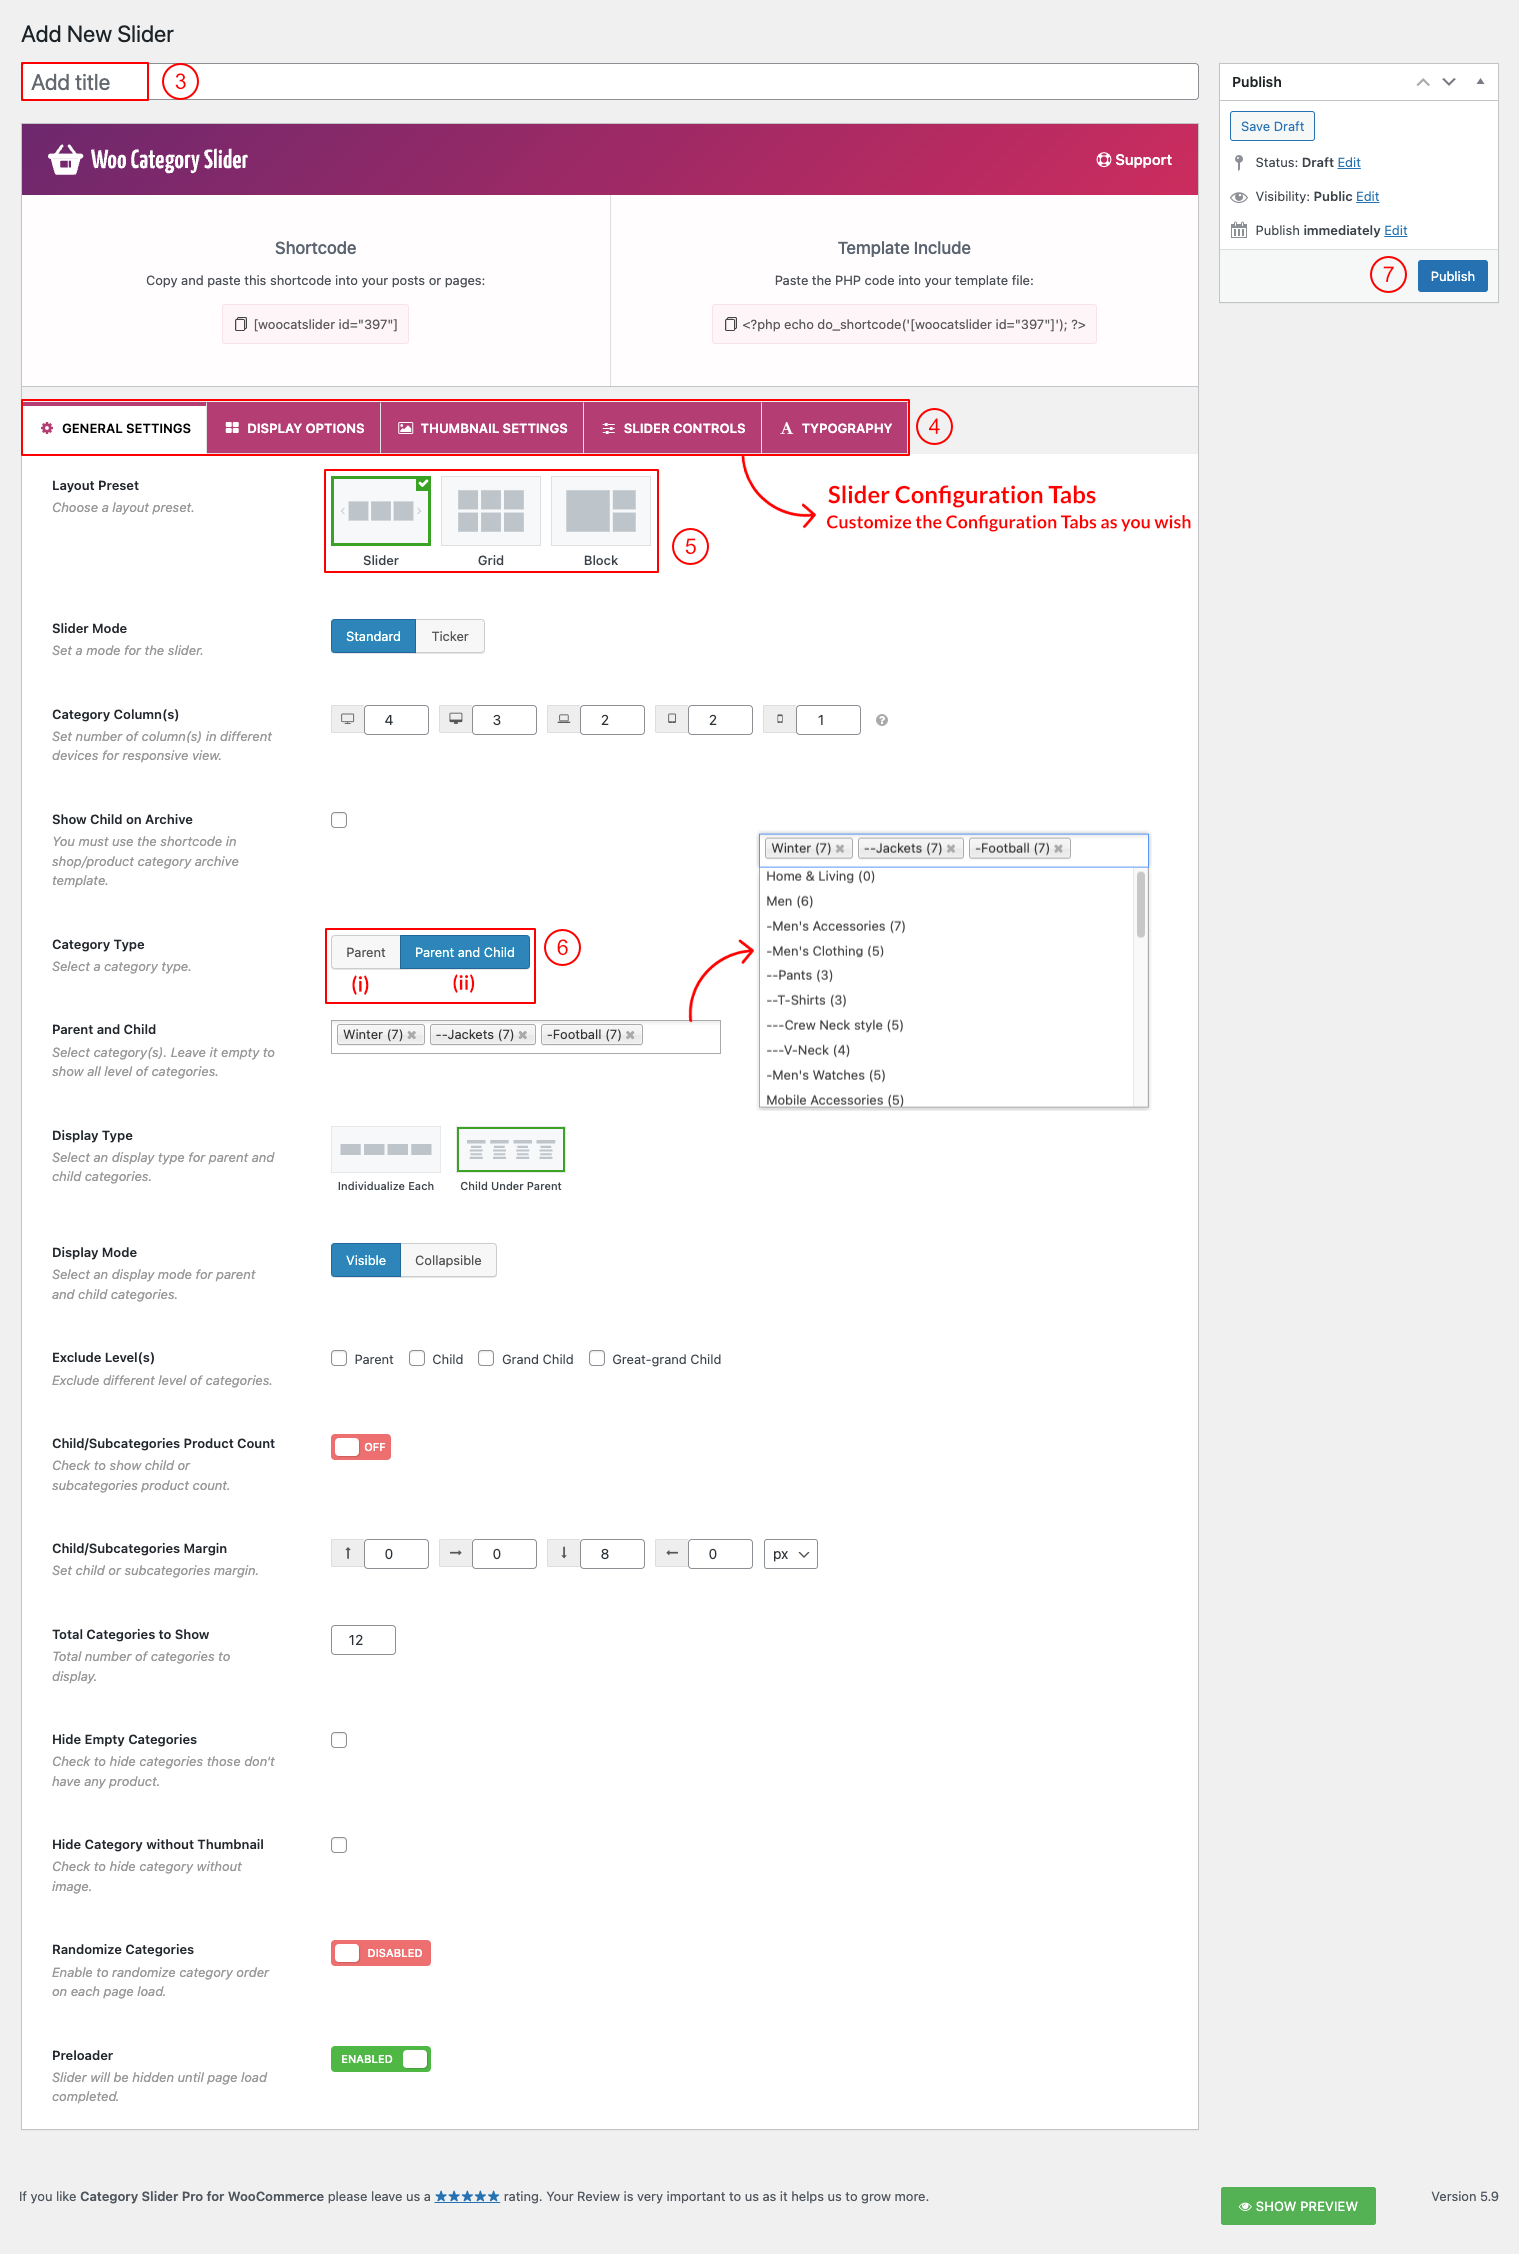
(3) Type a Shortcode Title used as Section Title for your category slider, grid, or block (optional).
(4) Customize Slider Configuration Tabs as per your needs or wish.
(5) Choose a Layout from→ 3 Layout Presets (Slider, Grid, Block).
(6) Choose Category Type and Filter Categories from→ (a) Parent (b) Parent and Child.
(7) And then click on→ Publish and you will see a Generated Shortcode in the top area.
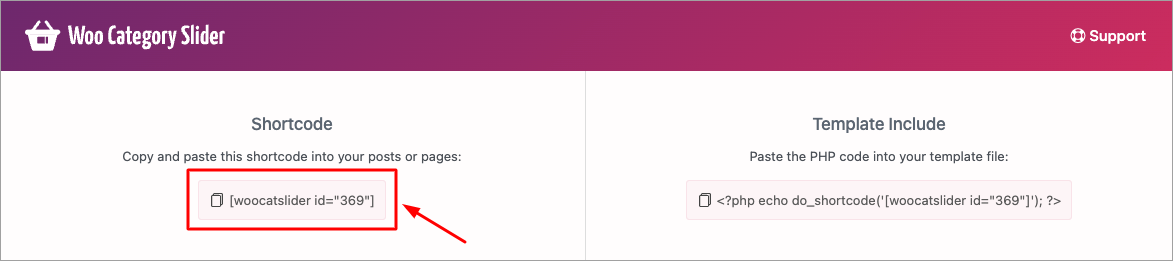
STEP 2: COPY AND USE THE CATEGORY SLIDER SHORTCODE
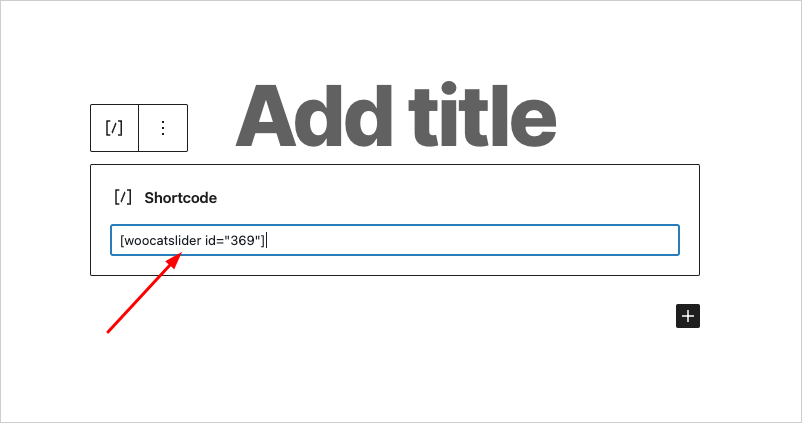
Copy and Paste the category slider shortcode to your post or page or anywhere on your site.
By following these steps, you can create numerous sliders, grids, and blocks with various designs for your site.
Watch the video to learn how you can add a slider shortly.